+1-714-528-6777 (toll-free: 1-888-669-2872)
+86-21-5258-9955 (toll-free: 800-820-5036)
2014 Moxa Inc. All rights reserved.
SATA Connector
The V2406A has 1 SATA-I/II connector for 2.5" SSD/HDD storage
expansion. You will need to use the hard disk installation package*
to install a 2.5" SSD/HDD. This package is not included with the
product, and should be purchased separately. To install the
SSD/HDD, remove the bottom panel, open the hard disk
installation package, and then place the SSD/HDD in the bracket
provided to hold the drive. Connect the SATA power cable and the
SATA cable to the appropriate connectors, and then fasten the
bracket to the V2406A. When finished, refasten the bottom panel to
the computer's housing. Refer to the V2406A Hardware User's
Manual or contact a qualified Moxa support engineer if you have
any questions about installing the drive.
*Moxa provides a “Hard disk installation package” that you can use
to expand the storage. For details, check the optional accessories
section of the V2406A datasheet.
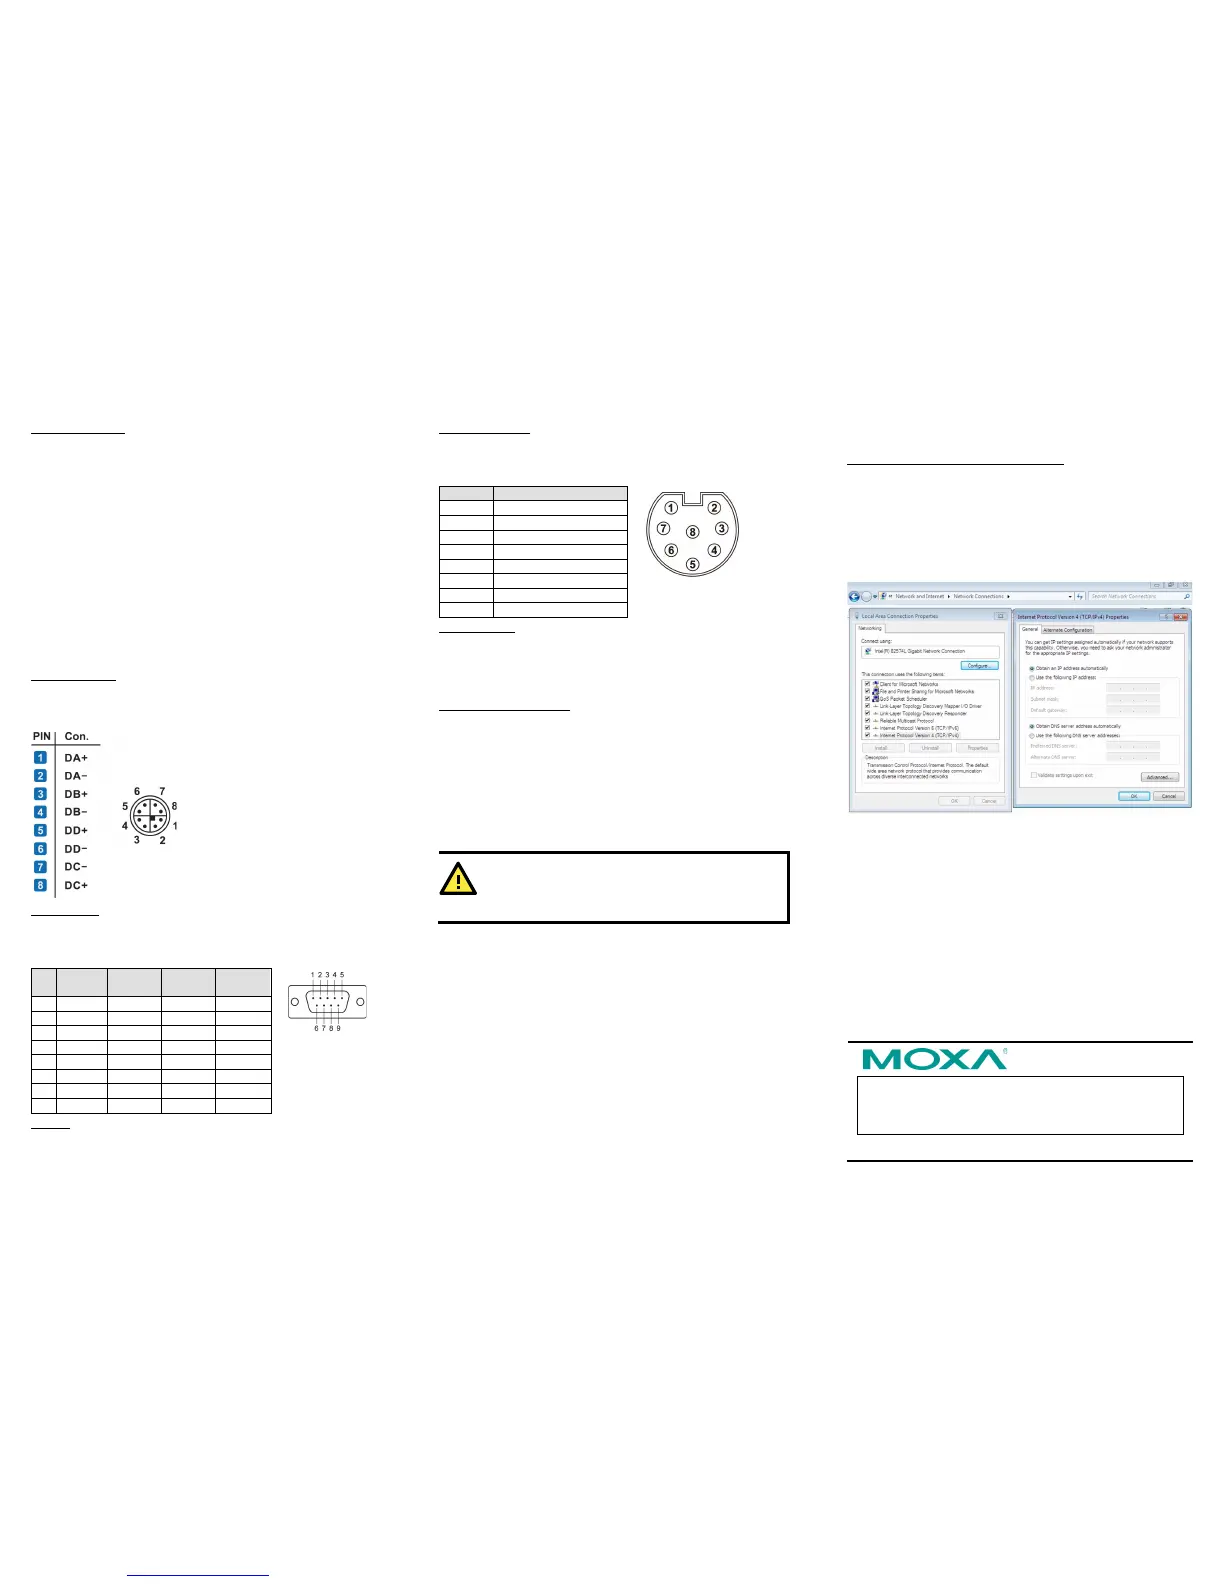
Ethernet Ports
Two 10/100/1000 Mbps Ethernet ports using M12 X-coded
connectors are located on the front panel. The pin assignments are
shown below.
Serial Ports
The serial ports use DB9 connectors. Each port can be configured
by software for RS-232, RS-422, or RS-485. The pin assignments
for the ports are shown in the following table:
DI/DO
The V2406A comes with a 6-ch digital input and 2-ch digital output
on the terminal block connectors.
Audio Interface
The V2406A comes with an M12 A-coded audio connector for audio
input and audio output, allowing users to connect a speaker or an
earphone.
Reset Button
Press the “Reset Button” on the rear panel of the computer to
reboot the system automatically. The Ready LED will blink on and
off for the first 5 seconds, and then maintain a steady glow once
the system has rebooted.
Real-Time Clock (RTC)
The V2406A’s real-time clock is powered by a lithium battery. You
can easily replace the battery yourself using an optional battery
kit*. However, please note that there is a risk of explosion if the
battery is replaced by an incorrect type of battery. Refer to the
V2406A Hardware User's Manual or contact a qualified Moxa
support engineer if you have any questions about the RTC battery.
*Moxa offers an “RTC battery kit” that you can use to easily replace
the battery. For details, check the optional accessories section of
the V2406A datasheet.
There is a risk of explosion if the battery is replaced by
battery of the incorrect type.
Powering on the V2406A
To power on the V2406A, connect the power cable to the V2406A’s
M12 A-coded power connector (located on the rear panel). Press
the power button to turn on the computer. Note that the Shielded
Ground wire should be connected to the central pin of the
connector. It takes about 30 seconds for the system to boot up.
Once the system is ready, the Power LED will light up.
Configuring the Ethernet Interface
W7E users should follow these steps:
1. Go to Start
View network status and tasks
Change adapter
setting.
2. In the Local Area Connection Properties screen, click Internet
Protocol (TCP/IP) and then select Properties. Select
Internet Protocol Version 4, and then click Properties.
3. Click OK after inputting the proper IP address and netmask.
 Loading...