USER MANUAL
MANUEL D’UTILISATION
MANUAL DEL USUARIO
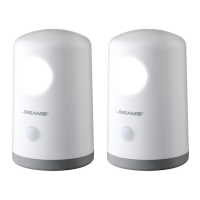
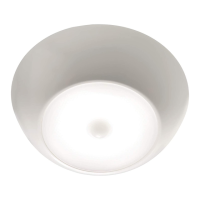
MB750 / MB750A
LED STAND ANYWHERE LIGHT | LAMPE À DEL À METTRE EN
POSITION VERTICALE N’IMPORTE OÙ | LUZ LED PARA APOYAR EN
CUALQUIER LUGAR
Customer Service | Service à la clientèle | Servicio de atención al cliente
9 am - 5 pm EST | 877.298.9082 | customerservice@mrbeams.com
Mailing Address | Adresse postale | Dirección postal
Mr Beams U.S. - 600 Beta Drive, Unit 100, Mayeld Village, OH 44143
www.mrbeams.com
1. This portable light can go anywhere indoors or outdoors.
Easily move the light anywhere in the house for surprisingly
bright light anywhere.
Cette lampe portable peut aller n’importe où, et ce, que
ce soit à l’intérieur ou à l’extérieur. Déplacez la lampe
avec facilité partout dans la maison pour une luminosité
surprenante partout où vous allez.
Esta lámpara portátil puede trasladarse a cualquier parte,
tanto a interiores como exteriores. Traslade la lámpara con
facilidad a cualquier lugar en su hogar para obtener una luz
sorprendentemente brillante donde lo desee.
2. Push the tab of the battery door in and pull up to release.
Appuyez sur la languette du couvercle du compartiment et
soulevez-la pour ouvrir.
Presione la lengüeta de la tapa de las pilas y tire hacia arriba para
liberarla.
4. Line up the arrows on the door and twist the battery cover back
into place. Be sure the arrow points to the lock symbol for a
secure seal.
Alignez les èches sur le couvercle et remettez le couvercle du
compartiment à piles en place. Assurez-vous que la èche est
orientée vers le symbole de verrouillage pour assurer l’étanchéité
du joint.
Alinee las echas de la tapa y gire la cubierta de las pilas para
colocarla nuevamente en su lugar. Asegúrese de que la echa
apunte al símbolo de bloqueo para que el sello esté ajustado.
BATTERY INSTALLATION |
INSTALLATION DES PILES |
INSTALACIÓN DE LAS PILAS
LIGHT INSTALLATION |
INSTALLATION DE LA LAMPE |
INSTALACIÓN DE LAS LÁMPARAS
1. Remove the battery cover from the back of the light by twisting
the cover counterclockwise until the lid comes o of the light.
Retirez le couvercle du compartiment à piles de l’arrière de
la lampe en tournant le couvercle dans le sens contraire des
aiguilles d’une montre jusqu’à ce qu’il soit retiré de la lampe.
Extraiga la cubierta de las pilas de la parte trasera de la lámpara
girando la cubierta en sentido contrario a las agujas del reloj
hasta que la tapa salga de la lámpara.
3. Insert 4 AA batteries into the light. Ensure the batteries are
inserted so that the at ends are making contact with the springs.
Attach the battery door by matching the tabs to the rectangular
holes and then push down on front until the door clicks into place.
Insérez 4 piles AA dans la lampe. Assurez-vous que les piles
sont insérées de sorte à ce que les extrémités plates soient en
contact avec les ressorts. Fixez le couvercle du compartiment en
faisant correspondre les languettes aux trous rectangulaires, puis
appuyez jusqu’à ce que le couvercle émette un clic.
Coloque 4 pilas AA dentro de la lámpara. Asegúrese de que
las pilas estén colocadas de manera tal que los extremos lisos
hagan contacto con los resortes. C) Coloque la tapa de las
pilas haciendo que las lengüetas coincidan con los agujeros
rectangulares y luego empuje hacia abajo la parte delantera
hasta que haga un sonido de clic al quedar en su lugar.