EasyManua.ls Logo

Mr. Coffee BVMC-DT100 - User Manual

Mr. Coffee BVMC-DT100
16 pages
Print Icon
To Next Page IconTo Next Page
Loading...
© 2021 Sunbeam Products, Inc. All rights reserved. Distributed by Sunbeam
Products, Inc. Boca Raton, Florida 33431. Made in China.
BVMC-DT100_20ESM1 (US)
GCDS-MRC1383826-LD
ART0000882509
www.mrcoffee.com
10 CUP PROGRAMMABLE COFFEEMAKER
USER MANUAL
BVMC-DT100_20ESM1 (US).indd 1-2 10/27/20 3:22 PM
Question and Answer IconNeed help?

Do you have a question about the Mr. Coffee BVMC-DT100 and is the answer not in the manual?

Summary

Introduction

Important Safeguards

Polarized Plug Safety

Explains the polarized plug feature as a safety measure to reduce electrical shock risk.

Power Cord Usage Instructions

Provides guidelines for safe use of the power supply cord and extension cords.

Product Notices

Get to Know Your Coffeemaker

Parts Identification

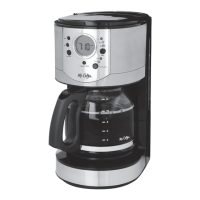
Identifies key components of the coffeemaker, including the water reservoir, brew basket, and control panel.

Understand Your Control Panel

Control Panel Functions

Explains the purpose and operation of each button and indicator on the coffeemaker's control panel.

Coffeemaker Features and Benefits

Key Features Overview

Details the main advantages and functionalities of the coffeemaker, such as Optimal Brew and Thermal Carafe.

Clean Your Coffeemaker Before Using the First Time

First-Time Cleaning Procedure

Provides a step-by-step guide for initial cleaning of the coffeemaker before its first use.

Setting the Clock

Clock Setting Instructions

Instructions on how to correctly set the current time on the coffeemaker's clock display.

Preparing for Use

Coffee Measurement and Water Filtration

Guidance on coffee-to-water ratios and the use of the water filtration system.

Adding Water and Ground Coffee

Details the process of adding water to the reservoir and coffee grounds to the filter basket.

How to Brew Coffee Now

Brewing Process

Step-by-step instructions for brewing coffee immediately using the 'Brew Now' function.

Freshness Timer Feature

Explanation of how the freshness timer works and its display.

How to Use the Strong Brew Function

Using the Strong Brew Setting

Instructions for activating and using the strong brew setting for a bolder coffee taste.

How to Brew Coffee Later

Setting Brew Later Function

Guide to programming the coffeemaker to brew coffee at a future scheduled time.

Cleaning and Maintaining Your Coffeemaker

Daily Cleaning Procedures

Steps for routine daily cleaning of the coffeemaker's removable parts and exterior.

Regular Cleaning Importance

Explanation of the importance of regular cleaning for optimal performance and the Clean Function.

Clean Function Indicator and Use

Details when the clean indicator illuminates and the steps to run the automatic cleaning cycle.

Water Filtration Disk Replacement

Information on when and how to replace the water filter disk for optimal coffee taste.

Cleaning the Thermal Carafe

Method for removing stains from the thermal carafe using a vinegar solution.

Troubleshooting Your Mr. Coffee Coffeemaker

Brew Now;On Light Issues

Troubleshooting steps for when the 'Brew Now' or 'On' light does not illuminate.

Coffee Not Brewing

Solutions for common problems preventing the coffeemaker from brewing coffee.

Brewing Only Water

Addresses issues where the coffeemaker brews only water, not coffee.

Slow Brewing

Troubleshooting steps for when the coffeemaker brews coffee at a slow rate.

Filter Basket Overflows

Solutions for problems causing the filter basket to overflow during brewing.

Coffee Not Hot

Troubleshooting steps for when the brewed coffee is not hot enough.

Coffee Tastes Bad

Guidance on resolving issues related to poor coffee taste, including grounds and ratios.

Grounds in Coffee

Solutions for preventing coffee grounds from ending up in the brewed coffee.

Brew Now LED Flashing Fast

Troubleshooting for the 'Brew Now' LED flashing rapidly, often indicating a water level issue.

Service and Maintenance

Replacement Parts Availability

Information on where to purchase replacement coffee filters, water filters, and carafes.

User Maintenance Limitations

Clarifies that only authorized personnel should perform maintenance beyond basic cleaning.

Overview

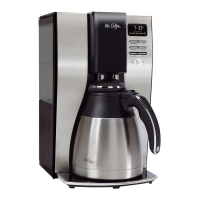
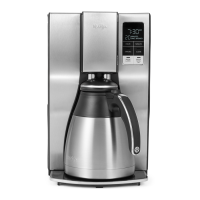
This document describes the Mr. Coffee 10-Cup Programmable Thermal Coffeemaker, a device designed to brew coffee hotter and faster for a richer taste.

Function Description:

The Mr. Coffee 10-Cup Programmable Thermal Coffeemaker is an appliance that brews coffee. It features an "Optimal Brew" system that brews coffee 20% faster at a higher temperature (up to 205 degrees Fahrenheit) to achieve a richer taste. Users can select a "Strong Brew" option for a bolder cup of coffee. The coffeemaker also includes a "Brew Later" function, allowing users to set a specific time for brewing to start automatically. A "Grab-A-Cup Auto Pause" feature temporarily stops the brewing cycle, enabling users to pour a cup before the brewing process is complete. The coffeemaker is equipped with a water filtration system that removes up to 97% of chlorine from the water, enhancing coffee taste. An "Automatic Clean Cycle" is integrated to remove calcium and mineral deposits from the water tank and heater, ensuring consistent performance. A "Freshness Timer" monitors how long the coffee has been brewed, displaying the time since brewing began.

Important Technical Specifications:

  • Brewing Capacity: 10 cups.
  • Brewing Temperature: Up to 205 degrees Fahrenheit for optimal brew.
  • Water Filtration: Removes up to 97% of chlorine.
  • Carafe Type: Double-walled stainless-steel thermal carafe.
  • Power Cord: Polarized plug, short power supply cord (or detachable power-supply cord) to reduce entanglement/tripping risks.
  • Electrical Rating: The marked electrical rating of the detachable power-supply cord or extension cord should be at least as great as the electrical rating of the appliance.
  • Grounding: If grounded type, extension cord should be a grounding type 3-wire cord.

Usage Features:

  • Control Panel: Features a clock display, AM/PM indicator, freshness timer display, and buttons for Hour, Minute, Strong Brew, Clean, Brew Later, and Brew Now/Off.
  • Setting the Clock: Plug in the coffeemaker, and the clock will flash. Press HOUR and MINUTE buttons to set the current time, noting the AM/PM indicator. The clock must be set to use the "Brew Later" feature.
  • Coffee Measurement Chart: Provides guidance for ground coffee measurement:
    • 10 cups: 7.5 tbs.
    • 8 cups: 6.5 tbs.
    • 6 cups: 4.5 tbs.
    • 4 cups: 3 tbs.
    • (1 level tablespoon = 5gr./0.17 oz.; 1 cup = 5fl. oz. of brewed coffee).
  • Water Filtration System: Includes a water filter frame and disk. The red indicator on the water filter frame should be aligned with the current month to remind users to change the disk monthly (approx. 30 brewing cycles). The disk should be rinsed in fresh water before first use and after each brewing cycle. The gray disk cover twists off for disk placement.
  • Adding Water and Ground Coffee:
    1. Open the brew basket drawer.
    2. Place a Mr. Coffee® brand 10-12 cup paper basket-style filter or a Mr. Coffee® permanent filter into the removable filter basket. Ensure paper filter sides fit flush; dampen if necessary.
    3. Add the desired amount of coffee (refer to measurement chart) and gently shake to level.
    4. Slide the brew basket back into place.
    5. Fill the removable water reservoir with cold, fresh water up to the desired capacity, not exceeding the "10 cup MAX line."
  • Brewing Coffee Now: After adding water and coffee, and with the carafe and filter basket in place, press the "BREW NOW" button. The light will illuminate, and an audible signal will sound when brewing is complete.
  • Strong Brew Function: Follow "Adding Water and Coffee" steps, then press the "STRONG" button (indicator light turns on), then "BREW NOW."
  • Brewing Coffee Later: Set the desired brew time using the "BREW LATER," HOUR, and MINUTE buttons. The display will show the current time after a few seconds. Prepare the coffeemaker with water and coffee. At the preset time, "BREW NOW" light turns on, and "BREW LATER" light turns off. The Freshness Timer will start. The coffeemaker will not automatically restart the next day for safety. To cancel "Brew Later," press the "BREW LATER" button until all lights turn off.
  • Freshness Timer: Automatically activates at the start of a brew cycle, displaying the time since brewing began under the clock.

Maintenance Features:

  • Daily Cleaning: Unplug and allow to cool. Remove and wash the filter basket, permanent filter (if applicable), carafe, and carafe lid with hot water and mild liquid soap. Do not use abrasive cleansers or immerse the coffeemaker itself in water.
  • Regular Cleaning and Maintenance (Automatic Clean Cycle): The "CLEAN" indicator illuminates after 90 brew cycles or two consecutive brew cycles lasting longer than 9.5 minutes. The cleaning cycle takes 45 minutes.
    1. Fill the reservoir with 6 cups of undiluted white household vinegar.
    2. Remove the water filtration disk (if applicable). Place an empty paper filter or permanent filter in the brew basket.
    3. Place the empty carafe back in the unit.
    4. Press the "CLEAN" button. The cleaning light will pulse, and "Brew Now/Off" button remains illuminated.
    5. During the cycle, the coffeemaker slow brews approx. 3 cups of solution, pauses for 30 minutes (CLEAN light pulses), then brews the remaining solution.
    6. When complete, the "CLEAN" indicator light turns off, and the coffeemaker turns off.
    7. Discard the cleaning solution, paper filter (or rinse permanent filter), and thoroughly rinse the carafe and filter basket.
    8. Brew 2 full 10-cup cycles with clean water.
  • Water Filtration Disk Replacement: Replace the disk once a month (approx. 30 brew cycles). Rinse with running water before use. Do not put the disk in the dishwasher.
  • Cleaning the Thermal Carafe: To remove whitish or brown stains, fill the carafe with equal parts water and vinegar, let stand for 20 minutes, then discard and wash/rinse. Do not use harsh abrasive cleaners. The thermal carafe is not dishwasher safe.
  • Cord Storage: Safely stores excess cord to keep the countertop neat.

Important Safeguards and Product Notices:

  • Read all instructions before use.
  • Do not touch hot surfaces.
  • Do not immerse cord, plugs, or appliance in water.
  • Not for use by children; close supervision is necessary.
  • Unplug when not in use and before cleaning.
  • Do not operate with a damaged cord or plug.
  • Do not use outdoors.
  • Do not let the cord hang over the edge of the table or counter.
  • Do not place on or near a hot gas or electric burner.
  • Always attach the plug to the appliance first, then to the wall outlet.
  • Do not use for other than intended use.
  • All lids should be closed during use.
  • Scalding may occur if the lid is removed or the brew basket door is opened during or immediately after brewing.
  • Place the appliance on a hard, flat, level surface.
  • Do not operate with an empty water tank.
  • Keep the area above the appliance clear during use due to hot steam.
  • The container is designed for use with this appliance only; never use on a range top.
  • Avoid sudden temperature changes with the container.
  • Do not use a cracked or chipped container.
  • Do not clean the container with cleansers, steel wool pads, or other abrasive material.
  • For appliances with service panels, do not remove the cover; no user-serviceable parts inside. Repair by authorized service personnel only.

Troubleshooting:

The manual provides a troubleshooting guide for common issues such as the "BREW NOW" light not illuminating, coffee not brewing, only water brewing, slow brewing, filter basket overflowing, coffee not being hot, bad-tasting coffee, and grounds in the coffee. Solutions include plugging in the unit, waiting for power to be restored, filling the water reservoir, inserting the filter basket correctly, adding coffee grounds, cleaning the coffeemaker, and using recommended coffee grounds and water-to-coffee ratios.

Service and Maintenance:

Replacement parts like coffee filters (paper or permanent) and water filtration disks can be purchased from retailers or online. Thermal carafes can also be replaced. The appliance has no user-serviceable parts beyond the cleaning described in the manual; any further servicing should be performed by an Authorized Service Representative. Warranty information is available online.

Mr. Coffee BVMC-DT100 Specifications

General IconGeneral
BrandMr. Coffee
ModelBVMC-DT100
CategoryCoffee Maker
LanguageEnglish

Related product manuals