Do you have a question about the Mr. Coffee BVMC-EM Series and is the answer not in the manual?
Follow basic safety precautions to reduce risk of fire, shock, and injury.
Not for unsupervised use by children or impaired persons; close supervision is necessary.
Do not immerse cord/plugs in water; unplug when not in use or before cleaning.
Do not operate with damaged cord; return to Authorized Service Center for repair.
Use only manufacturer-recommended accessories to avoid hazards.
Do not use outdoors or let cord hang over edges or touch hot surfaces.
Do not place on or near hot burners or in heated ovens.
Attach plug to appliance first; use only for intended use with lids closed.
Avoid removing lid or opening door during/after brewing; allow to cool.
Never open brew chamber during cycle; only use intended capsules.
Container not for range top; avoid thermal shock and damage from misuse.
Do not remove cover; no user-serviceable parts inside; service by professionals.
Plug fits outlet one way to reduce shock risk; do not defeat feature.
Use short cord to reduce entanglement; ensure proper extension cord use.
Match electrical rating, use grounding type, and arrange safely.
Do not pull, twist, or otherwise abuse the power cord.
Place on hard, flat, level surface for proper airflow.
Discard if boiled dry; protect from blows and rough handling.
Do not operate with empty tank; keep area above clear for steam.
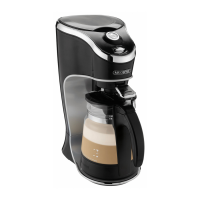
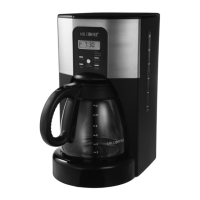
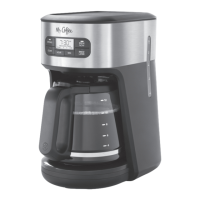
Identify brew basket, carafe, control panel, base, warming plate, lid.
Identify Grab-a-cup Auto Pause and Water Reservoir Lid.
Strong Brew, Brew Later, Brew Now/Off, Hour, Minute buttons.
Strong, Clean, Brew Now, Brew Later indicators.
Clock Display, AM/PM Indicator, Freshness Timer.
Accessory for filtering water to improve coffee taste.
Remove packaging and keep plastic bags away from children.
Use HR and MIN buttons to set the clock.
Benefits and initial setup of the water filter system.
Align indicator for monthly replacement; rinse after use, not in dishwasher.
Instructions for removing used and inserting new water filter disks.
Wash parts in mild detergent and water, then rinse thoroughly.
Fill reservoir with fresh water to the MAX fill line.
Position carafe and run a cycle without coffee for cleansing.
Fill reservoir to desired amount using the water window.
Line with an 8-12 cup paper filter or reusable coffee filter.
Scoop desired amount of coffee, referring to the chart.
Place carafe on warming plate and press BREW NOW button.
BREW NOW indicator stays lit during keep warm; press to turn off early.
Press STRONG Button to illuminate indicator for bolder flavor.
Press STRONG Button again to turn off the indicator.
Follow brewing steps, press BREW LATER, then set HR/MIN for desired time.
Light confirms coffeemaker is set to brew at a later time.
Press BREW LATER again to turn off the feature.
Use clean, fresh water free of impurities; avoid soft or well water.
Ensure coffeemaker is unplugged and cooled before cleaning.
Wash carafe and brew basket by hand or on top rack of dishwasher.
Do not wash the water filter cartridge with soap.
Remove the filter system before starting the decalcifying process.
Use 4 cups or 20 fl. oz. of undiluted white household vinegar.
Place an 8-12 cup paper filter or reusable filter in the brew basket.
Place carafe and press CLEAN to start the approx. 45-minute cycle.
Discard solution, rinse carafe, fill reservoir with clean water, run rinse cycle.
Repeat rinsing steps to ensure the coffeemaker is fully rinsed.
Indicator blinks at 90 cycles; press CLEAN twice to turn off.
Press CLEAN to stop; press BREW NOW to resume or turn off indicator.
Clean every 80 brew cycles when using soft water.
Clean every 40 brew cycles when using hard water.
Check plug and power outage if BREW NOW light does not light up.
Check plug, power outage, water level, and brew basket insertion.
Ensure coffee grounds and filter are added to the brew basket.
Check for cleaning needs or if Strong Brew function is engaged.
Ensure proper basket insertion, carafe placement, and coffee amount.
Turn off, cool, and wipe spills if carafe is removed for >30 seconds.
Wait for power to be restored if there is a power outage.
Use proper grounds, correct ratio, and clean the coffeemaker.
Refill the water reservoir to the desired level.
Details on warranty period, coverage, and common exclusions.
Call 1-800-672-6333 for warranty questions and service center information.
| Brand | Mr. Coffee |
|---|---|
| Model | BVMC-EM Series |
| Capacity | 12 cups |
| Pause and Serve | Yes |
| Carafe | Glass |
| Brew Pause | Yes |
| Water Reservoir | Removable |
| Material | Plastic |
| Auto Shut-Off | Yes |
| Type | Automatic Drip Coffee Maker |