EasyManua.ls Logo

Mr. Coffee BVMC-SS12XTH - User Manual

Mr. Coffee BVMC-SS12XTH
27 pages
Print Icon
To Next Page IconTo Next Page
Loading...
User Manual
P.N. NWL0001317331
BVMC-SS12XTH 2121469
MRCOFFEE.COM
+
S
P
A C E
S
A V I N G
COMBO BREWER
BVMC-SS12XTH_21ESM1.indd 1BVMC-SS12XTH_21ESM1.indd 1 2021/8/11 上午9:552021/8/11 上午9:55
Question and Answer IconNeed help?

Do you have a question about the Mr. Coffee BVMC-SS12XTH and is the answer not in the manual?

Overview

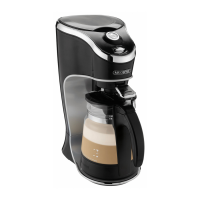
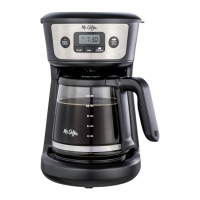
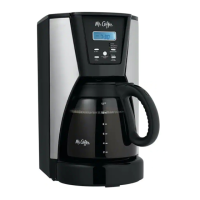
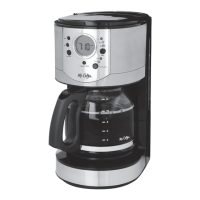
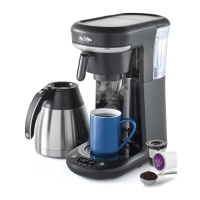
The Mr. Coffee Pod + 10 Cup Space Saving Combo Brewer is a versatile coffeemaker designed to offer flexibility in brewing, allowing users to make both single-serve pods and up to 10 cups of drip coffee. Its space-saving design makes it suitable for various kitchen sizes.

Function Description:

The primary function of this appliance is to brew coffee using either single-serve pods or ground coffee for a carafe. It features a "Brew Now" function for immediate brewing and a "Brew Later" function for scheduled brewing. The "Strong Brew" function allows for a richer, bolder coffee flavor by slowing down the brewing process to fully saturate the grounds. The coffeemaker incorporates an Advanced Water Filtration System to reduce impurities like chlorine and calcium, aiming to improve coffee taste.

Important Technical Specifications:

  • Capacity: Brews single-serve pods and up to 10 cups of drip coffee.
  • Water Filtration: Features an improved 2-step advanced water filtration system.
  • Power Cord: North American models include a polarized plug for safety. A short power-supply cord is provided, with options for longer detachable cords or extension cords if used with care and proper electrical ratings.
  • Model Number: BVMC-SS12XTH 2121469
  • Part Number: P.N. NWL000131731

Usage Features:

  • Control Panel: The control panel includes buttons for "Brew Later," "Brew Now," "Size," "Strong," "HR" (Hour), and "MIN" (Minute). It also features a clock display, AM/PM indicator, water indicator, ounces indicator, and cups indicator.
  • Setting the Clock: Users can set the clock by pressing the "HR" and "MIN" buttons after plugging in the brewer. The clock sets after 5 seconds of inactivity.
  • Single Cup Brewing:
    • Fill the water reservoir to the MAX line with cold, fresh water.
    • Place the Pod Holder inside the Brew Basket.
    • Insert a single-serve pod or a Reusable Single Serve Coffee Filter (with ground coffee) into the Pod Holder, ensuring the lid snaps shut.
    • Place a mug on the Drip Tray under the Brew Basket.
    • Select the desired cup size using the "SIZE" button.
    • Press "BREW NOW" to start brewing. The "BREW NOW" indicator will illuminate during brewing and turn off when complete.
    • It is recommended to clean the Pod Holder and Brew Basket between each use for a fresh cup.
  • Carafe Brewing:
    • Fill the water reservoir to the MAX line with cold, fresh water.
    • Slide out the Brew Basket, remove the Pod Holder (if present), and place a 10-12 Cup Paper Filter or a Reusable Coffee Filter (not included) inside the Brew Basket.
    • Add the desired amount of ground coffee into the filter, referring to the Suggested Coffee Measurement Chart (e.g., 10 tbs. for 10 cups).
    • Slide the Brew Basket back into place and position the Thermal Carafe on the drip tray under the Brew Basket.
    • Select the desired cup size using the "SIZE" button.
    • Press "BREW NOW" to start brewing. The "BREW NOW" indicator will illuminate during brewing and turn off when complete.
    • It is recommended to clean the Brew Basket between each use for a fresh cup.
  • Strong Brew Function:
    • After setting up for single cup or carafe brewing, press the "STRONG" button once. The "Strong Indicator" will illuminate.
    • Proceed with "BREW NOW" or "Brew Later" as usual.
    • To turn off the Strong Brew Function, press "STRONG" again.
  • Brew Later Function:
    • Important: The clock must be set before using this feature.
    • Set up the coffeemaker for either single cup or carafe brewing.
    • Press "BREW LATER." The "Brew Later Indicator" will light up, the clock will flash, and "SET BREW LATER" will be illuminated.
    • Use the "HR" and "MIN" buttons to set the desired brew time. After 5 seconds of inactivity, the time will be set, and "SET BREW LATER" will change to "BREW LATER." The "Brew Later Indicator" will remain illuminated.
    • To turn off "Brew Later," press "BREW LATER" again. The coffeemaker will remember the set time until changed or unplugged, but the "BREW LATER" button must be pressed each time for the feature to activate.
  • Water Quality: Always use fresh, cold, filtered water. Avoid soft or well water.

Maintenance Features:

  • Clean Before First Use:
    • Wash the Carafe, Carafe Lid, Brew Basket, Pod Holder, and Water Reservoir with mild detergent and water, then rinse thoroughly.
    • Insert the Advanced Water Filtration Holder into the Water Reservoir, fill with cold water to MAX, and place on the unit.
    • Place a large mug on the Drip Tray, insert the Pod Holder into the Brew Basket, and slide the Brew Basket into place.
    • Perform a cleansing brew by selecting "12 oz" with the "SIZE" button and pressing "BREW NOW." Discard the hot water and allow components to cool before handling.
  • Advanced Water Filtration System:
    • Soak the Advanced Water Filtration Cartridge in cold water for 5 minutes, then rinse for about 1 minute.
    • Insert the cartridge into the bottom hatch of the Advanced Water Filtration Holder.
    • Replace the cartridge after 30 days or 30 uses, whichever comes first.
  • Daily Cleaning:
    • Ensure the coffeemaker is unplugged and cooled.
    • Remove and wash the Brew Basket, Pod Holder, Carafe, Carafe Lid, Removable Water Reservoir, and Reusable Single Serve Coffee Filter with hot water and mild liquid soap.
    • The Brew Basket, Pod Holder, and Reusable Single Serve Coffee Filter are top-rack dishwasher safe.
    • The Carafe, Carafe Lid, and Removable Water Reservoir should be hand washed only.
  • Decalcifying:
    • Regularly remove mineral deposits (calcium/limestone) using vinegar to maintain performance.
    • Important: Remove the Advanced Water Filtration System from the Water Reservoir before decalcifying.
    • Prepare 4 cups (20 fl. oz.) of undiluted white household vinegar and pour into the Water Reservoir.
    • Place an empty 10-12 cup basket-style paper filter or Mr. Coffee Reusable Coffee Filter into the Brew Basket and slide it into place.
    • Place the empty Carafe on the Drip Tray.
    • Select "4 cups" with the "SIZE" button and press "BREW NOW" to brew the cleaning solution.
    • After brewing, let stand for 30 minutes. Discard the solution and rinse the carafe.
    • Fill the Water Reservoir with 10 cups of clean, fresh water.
    • Place the empty Carafe back on the Drip Tray.
    • Remove and discard the used filter (or rinse the reusable filter).
    • Press "BREW NOW" to complete a full brew cycle with hot water, rinsing the coffeemaker.
    • Discard the water and rinse the carafe.
    • Repeat steps 8-12 one more time to ensure thorough rinsing.
  • Cleaning Frequency (Decalcifying):
    • Soft Water: Every 80 Brew Cycles
    • Hard Water: Every 40 Brew Cycles
  • Carafe Use and Care:
    • To remove white or brown stains from hard water or coffee, fill the carafe with equal parts water and vinegar. Let stand for approximately 20 minutes, then discard the solution, wash, and rinse.
    • Caution: Do not use harsh abrasive cleaners that may scratch the Carafe.

Mr. Coffee BVMC-SS12XTH Specifications

General IconGeneral
BrandMr. Coffee
ModelBVMC-SS12XTH
CategoryCoffee Maker
LanguageEnglish

Related product manuals