Do you have a question about the MSI Afterburner and is the answer not in the manual?
Turn off the computer, remove the case, and clear any obstructing brackets for graphics card installation.
Align the card with the PCI EXPRESS slot, press firmly to seat it, and secure with a bracket screw.
Connect the required 6-pin or 8-pin power connectors to the graphics card, if applicable.
Replace the computer case, connect the display output, and connect the monitor using the display cable.
Ensure the computer is powered on before proceeding with software installation.
Insert the Driver CD into the optical drive and launch the setup program or manually run setup.exe.
Click on NVIDIA/AMD drivers to find and install the appropriate driver for your graphics card.
After restarting, install optional software like DirectX or Adobe Reader from the Driver CD.
Visit MSI websites for potential later versions of drivers and BIOS for your graphics card.
The MSI Graphics Card Quick User's Guide provides comprehensive instructions for installing and utilizing MSI graphics cards, catering to users ranging from casual enthusiasts to serious gamers and professionals. This manual serves as an essential resource for ensuring optimal performance and longevity of your graphics card.
The MSI Graphics Card is a crucial component designed to process and render images, videos, and animations, displaying them on a monitor or other display devices. It significantly enhances the visual experience for gaming, video editing, graphic design, and other visually intensive applications. By offloading graphics processing from the CPU, the graphics card allows for smoother frame rates, higher resolutions, and more detailed visual effects.
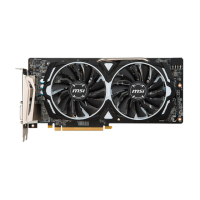
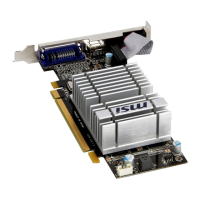
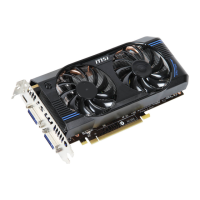
MSI offers a diverse range of graphics cards categorized into several series, each tailored to specific user needs and performance expectations. The "OC Series" (Overclocking Series) is designed for users who seek to push their hardware to its limits, offering enhanced clock speeds and robust cooling solutions to support stable overclocking. These cards are often equipped with premium components and advanced power delivery systems to ensure reliability under extreme loads. The "GAMING Series" is specifically engineered for gamers, providing a balance of performance, cooling efficiency, and aesthetic appeal. These cards typically feature advanced thermal designs, quiet operation, and customizable RGB lighting, creating an immersive gaming environment. The "ARMOR Series" focuses on durability and efficient cooling, offering a solid performance foundation for everyday use and moderate gaming. These cards are known for their robust build quality and effective heat dissipation, ensuring stable operation over extended periods.
A key software utility associated with MSI graphics cards is "MSI Afterburner," which is highlighted as the "world's most recognized and widely used graphics card overclocking utility." Afterburner empowers users with advanced control over their graphics card's parameters, including core clock, memory clock, voltage, and fan speed. This allows users to fine-tune their card's performance to achieve higher frame rates or improve cooling efficiency. Beyond overclocking, Afterburner also provides comprehensive monitoring tools, displaying real-time information about GPU temperature, usage, and clock speeds. It also includes features like custom fan profiles, video capture (Predator), and on-screen display (OSD) for monitoring in-game performance. The utility's intuitive interface makes it accessible for both beginners and experienced users, enabling them to maximize their graphics card's potential.
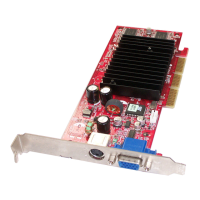
The graphics card connects to the motherboard via a PCI Express x16 slot, which provides the necessary bandwidth for high-speed data transfer. It requires a monitor with a compatible input connector (e.g., HDMI, DisplayPort, DVI) to display the output. Depending on the specific model, the graphics card may also require additional power connectors (6-pin or 8-pin) directly from the power supply unit (PSU) to meet its power demands, especially for high-performance cards.
The installation process for an MSI Graphics Card is designed to be straightforward, guiding users through each step to ensure proper setup. Before installation, it is crucial to turn off the computer and remove its case. Any existing brackets that might obstruct the graphics card's slot need to be removed. The card is then carefully aligned with the PCI Express x16 slot on the motherboard and gently pressed into place until it is fully seated. Securing the card with a bracket screw ensures stability. For high-performance cards, connecting the appropriate 6/8-pin power connectors from the PSU is a critical step to provide sufficient power. Finally, the computer case is replaced, and the monitor is connected to the graphics card using a display cable.
Software installation is equally important for the graphics card to function correctly and to unlock its full potential. The process begins by inserting the provided Driver CD into the optical drive. The Autorun program on the CD typically initiates the setup program automatically. If not, users can manually run the setup.exe file from the CD. The setup program guides users to install the necessary NVIDIA or AMD drivers, which are essential for the operating system to recognize and communicate with the graphics card. After installing the drivers and restarting the computer, users can proceed to install optional software and utilities also provided on the Driver CD. These may include Microsoft DirectX, Adobe Acrobat Reader, and other related links. The manual emphasizes checking for later versions of drivers and BIOS online, as MSI continually improves its products. This ensures users have access to the latest performance enhancements and bug fixes.
The manual also highlights the importance of auxiliary tools for a smooth installation. A cross-screwdriver, preferably with a magnetic head, is recommended for most installation tasks, making it easier to handle small screws. Pliers can be useful for pulling out power connectors or removing stubborn brackets. Rubber gloves are suggested to prevent cuts and protect against static discharge, which can damage sensitive electronic components. These simple tools contribute significantly to a safe and efficient installation process.
The MSI Graphics Card, once installed and configured, offers a range of usage features that enhance the computing experience. For gamers, it provides the horsepower needed to run demanding titles at high resolutions and frame rates, often with advanced graphical settings enabled. For content creators, it accelerates tasks such as video rendering, 3D modeling, and graphic design, significantly reducing processing times. The integration with MSI Afterburner allows users to customize their experience further, whether it's optimizing for maximum performance during gaming sessions or adjusting fan curves for quieter operation during less intensive tasks. The ability to monitor real-time performance metrics provides valuable insights into the card's operation and helps in troubleshooting any potential issues.
While the manual primarily focuses on installation and initial setup, several aspects contribute to the long-term maintenance and optimal performance of an MSI Graphics Card. Regular driver updates are crucial for maintenance. MSI, in collaboration with NVIDIA and AMD, frequently releases new drivers that include performance optimizations, bug fixes, and support for new games and applications. Users are encouraged to regularly check the MSI website or the respective GPU manufacturer's website for the latest driver versions. Keeping drivers up-to-date ensures compatibility, enhances stability, and often provides a noticeable boost in performance.
Physical maintenance involves keeping the graphics card and the computer's interior clean. Dust accumulation is a common issue that can impede cooling efficiency. Over time, dust can clog the heatsink fins and fan blades, leading to higher operating temperatures and potentially reduced performance or even hardware damage. Periodically cleaning the graphics card with compressed air can help remove dust and maintain optimal airflow. It's important to do this with the computer powered off and unplugged, and to hold the fan blades gently to prevent them from spinning too fast, which could damage the bearings.
Monitoring the graphics card's temperature through utilities like MSI Afterburner is a key maintenance practice. High temperatures can indicate insufficient cooling or excessive load. If temperatures consistently run high, users might need to adjust fan curves in Afterburner to increase fan speeds, improve case airflow, or consider cleaning the card. Maintaining appropriate operating temperatures is vital for the longevity and stability of the graphics card.
The manual's mention of "continual improvement" in MSI products implies that the company is committed to providing ongoing support and enhancements. This includes not only driver updates but also potential firmware (BIOS) updates for the graphics card itself. While less frequent than driver updates, BIOS updates can sometimes address hardware-level issues, improve compatibility, or unlock new features. Users should follow MSI's guidelines when performing BIOS updates, as incorrect procedures can lead to problems.
In summary, the MSI Graphics Card is a high-performance component designed to elevate the visual computing experience across various applications. Its usage is supported by a clear installation guide and powerful software like MSI Afterburner, which offers extensive control and monitoring capabilities. Maintenance primarily involves regular driver updates, physical cleaning to ensure efficient cooling, and temperature monitoring to safeguard the card's health and performance over its lifespan.
| Customizable Interface | Yes |
|---|---|
| Fan Control | Yes |
| On-Screen Display (OSD) | Yes |
| Category | Overclocking Utility |
| Function | Overclocking, monitoring |
| Supported GPUs | NVIDIA and AMD graphics cards |
| OS Support | Windows |
| Voltage Control | Yes |
| Video Recording | Yes |
| Developer | MSI |
| Features | Real-time monitoring |