Do you have a question about the MSI Modern MD271UL and is the answer not in the manual?
Lists all items included in the monitor package, including monitor, documentation, accessories, and cables.
Provides step-by-step instructions for attaching the monitor stand to the display panel.
Guides users through the process of connecting the monitor to a computer system.
Explains image-related OSD settings like Brightness, Contrast, Sharpness, Image Enhancement, and Low Blue Light.
Explains how to select the video input source for the monitor, including HDMI, DP, and Type C.
Provides safety guidelines related to the monitor's power connection and usage.
Outlines precautions and safety information regarding the battery, including disposal and handling.
This document serves as a comprehensive user guide for the MSI Modern Series LCD Monitor, specifically the Modern MD271UL (3PB8) model. It provides essential information for setting up, operating, and maintaining the monitor, ensuring users can maximize its features and capabilities.
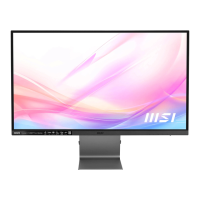
The primary function of this device is to serve as a high-resolution LCD monitor, offering a visual display for computers and other compatible devices. It is designed to provide a comfortable viewing experience with various adjustment capabilities and display modes.
The guide begins with a "Getting Started" section, detailing the initial setup process. This includes a list of package contents, ensuring users can verify all necessary components are present. The package typically includes the Modern MD271UL monitor, a Quick Start Guide, a stand with screws, a power cord, an external power supply, and a Premium High Speed HDMI™ Cable. Users are advised to contact their place of purchase if any items are damaged or missing, and to note that package contents may vary by country. A crucial safety note emphasizes that the included power cord is exclusively for this monitor.
Installing the monitor stand is a straightforward process outlined with clear steps. Users are instructed to leave the monitor in its protective foam, align the stand to the monitor groove, push it until it locks, and ensure proper installation before setting the monitor upright. Important precautions are highlighted, such as placing the monitor on a soft, protected surface to prevent scratches, avoiding sharp objects on the panel, and noting that the stand bracket groove can also be used for wall mounting. A significant warning states that the product comes with no protective film to be removed by the user, and any mechanical damage, including removal of the polarizing film, may affect the warranty.
Adjusting the monitor for optimal viewing comfort is also covered. The monitor is designed with tilt adjustment capabilities, allowing users to position the screen between -5° and 20°. A key reminder is to avoid touching the display panel while making adjustments.
Connecting the monitor to a PC involves a series of steps: turning off the computer, connecting the video cable from the monitor to the computer, assembling the external power supply and power cord, connecting the external power supply to the monitor power jack, plugging the power cord into an electrical outlet, turning on the monitor, and finally, powering on the computer, after which the monitor will auto-detect the signal source.
A detailed "Monitor Overview" section illustrates the physical components and connectors of the device. Key elements include the Navi Key, Power Button, and Power LED. The Power LED indicates the monitor's status: lit white when on, orange when no signal input, and orange in Stand-by mode.
Connectivity options are extensive, featuring two HDMI™ 2.0b connectors supporting 4K@60Hz, a DisplayPort 1.2a supporting 4K@60Hz, and a USB Type-C Port. The USB Type-C port is particularly versatile, supporting DisplayPort Alternate (DP Alt) Mode and delivering up to 20V/3.25A (65W) power. Additionally, the monitor includes a Headphone Jack for audio output and a Power Jack for the external power supply. A Cable Routing Hole helps manage cables for a tidy setup.
The "OSD Setup" chapter provides essential information on navigating and configuring the On-Screen Display (OSD) menu. The monitor features a Navi Key, a multi-directional control that simplifies menu navigation. The guide explains the functions of the Navi Key when the OSD is off (Hot Key functions) and when it's on (OSD Setup functions). For instance, pressing the 'M' key activates the OSD Main Menu, while the directional keys navigate menus and adjust values, and the 'E' key confirms selections or exits the current menu.
The OSD Menus are organized into several categories: Professional, Image, Input Source, Navi Key, and Setting.
Under the "Professional" menu, users can select various display modes such as Eco, User, sRGB, Anti-Blue, Movie, Office, and Black-White. These modes allow users to quickly optimize the display for different content types. The "Response Time" setting can be adjusted to Normal, Fast, or Fastest, catering to different visual preferences and reducing motion blur. "Refresh Rate" can be set to OFF or ON, with location adjustments for the Refresh Rate display. An "Alarm Clock" feature allows users to set a timer, with location options for its display. The "Screen Assistance" submenu offers tools like Eye-Q Check (OFF, Amsler Grid, Astigmatism, Posture Correction) and Crosshair options (None, various patterns) for specific user needs. "Screen Size" can be set to Auto, 4:3, or 16:9, and "Adaptive-Sync" can be toggled ON or OFF to prevent screen tearing.
The "Image" menu provides controls for fundamental display characteristics. "Brightness" can be adjusted from 0-100, with a note that activating HDCR will affect this setting. "Contrast" (0-100) helps relax the eyes, while "Sharpness" (0-5) enhances image clarity. "Image Enhancement" (Weak, Medium, Strong, Strongest) improves image edges. "Low Blue Light" can be turned ON or OFF to protect eyes by adjusting the screen color temperature to a warmer glow, and it's mandatory when "Pro Mode" is set to Anti-Blue. "HDCR" (OFF/ON) enhances image quality by increasing contrast. "Color Temperature" offers Cool, Normal, Warm, and Customization (R, G, B adjustments from 0-100) options.
The "Input Source" menu allows users to select between HDMI™1, HDMI™2, DP, and Type C. The "Auto Scan" feature (OFF/ON) enables the monitor to automatically detect the signal source, especially useful when the monitor is in power saving mode or displaying a "No Signal" message.
The "Navi Key" menu allows customization of the Navi Key's hotkey functions when the OSD is off, including shortcuts for Brightness, Mode, Alarm Clock, Input Source, Refresh Rate, and Info. On Screen.
The "Setting" menu provides general monitor configurations. "Language" offers a wide range of options, and users must press the OK Button to confirm. "Transparency" (0-5) adjusts the OSD menu's opacity. "OSD Time Out" (5-30s) controls how long the OSD remains visible. "Power Button" can be set to OFF (monitor turns off) or Standby (panel and backlight turn off). "HDMI™ CEC" (OFF/ON) supports Consumer Electronics Control for compatible devices, allowing the monitor to automatically power on/off with the CEC device. "Info. On Screen" (OFF/ON) displays monitor status information. "Type C PD Charge" (OFF/ON) enables charging devices via the USB Type-C port. Finally, "Reset" (YES/NO) restores all settings to their original OSD Default.
The "Troubleshooting" section addresses common issues users might encounter, such as the power LED being off, no image, improper screen sizing or centering, no Plug & Play functionality, fuzzy/blurry icons/fonts/screens, or flickering/wavy displays. For each issue, practical solutions are provided, ranging from checking cable connections and power supply to adjusting display settings and updating drivers.
"Safety Instructions" are paramount, emphasizing the importance of reading the guide thoroughly, noting all cautions and warnings, and referring servicing to qualified personnel. Power-related safety includes ensuring correct voltage (100~240V), proper grounding for 3-pin plugs, confirming circuit breaker ratings, disconnecting power when unused, careful cord placement, and using only MSI-provided AC adapters.
For devices with batteries, special precautions are advised to prevent explosion, such as replacing with the correct type, avoiding disposal into fire or crushing, and keeping batteries away from extreme temperatures or children. European Union, BSMI, Japan JIS C 0950, India RoHS, Turkey EEE, Ukraine Restriction of Hazardous Substances, and Vietnam RoHS statements ensure compliance with regional environmental and hazardous substance regulations.
"Green Product Features" highlight the monitor's design for reduced energy consumption, limited use of harmful substances, easy dismantling and recycling, reduced natural resource use, extended product lifetime, and reduced solid waste. The "Environmental Policy" encourages proper disposal and recycling through local authorized collection points.
A "Warning!" about overuse of screens affecting eyesight is included, along with "Recommendations" for screen time management: a 10-minute break every 30 minutes, no screen time for children under 2, and limited screen time for children aged 2 and over.
Finally, "Copyright and Trademarks Notice" clarifies intellectual property rights, and "Technical Support" directs users to contact their place of purchase or MSI's support website for further assistance.
| Color depth | 8 bit |
|---|---|
| Pixel pitch | 0.1554 x 0.1554 mm |
| Screen shape | Flat |
| Display diagonal | 27 \ |
| Anti-glare screen | Yes |
| Display technology | - |
| Native aspect ratio | 16:9 |
| Vertical scan range | 50 - 60 Hz |
| Maximum refresh rate | 60 Hz |
| Viewable size, vertical | 335.664 mm |
| Contrast ratio (typical) | 1000:1 |
| Display number of colors | 1.07 billion colors |
| Viewable size, horizontal | 596.736 mm |
| Supported graphics resolutions | 3840 x 2160 |
| Compatibility | PC, Mac, PS5™, PS4™, Xbox, Mobile, Notebook |
| Product color | Gray |
| Market positioning | Graphics design |
| DisplayPort version | 1.2a |
| Input current | 5.79 A |
| AC input voltage | 100 - 240 V |
| Power supply type | External |
| Energy efficiency scale | A to G |
| AC adapter output voltage | 19 V |
| Power consumption (standby) | - W |
| Power consumption (typical) | 65 W |
| Tilt angle range | -5 - 20 ° |
| Cable lock slot type | Kensington |
| Package depth | 192 mm |
| Package width | 805 mm |
| Package height | 457 mm |
| Package weight | 7350 g |
| Depth (with stand) | 198.3 mm |
|---|---|
| Width (with stand) | 613.49 mm |
| Height (with stand) | 473.1 mm |
| Weight (with stand) | 5750 g |
| Depth (without stand) | 51.28 mm |
| Height (without stand) | 362.45 mm |
| Weight (without stand) | 3750 g |