This document is an operator's manual for the M.T.H. Premier GP60M Diesel Engine, featuring Proto-Sound 2.0 (3V PS-2) and Proto-Scale 3-2. This model is an electrically operated product recommended for ages 14 and up, requiring adult supervision for users under 14. Basic safety precautions, such as examining the transformer and other electronic equipment for damage, operating the layout attended, and using it indoors away from water, should always be observed.
Function Description
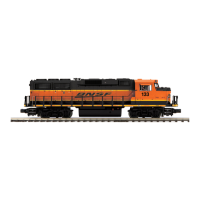
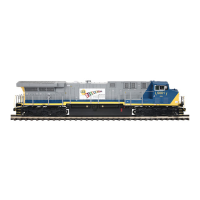
The M.T.H. Premier GP60M Diesel Engine is a model train locomotive equipped with Proto-Sound 2.0, offering realistic sound and train control features. It can operate on any traditional O-42 Gauge track system, including M.T.H.'s RealTrax® or ScaleTrax™, and is compatible with most standard AC transformers. The locomotive can be configured for either 2-Rail or 3-Rail track operation. From the factory, it is set up for 3-Rail operation, but can be switched to 2-Rail by removing the center rail pickup roller assemblies and changing the power input. For 2-rail DCS operation, proper polarity from the transformer to the engine is crucial, which can be adjusted via a polarity switch inside the locomotive.
The Proto-Sound 2.0 system includes several automatic sound effects such as Squealing Brakes (when speed decreases rapidly), Cab Chatter (randomly when idling in neutral), and Engine Start-up and Shut-down sounds (when powered on or off for five seconds or more). The engine is also equipped with coil-wound Proto-Couplers for remote uncoupling, which do not require a special uncoupling track section.
Usage Features
Basic Operation:
To start the train, turn the throttle knob up until the engine and caboose lights shine brightly, then press the Direction button on your transformer for about 1 second. If the train doesn't move, increase the throttle slightly.
Activating Features:
- Throttle: Controls train speed by increasing or decreasing track voltage. Turning clockwise increases speed, counter-clockwise decreases it. The engine maintains the set speed until the throttle is adjusted again.
- Bell: To sound the bell, firmly press and release the Bell button. Press and release again to turn it off. The bell rings continuously until turned off.
- Horn/Whistle: To sound the whistle, firmly press and hold the Horn/Whistle button. The whistle sounds as long as the button is depressed and stops upon release.
- Direction: The train starts in neutral and cycles through neutral-forward-neutral-reverse with each press and release of the direction button. If track voltage is turned off for 25 seconds or more, the engine restarts in neutral.
Proto-Sound 2.0 Conventional Mode Features:
These features are activated by quick sequences of Bell and Horn/Whistle button pushes, with a 1/2-second pause between presses.
- Freight Yard Sounds (FYS) / Passenger Station Announcements (PSA): Activated by 1 Bell, 2 Horn/Whistles. These sound sequences play as long as they are left on, generating sounds randomly. To trigger sequences, stop the engine and press the Direction button after waiting approximately 30 seconds for each sequence to run. The engine will automatically move at the current throttle setting after the final sequence. FYS/PSA can be triggered from neutral and can be terminated by turning off track power for 15 seconds.
- Proto-Coupler™ Operation:
- Rear Coupler: Activated by 1 Bell, 3 Horn/Whistles.
- Front Coupler: Activated by 1 Bell, 4 Horn/Whistles.
The sound of the liftbar and air line depletion will play, and the knuckle will be released.
- Speed Control: M.T.H. engines with Proto-Sound 2.0 have cruise control capabilities, maintaining constant speed regardless of grades or added/removed cars. It starts activated by default. To turn it on/off, put the engine in neutral, then quickly tap the Horn/Whistle button once, followed by two quick taps of the Bell button (1 Horn/Whistle, 2 Bells). Two whistle blasts indicate the change.
- Lock into a Direction: To lock the engine into forward, neutral, or reverse, put it in the desired direction (or neutral), run it at a very slow crawl, then quickly tap the Horn/Whistle button once followed by three quick taps of the Bell button (1 Horn/Whistle, 3 Bells). Two horn/whistle blasts confirm the change. The engine will remain locked until the code is repeated.
- Reset to Factory Defaults: To override current settings, put the engine in neutral, then quickly tap the Horn/Whistle button once, followed by five quick taps of the Bell button (1 Horn/Whistle, 5 Bells). Two horn/whistle blasts confirm the reset.
Manual Volume Control:
A manual volume control knob allows adjustment of all sounds. Turning clockwise increases volume, counter-clockwise decreases it.
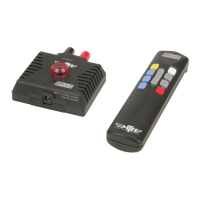
Additional Features with DCS Remote Control System (Requires additional equipment):
With the DCS Remote Control System (including a handheld remote and Track Interface Unit), users can access advanced command functions:
- DCS Proto-Speed Control: Set desired locomotive speed in scale miles per hour, and adjust acceleration/deceleration rates.
- ProtoSmoke® Variable Output Control: Control smoke output volume and match it to locomotive speed.
- Locomotive Lighting Control: Control headlights, marker, interior, beacon, ditch, and MARS lights.
- Emergency Stop: Single button push stops all Proto-Sound 2.0 trains without turning off power.
- One Touch Global Mute/UnMute: Mute or unmute all DCS-controlled locomotives' user-defined actions (sound, lights, smoke).
- Proto-Dispatch Operation: Public Address-like feature to speak through the locomotive speaker.
- Proto-Cast: Play audio recordings through the locomotive speaker.
- Proto-Doppler Sound Effects Set Up: Configure Doppler Operation, including setting distance points for start, repeat, and stop modes.
- Independent Volume Control: Adjust volume for engine sounds, bell, horn, and whistle for each locomotive.
- Control Multiple Locomotives: Control up to 50 different DCS-Equipped Locomotives simultaneously with multiple TIUs.
- Proto-Effects™ Set Up: Select individual Proto-Effects™ operations (cab chatter, train wreck sounds, coupler sounds, Direction Control Set Up) to be active or inactive.
- Locomotive Consist Set-up: Determine locomotive values for consist make-ups, allowing multiple locomotives to operate together.
Maintenance Features
Lubrication and Greasing:
- General Lubrication: Lubricate all axles and pickup rollers regularly with light household oil to prevent squeaking. Apply a drop or two to each pivot point. Do not over-oil.
- Internal Gearing: The internal gearing is factory-greased and typically doesn't need additional grease until after 50 hours of operation or one year. To grease, remove the Roller Pickup Assembly and Grease Port Screw, then apply 1-2mL of lithium-based grease into the gearbox and axles. Replace the screw.
- Outside Truck Block Idler and Drive Gears: Lubricate these with grease as shown in the diagrams.
Cleaning Wheels, Tires, and Track:
- Locomotive Wheels and Pickups: Periodically check for dirt and buildup, which can affect electrical contact and traction. Clean with denatured (not rubbing) alcohol and a cotton swab.
- Track: Use RailKing Track Cleaning Fluid (30-50010) or denatured alcohol and a clean rag. Unplug the transformer, wipe the rails, and turn the rag frequently. For stubborn track, use a heavy-duty track cleaning block (40-1099), which can also accommodate sandpaper.
Traction Tire Replacement:
The locomotive has two neoprene rubber traction tires on each powered truck block.
- Turn the engine upside down.
- Remove the two Phillips screws attaching each truck side to the truck block.
- Completely remove the old tire from the drive wheel groove using a razor blade or small flathead screwdriver.
- Slip the new tire onto the wheel, using two small flathead screwdrivers if needed to stretch it. Ensure the tire is fully seated in the groove. Trim any excess.
- Reassemble in reverse order.
Replacement tires are included with the model, and additional sets can be ordered from M.T.H. Parts Department.
Locomotive Light Bulb Replacement:
- Remove the body from the chassis by unscrewing the body mount screws.
- Locate the burned-out bulb(s).
- Carefully remove the bulb(s) from their mounting.
- Disconnect the light bulb harness from the main harness wire.
- Connect the replacement bulb harness and reassemble in reverse.
Replacement bulb harnesses are available from M.T.H. Parts Department.
Self-Charging Battery Back-up:
The engine uses a special NiCad 2.4v self-charging battery that recharges continuously during operation and lasts up to five years.
- Testing: If sounds are distorted or garbled, or silent when power is off, test the battery. Put the engine in neutral and leave track voltage at 10-12 volts for 15 minutes.
- Recharging: If sounds improve after the test charge, the battery needs recharging. Leave the engine in neutral with 10-12 volts for 6-7 hours (smoke unit off), or use M.T.H.'s battery recharger (50-1019) overnight via the special port under the engine.
- Replacing: If sounds don't improve after the test charge, replace the battery with an AA NiCad Proto-Sound® Battery (50-1024) from M.T.H. Do NOT use alkaline batteries, as they can damage the PS 2.0 circuit board or the batteries themselves.
ProtoSmoke™ Unit Operation:
The smoke unit outputs smoke through the smokestack using a heating element, wick, and mineral oil-based fluid, forced out by an electric fan. Smoke volume is controlled by the Proto-Sound 2.0 system.
- Priming: Add 15-20 drops of smoke fluid (M.T.H. ProtoSmoke, Seuthe, LGB, or LVTS fluids recommended) through the smokestack before running. Do not overfill.
- Running Smoke-Free: If not adding fluid, turn the smoke unit control to the "OFF" (fully counter-clockwise) position to prevent damage to the heating element or wicking material.
- Adjusting Smoke Volume: Turn the smoke unit volume control clockwise to increase smoke, counter-clockwise to decrease.
- Refilling: When smoke output diminishes, add 10-15 more drops or turn the unit off.
- Storage: Add about 15 drops of fluid before long-term storage to prevent the wick from drying out. After storage, add 25 drops and let the wick soak for 15 minutes.
- Troubleshooting Poor Smoke Output: If smoke output is poor despite having fluid, check the wick for hardness, blackening, or being unabsorbent. Remove the locomotive body and smoke unit inspection cover to inspect the wick. If damaged, it should be replaced. Replacement parts are available from M.T.H. Parts Department.
- ProtoSmoke™ Fluid: M.T.H. ProtoSmoke fluid is recommended and available in 12 different scents.