A
Amy MarshSep 5, 2025
How to fix the bell on MTHTrains Toy so it works on a separate bell button?
- AAnna StantonSep 5, 2025
Check the wiring of the separate button.
How to fix the bell on MTHTrains Toy so it works on a separate bell button?
Check the wiring of the separate button.
Why won’t my MTHTrains Toy engine lock into forward, neutral, or reverse?
The engine speed must be below 10 scale mph (approximately 10 volts or less in conventional mode).
Why are there no sounds when my MTHTrains Toy engine shifts directions?
The battery may be dead or need to be charged.
Why does PFA start when I try to fire the coupler on my MTHTrains Toy?
You are waiting too long between whistle button presses.
Why don't Cab Chatter sounds always play on my MTHTrains Toy?
Cab Chatter plays only in neutral at random intervals.
Why does my MTHTrains Toy engine continue to make sounds after I turn off the transformer?
Proto-Sound 2.0 is designed to continue to sound for a few seconds after power to the track has been shut off.
| Sound System | Proto-Sound 2.0 |
|---|---|
| Control Type | Digital Command System |
| Sound | Yes |
| Speed Control | Yes |
| Directional Lighting | Yes |
| Compatibility | DCS |
| Features | Digital Command System |
| Power Supply | AC Power |
| Sound Features | Passenger Station or Freight Yard Proto-Effects |
| Proto-Coupler® | Yes, Remotely Controlled |
| Scale | O Scale |
Securely attach the PS-2 board and plastic mounting bracket to the tender floor.
Install the new Proto-Coupler assembly into the tender's existing coupler location.
Properly install the plastic insulator between the coupler and truck components.
Connect wiring for an optional front-mounted Proto-Coupler, rerouting headlight control.
Connect all specified tender components, including harness, speaker, and lights.
Identify and connect the various harness plugs to the PS-2 circuit board.
Solder speaker wires, ensuring correct polarity and preventing shorts to the frame.
Mount and connect the rechargeable battery pack and volume control pot.
Identify the locomotive's motor type (Pittman or Mabuchi) for bracket installation.
Mount the tach reader bracket onto the locomotive's motor.
Apply speed control tach tape to the motor flywheel, measuring diameter first.
Install the tach reader into its bracket, ensuring the correct gap to the flywheel.
Mount the 10-pin connector for the locomotive harness to the chassis.
Solder and connect motor, ground, and pickup wires to the locomotive.
Install the locomotive headlight bulb and connect its wire harness.
Modify and install the headlight assembly in specific RailKing steam locomotives.
Connect the PS-2 harness to the locomotive's smoke unit, including critical wiring steps.
Alternative wiring methods for connecting the locomotive's smoke unit.
Connect track power to the constant voltage board via an inductor.
Route and secure wires to prevent pinching and short circuits.
Locate the correct 3-volt sound file for the locomotive on the MTH website.
Search for the locomotive's general engine type and wheel arrangement.
Choose and download the appropriate 3-volt or PS 2.0 Upgrade sound file.
Assign a name to the upgraded engine within the DCS system.
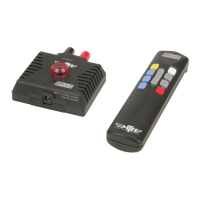
Adjust train speed by turning the throttle control knob clockwise or counterclockwise.
Activate the bell sound by firmly pressing and releasing the Bell button.
Activate the horn or whistle sound by firmly pressing the Horn/Whistle button.
Change the locomotive's direction of travel by pressing the Direction button.
Adjust the volume of all sounds by turning the manual volume control knob.
Activate advanced features using specific sequences of Bell and Horn button presses.
Play station or freight announcements by following a specific button code sequence.
Remotely uncouple the rear coupler using a specific Bell and Horn button sequence.
Remotely uncouple the front coupler using a specific Bell and Horn button sequence.
Enable or disable the locomotive's speed control feature via button sequence.
Prevent the locomotive from changing its direction of travel.
Restore the locomotive's settings and functions to their factory defaults.
Detailed instructions for remotely operating the rear coupler.
Details on enabling, disabling, and using the locomotive's speed control feature.
Procedure to reset the locomotive's settings to factory defaults.
Explanation of automatic sound effects like squealing brakes and cab chatter.
Address issues with the engine not starting immediately upon power application.
Troubleshoot problems related to whistle and horn activation.
Troubleshoot problems related to bell activation.
Troubleshoot issues with the coupler's uncoupling or coupling.
Address playback issues or absence of Cab Chatter sounds.
Troubleshoot engine not moving after power-up or being locked in neutral.
Address distorted or low sound volume, especially when activating sounds.
Troubleshoot issues related to the battery not charging or holding sufficient charge.
Troubleshoot Passenger/Freight Announcement playback issues and sequences.
Details on the 90-day warranty coverage for the PS-2 Upgrade Kit when professionally installed.