
G
Gwendolyn RiveraAug 2, 2025
How to restore AC power on MULTIQUIP DLW400ESA4 Inverter?
- JjrodriguezAug 2, 2025
To restore AC power on your MULTIQUIP Inverter, ensure all circuit breakers (CB1, CB2, CB3, and CB4) are in the ON position.
How to restore AC power on MULTIQUIP DLW400ESA4 Inverter?
To restore AC power on your MULTIQUIP Inverter, ensure all circuit breakers (CB1, CB2, CB3, and CB4) are in the ON position.
What to do if engine cannot be restarted from idle stop on MULTIQUIP Inverter?
If the engine of your MULTIQUIP Inverter cannot be restarted from idle stop, verify that the Idle Stop switch is in the ON position. Then, push the Engine Start button to start the engine.
Why does engine RPM fluctuate during welding on MULTIQUIP Inverter?
If the engine RPM fluctuates higher or lower during welding with your MULTIQUIP Inverter, it could be due to the automatic control responding to the welding output and preset AC power frequency. If the E-mode switch is set to Variable/Low, the engine revolutions are controlled based on the preset welding current value. The engine speed adjusts to meet the total output if AC power is used simultaneously by two operators, or if AC frequency is outputted. Another cause can be overheating of the semiconductor due to open side door or clogged exhaust vents.
Why welding current does not match preset value on MULTIQUIP DLW400ESA4?
If the welding current on your MULTIQUIP Inverter does not match the preset value, it may be because the welding regulator is not in the constant current position. Adjust the welding regulator to the position that is suitable for your welding work. Note that the welding current may vary depending on the diameter and length of the welding cable, as well as the type, thickness, and arc length of the welding electrode. Also, the rotation speed of the engine may be low due to overload or being out of condition. Furthermore, the semiconductor may be overheated.
What does 'IdS' on MULTIQUIP DLW400ESA4 welding current meter display mean?
If the welding current meter display on your MULTIQUIP Inverter indicates “IdS”, it means the welding preset time (1–30 minutes) has been reached when using the idle stop function. To resolve this, restart the engine from idle stop using any of the restarting methods. Alternatively, set the starter switch to STOP once, then to RUN again, and push the Engine Start button.
What to do if MULTIQUIP DLW400ESA4 Inverter engine cannot be restarted from idle stop and 'IdS' is indicated?
If your MULTIQUIP Inverter engine cannot be restarted from idle stop and “IdS” and the preset current value are alternately displayed on the welding current meter while the indicator lamp on the idle stop monitor is blinking, check these items: * Ensure all circuit breakers (Main CB1 and auxiliary AC CB2, CB3, CB4) are in the OFF position. The AC Load lamp on the idle stop monitor will blink if AC auxiliary circuit breakers are ON. * Make sure the side door is closed. The Side Door Open lamp on the idle stop monitor will blink if the side door is open. * If a power tool is connected to the 120V GFCI receptacle, set its power switch to ON then OFF twice or more and wait with the switch in the OFF position until the engine restarts. This prevents restart for safety if the switch remai...
Explains the four safety messages: DANGER, WARNING, CAUTION, NOTICE.
Lists hazard symbols and their corresponding safety hazards.
Provides essential safety precautions for operating the equipment.
Details safety precautions specific to welding operations and hazards.
Covers critical safety measures related to the engine and its operation.
Outlines precautions for handling fuel safely to prevent fire or explosion.
Details safety guidelines for electrical connections, maintenance, and operation.
Explains proper grounding procedures for the welder-generator to prevent shock.
Provides safety instructions for handling and maintaining the battery.
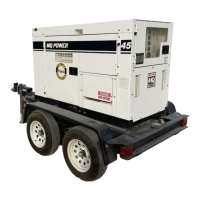
Covers safety procedures for lifting and transporting the equipment.
Discusses safe disposal and environmental considerations for the equipment.
Details electrical and performance specifications for the welding generator.
Outlines electrical output specifications for the AC generator function.
Explains capabilities and limitations of using AC and DC power concurrently.
Provides details on the Kubota diesel engine powering the unit.
Details fuel usage rates under various operating conditions.
Guides on properly connecting the ground for safe operation and code compliance.
Specifies requirements and precautions for installing the unit outdoors.
Details ventilation and safety requirements for indoor installation.
Recommends proper placement for safe and stable operation.
Explains grounding requirements per OSHA and NEC standards.
Lists and describes the components found on the welder-generator's control panel.
Details the types and ratings of output receptacles available on the unit.
Lists optional accessories available for the welder-generator.
Provides guidance on selecting appropriate extension cables for power transmission.
Explains the concept of polarity and its effect on welding heat concentration.
Defines duty cycle and its implications for welding machine performance and longevity.
Describes the Ground Fault Circuit Interrupter receptacle and its safety features.
Details the different types of twist-lock receptacles and their voltage/amperage ratings.
Guides on checking and maintaining the engine's lubrication oil level.
Provides instructions for safely refilling the fuel tank with diesel fuel.
Details on checking and maintaining engine coolant levels and types.
Instructions for cleaning the radiator to maintain cooling efficiency.
Guidance on inspecting and cleaning the air cleaner element for optimal engine performance.
Explains how to check and maintain proper fan belt tension for cooling and charging.
Provides guidance on choosing the correct welding cable size based on current and length.
Details how to connect welding cables and select correct polarities for different applications.
Step-by-step guide on how to safely start the welder-generator engine.
Instructions for performing Constant Current (CC) welding in single mode.
Instructions for performing Constant Current (CC) welding in dual mode.
Instructions for performing Constant Voltage (CV) welding operations.
Guides on setting up and using the idle stop feature for fuel efficiency and noise reduction.
Explains how to restart the engine from idle stop using the welding side.
Explains how to restart the engine from idle stop using the generator side.
Step-by-step guide for safely shutting down the welder-generator.
Outlines the procedure for an emergency shutdown of the equipment.
Lists scheduled maintenance tasks for the engine based on operating hours.
Outlines inspection and maintenance tasks for the generator components.
Details procedures for cleaning or replacing the air cleaner element.
Instructions for daily checking of engine oil level and quality.
Procedures for draining old engine oil for replacement or disposal.
Guides on how to replace the engine oil filter.
Procedures for safely draining engine coolant from the radiator.
Instructions for flushing the radiator and replacing engine coolant.
Details methods for cleaning the radiator to maintain cooling efficiency.
Procedure to remove water contamination from the fuel tank.
Steps for cleaning the interior of the fuel tank.
Guidelines for inspecting fuel hoses and fuel tank lining for wear.
Routine cleaning of the fuel filter bowl to remove debris and water.
Explains the automatic air bleeding process for the fuel system.
Provides procedures for stopping the engine if the starter switch fails.
Details how to visually inspect the V-belt for damage and wear.
Describes the procedure for testing the GFCI module's functionality.
Outlines the procedure for testing the GFCI receptacle's safety features.
Explains the unit's protection devices and how error codes are displayed.
Details error codes related to the generator side, such as overheating.
Information regarding the engine wiring system fuses and troubleshooting.
Lists connectors used in the wiring diagram and their corresponding designations.
Lists connectors used in the wiring diagram and their corresponding designations.