3
MC-3+USB Quick Start Guide – Windows Version
Hardware Setup
Power up the MC-3+USB via the switch on the rear of the device.
The MC-3+USB has several modes of operation, but for audio re-clocking you need to set it to »INTERN« & »RE-CLK«.
Press the MENU button once (LEDs flash) and use the SELECT button to cycle through the MODE menu until the top
(INTERN) and bottom (RE-CLK) LEDs in the MODE column both light up.
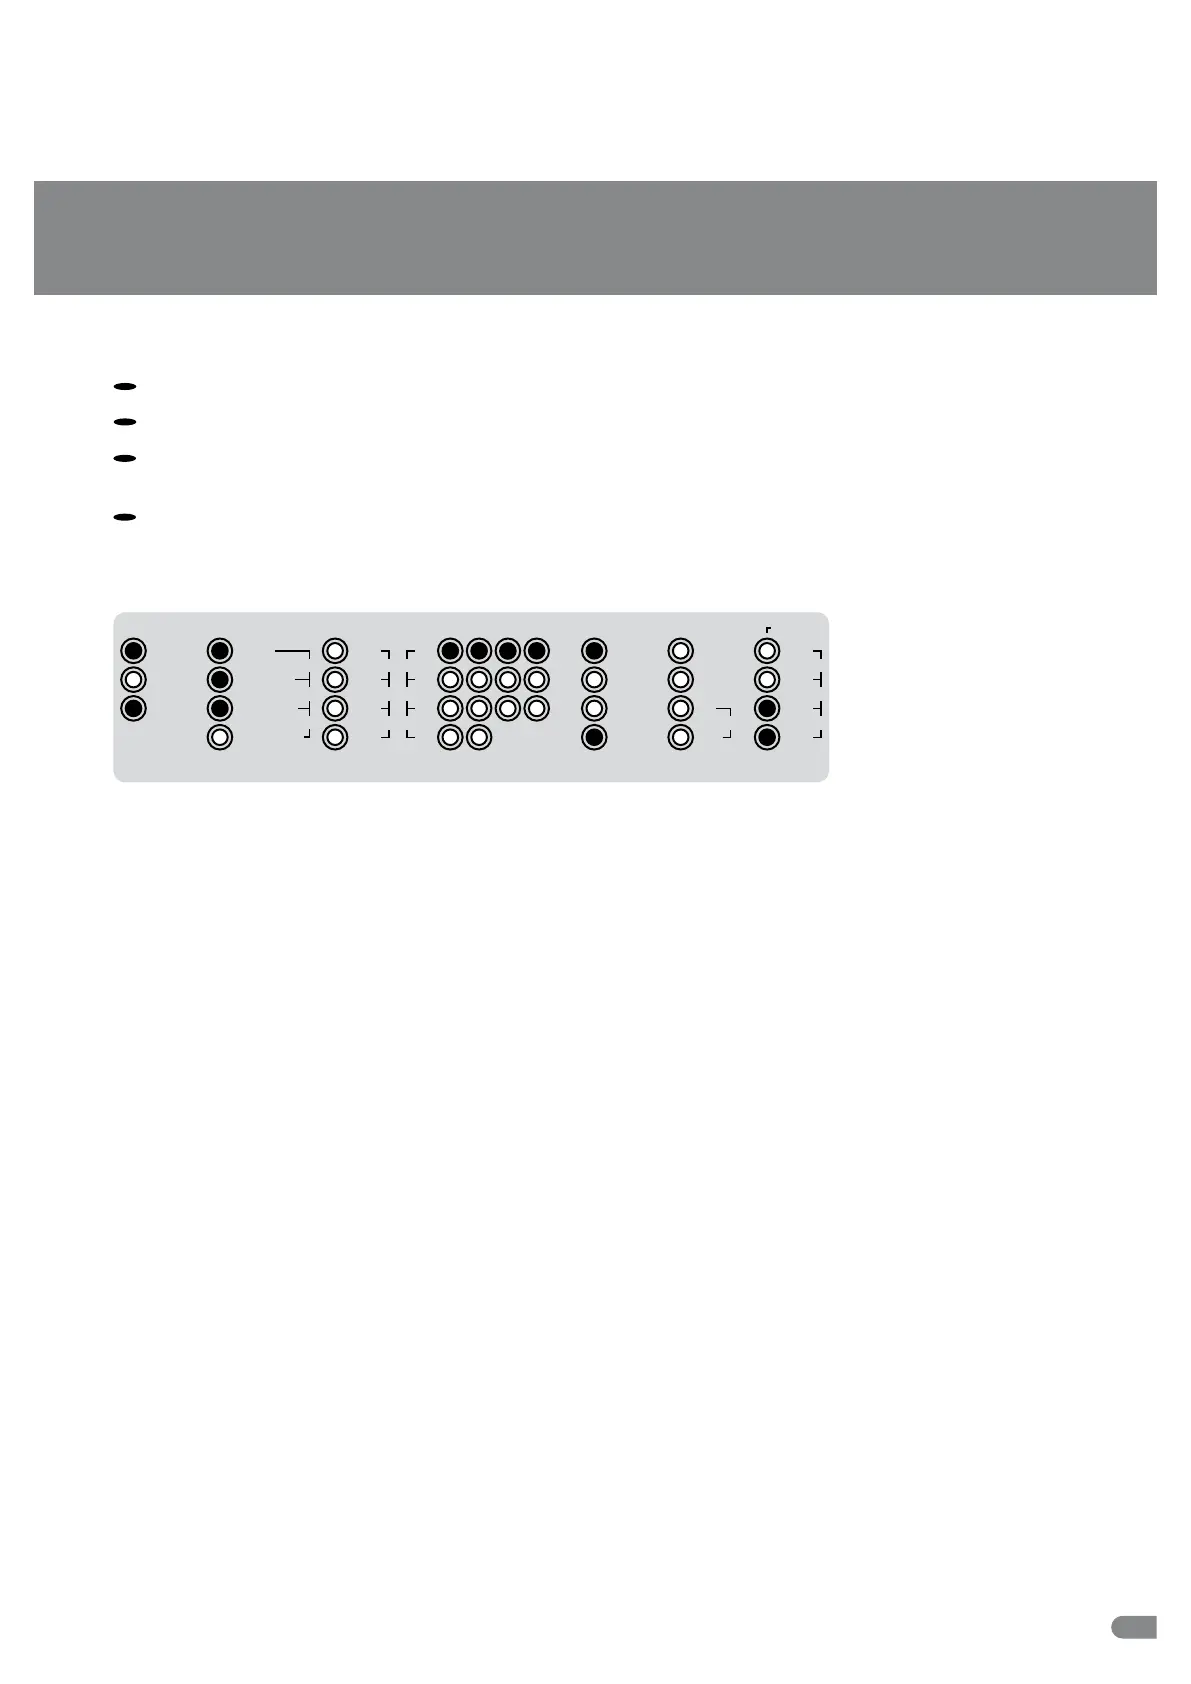
As a result the top three LEDs in the REFERENCE menu should light up at once as the default setting and indicate that the
USB input has been selected as audio input. When sending a valid audio stream into the USB input, the top blue LOCK LED
and the red AUDIO LED in the STATUS column should now be illuminated confirming a lock to the USB audio stream as
reference (see sketch below, e.g. sampling rate of audio input reference = 192.0 kHz).
3
CLOCK MULTIPLIERS
1 2 3 4
MODE
32.0
48.0
INTERN
RE
-
CLK
EXTERN
×
1
×
8
×
4
×
244.1
88.2
96.0
×
256 SC
×
512
×
256
WC176.4
192.0
REFERENCE CLOCK OUT
WCLK
1
–
10.0M
USB
-
PCM
AES3/11
S/P
-
DIF BNC
AES3/11id
S/P
-
DIF OP
USB
-
DSD/DoP
STATUS
LOCK
MAIN REF
LOCK
RE
-
CLK REF
CLOCK IN
32.0
48.0
DoP
AUDIO
HOLD
44.1
DSD
88.2
64
128
96.0
176.4
192.0256
1
–
10.0M
When you want to use one of the other inputs as audio source, press the menu button to switch to the REFERENCE menu
(LEDs flash) and use the SELECT button to cycle through the REFERENCE menu until you have activated the desired input.
Software Setup
As a last step you need to set up the MC-3+USB as a standard sound device. Click the »Start Menu« button and select
»Control Panel«. Click on »Sound« in the »Hardware & Sound« area to select the MC-3+USB as a playback device. Refer to
page 16 in the operating manual for further information.
This concludes the initial setup for computer audio playback on a Windows PC. Please refer to the operating manual for
additional information and if you should have any questions.
 Loading...