· The shoulder straps must be mounted in the under most openings of
the backrest. See ‘The 5-point safety belt’.
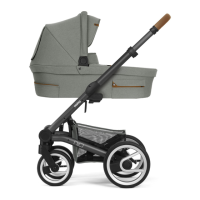
Never use the reclined carriage position of the seat unless the child is
properly secured with the 5-point safety harness.
The pushchair seat must be removed from the reclined carriage position
for infants from 6 months and up to 25 kg.
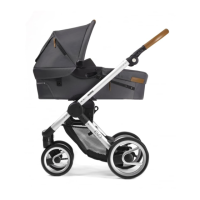
· The seat needs to be set be set into the sitting position. Pull the outer
strap partially out of the upholstery to loosen the press-stud (t2). Loos-
en the press-stud. Push the seat down completely.
· The backrest can be set to any desirable position. See ‘Adjusting the
backrest’.
· Undo the press studs in order to store the leg rest barrier. Open the zip
on the pocket.
· First fold the two sides with the press studs inwards and then fold in the
centre section. Put the 2 fabric parts under the centre section when
folding and make sure that there are no sharp corners in the ribbing.
· Close the zip on the pocket.
· The padded crotch strap of the safety belt must be mounted in the
foremost opening of the seat. See ‘The 5-point safety belt’.
· The shoulder straps must be mounted in one of the top three pairs of
openings of the backrest. See ‘The 5-point safety belt’.
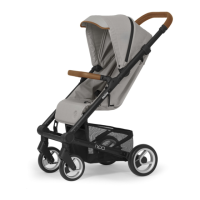
Adjust the back support (m)
· The button for adjusting the back support is located at the rear of the
back support.
· Pinch the button and continue pressing it while moving the back sup-
port backwards to lower the back support. Release the button when
the back support has reached the desired position.
· Pinch the button and continue pressing it while moving the back sup-
port forwards to bring the back support in an upright position. Re-
lease the button when the back support has reached the desired
position.
Adjust the leg support (n)
· Lift the leg support to place it upwards.
· Pull the tube (n1) at the bottom of the leg rest to lower it again.
Attach and remove bumper bar (o)
· To secure the front bumper, press the ends of the bumper into the re-
cesses (o1) intended for this purpose on the frame until you hear a click.
· Press the unlock buttons (o2) on the inside of the bumper bar to re-