3.4Encoder reset and encoder
Encoder Correction procedure
Upon completion of the encoder
resetting, proceed with the encoder correction.
Press f9 <Encoder Correct>.
The screen which appeared immediately after [3 Machine Constants] [4 Encoder
Correction] were selected is restored.
Either "Data Input" or "Position Record" can be used as the method for encoder
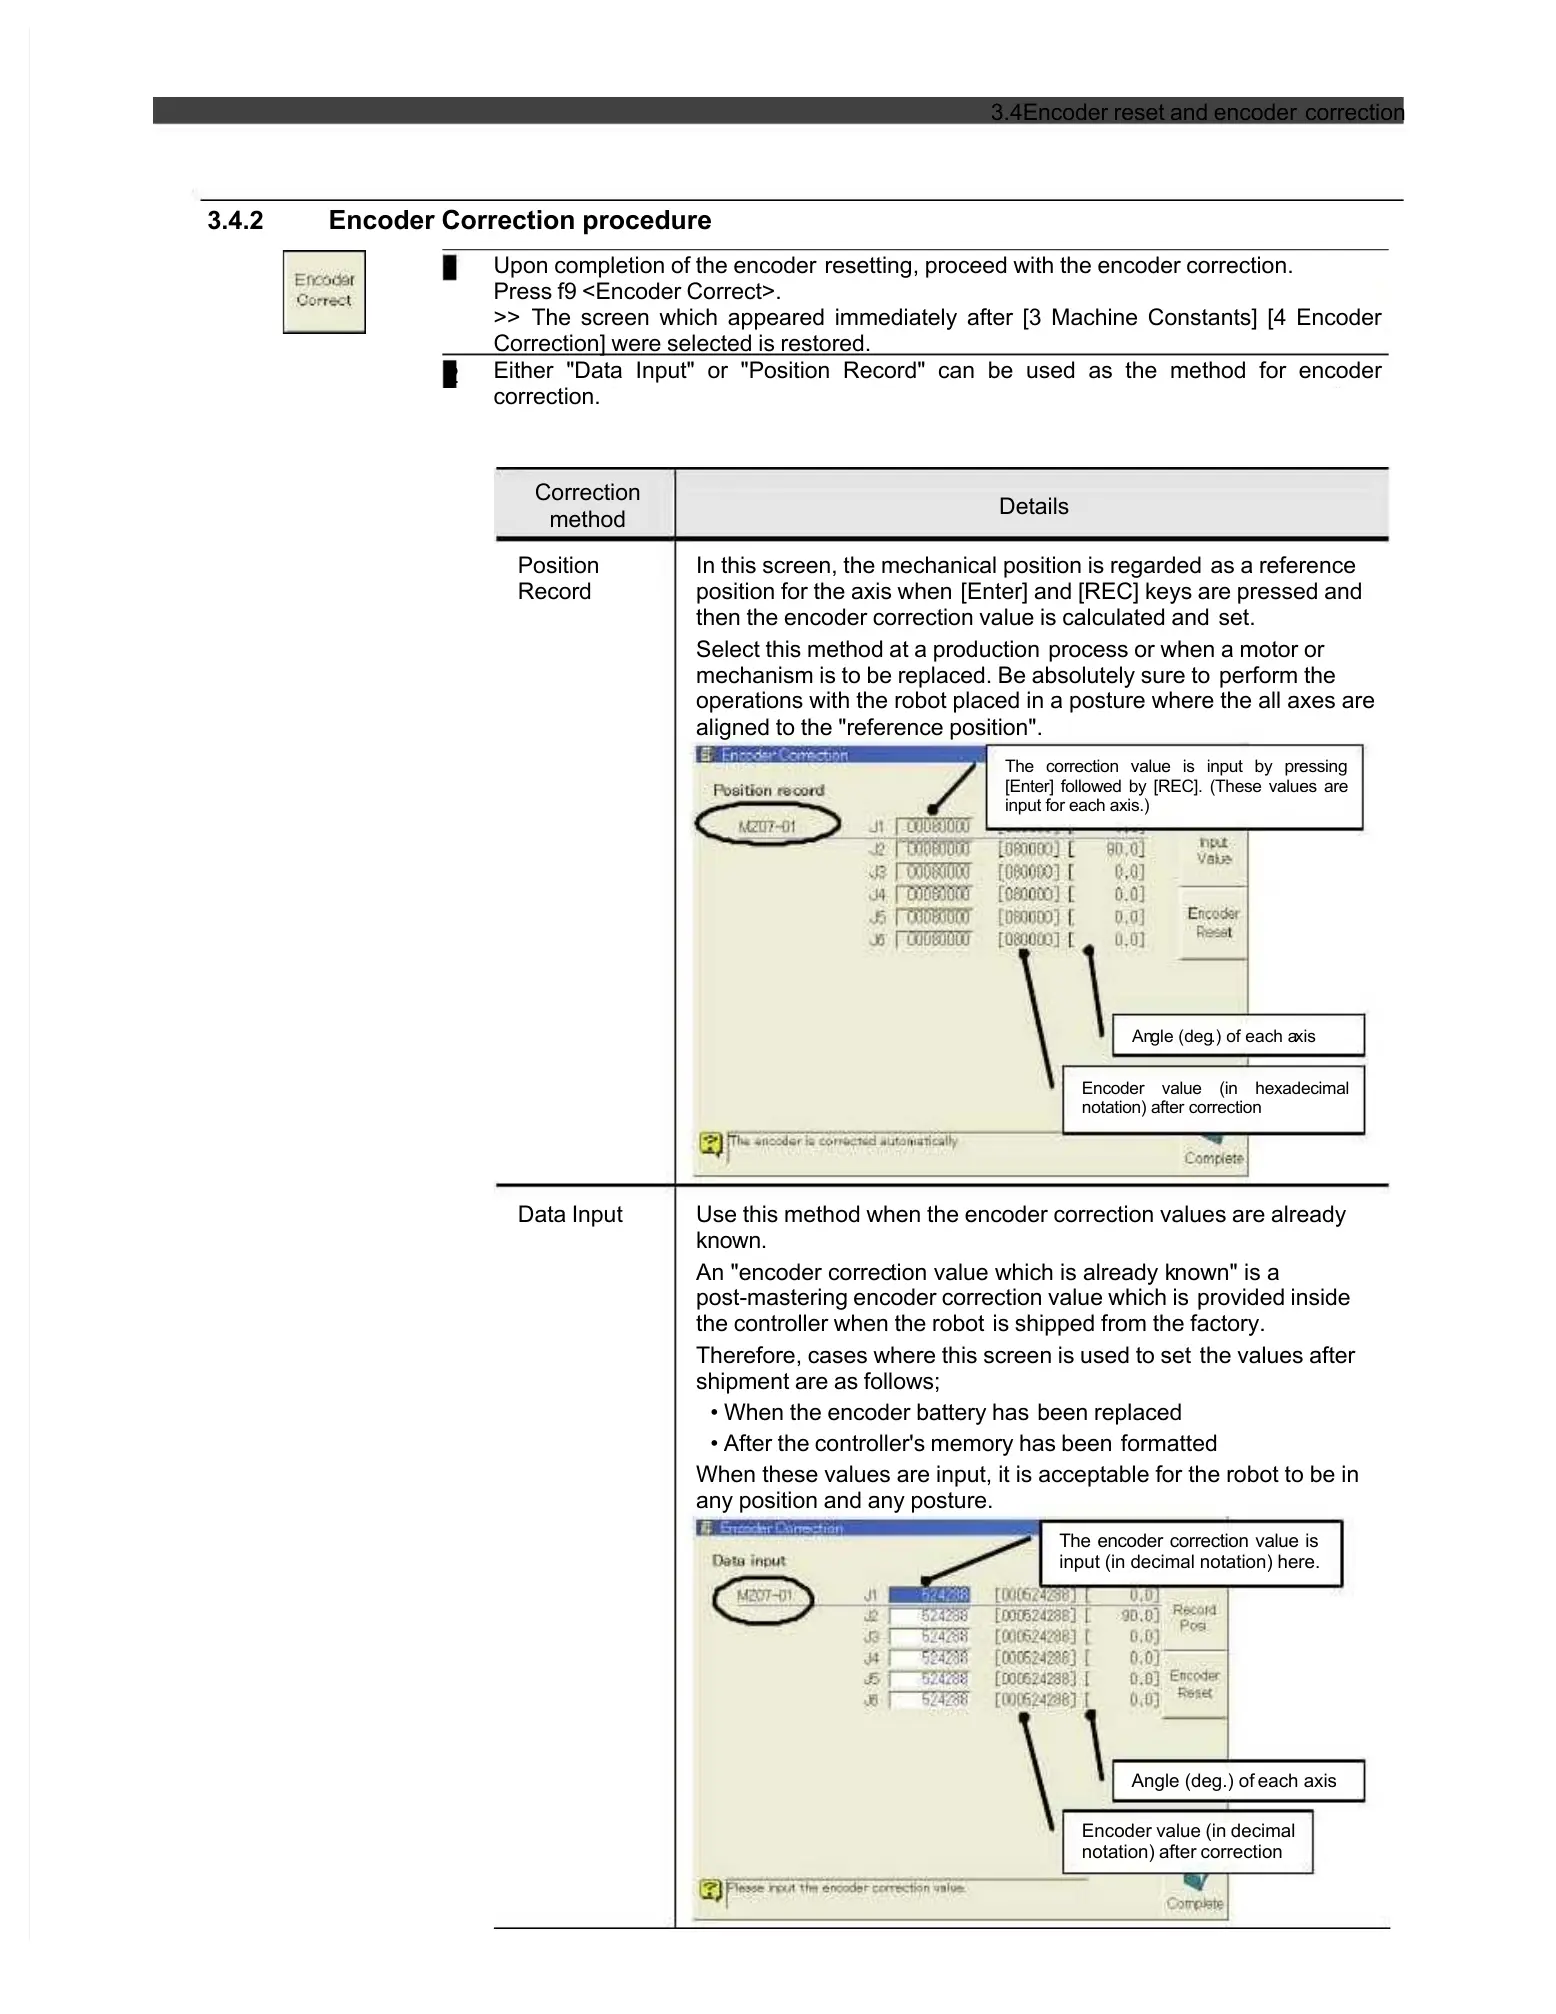
In this screen, the mechanical position is regarded
position for the axis when
[Enter] and [REC] keys are pressed and
then the encoder correction value is calculated and
Select this method at a production
process or when a motor or
mechanism is to be replaced. Be absolutely sure to
operations with the robot placed in a posture where the all axes are
aligned to the "reference position".
The correction value is input by pressing
[Enter] followed by [REC]. (These values are
Encoder value (in hexadecimal
notation) after correction
Use this method when the encoder correction values are already
tion value which is already k
post-mastering encoder correction value which is
the controller when the robot
is shipped from the factory.
Therefore, cases where this screen is used to set
• When the encoder battery has
• After the controller's memory has been
When these values are input, it is acceptable for the robot to be in
any position and any posture.
The encoder correction value is
input (in decimal notation) here.
Encoder value (in decimal
notation) after correction
 Loading...