E3
mains input
and fuse
4 Installation
Power supplies should be installed on an equipment rack intended for the purpose in their
final location before connecting cables or switching on. Ensure that power amplifiers are
switched off and the preamplifier volume is turned down before power supplies are switched
on. The power buttons are located on the front panel. Connection diagrams will be found in
the appropriate product owners manual.
Some power supplies are heavy and care should be taken when lifting or moving them. Make
sure that the surface on which they are to be placed can support their weight.
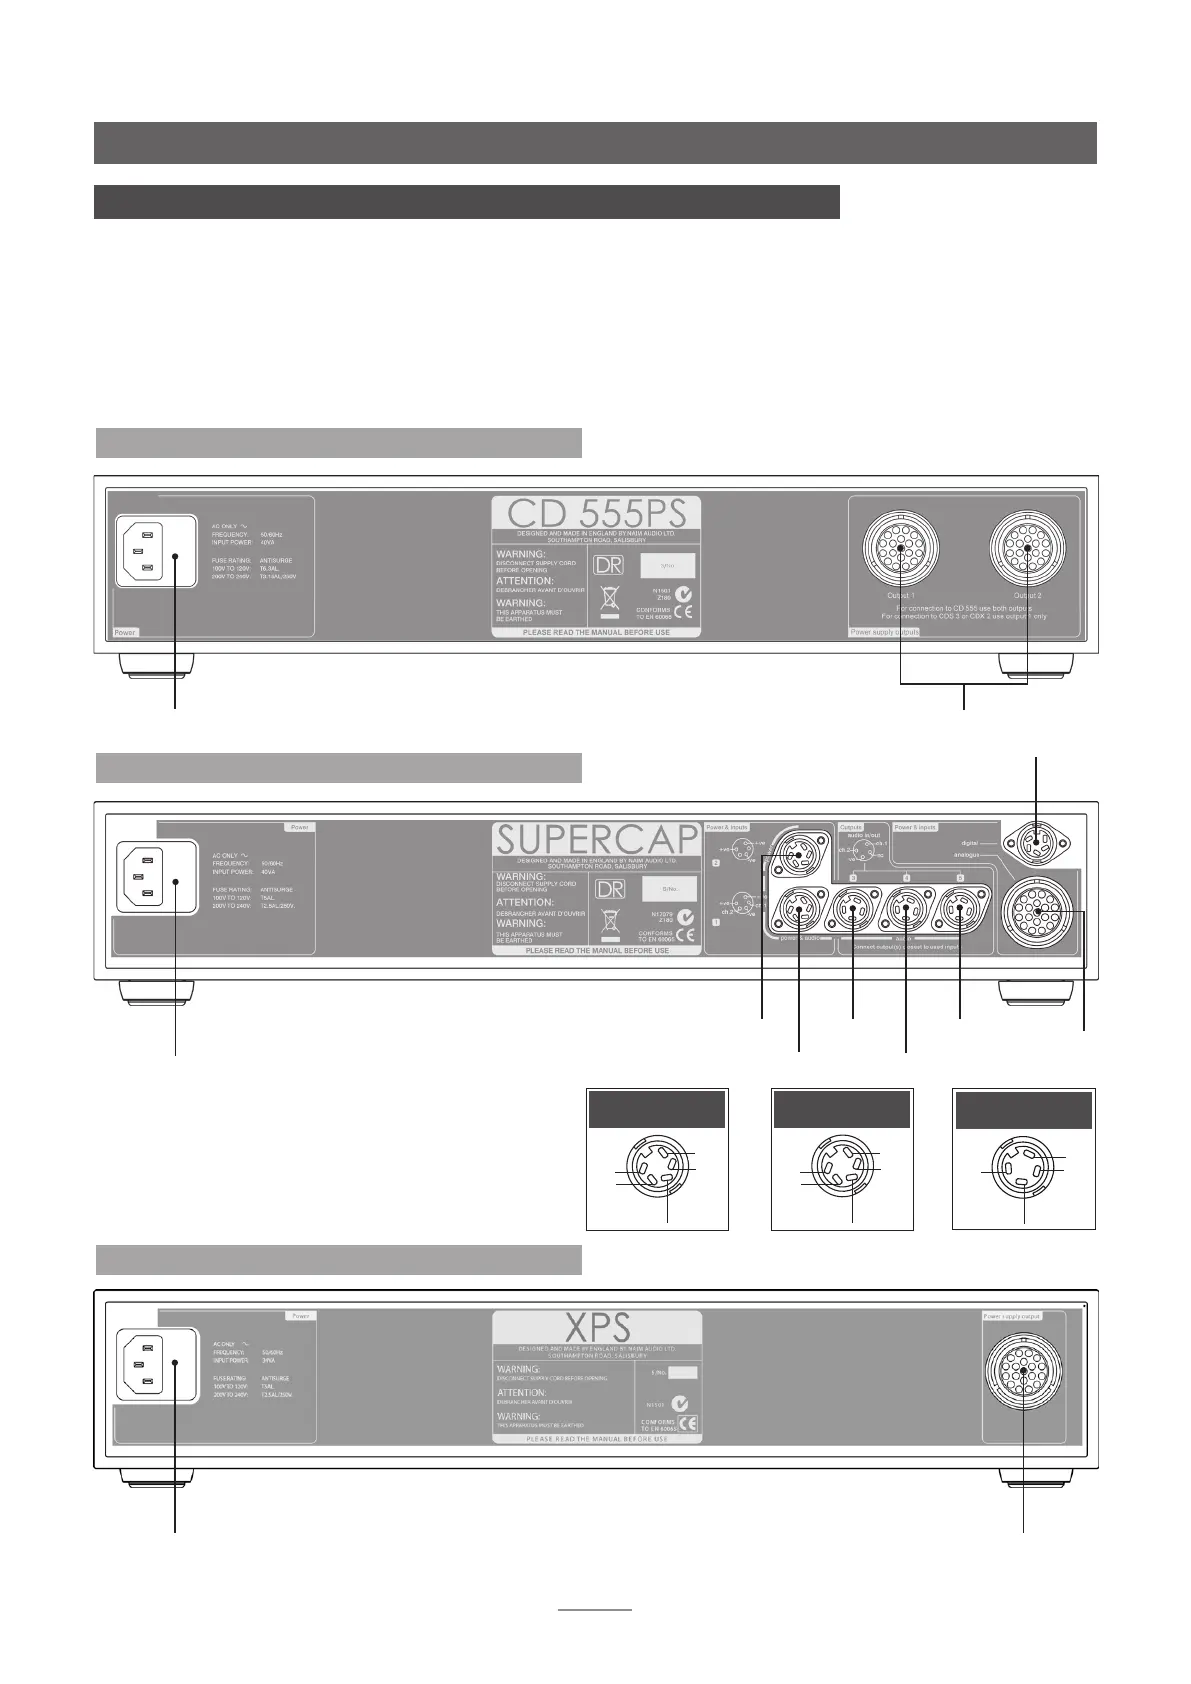
4.2 SuperCap Rear
socket
1
socket
2
socket
4
socket
3
socket
5
NAC 252,
SuperLine
or SNAXO
only
NAC 252
only
+ve
-ve
+ve
ch1
ch2
Socket 1
+ve
-ve
+ve
nc
nc
Socket 2
ch2
-ve
ch1
nc
Socket 3, 4 & 5
mains input and fuse
4.3 XPS Rear
multiple power output
555 PS, SuperCap and XPS
mains input
and fuse
Note: The 555 PS can be used to power the CD555, CDS3, CDX2,
HDX, DAC, NDX and ND5 XS. In the case of the CDS3, CDX2,
HDX, DAC, NDX and ND5 XS only Output 1 is used.
4.1 CD 555 PS Rear
Note: The XPS can be used to power the CDS3, CDX2, HDX,
DAC, NDX and ND5 XS. It cannot be used to power the CD555.
multiple power output