23 24
9. Digital Stylus Gauge
Before using the Digital Stylus gauge for the rst time, remove the
battery seal from the battery compartment on the back of the device.
9.1 Unit Selection
To adjust the tracking force we recommend using the default setting: ‘g’.
If you want to use another unit of measurement, tap the [MODE] button to
cycle through the options.
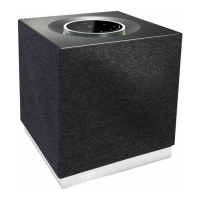
The measuring area of the Digital Stylus Gauge (marked ‘Measuring
area’) is at the same height as a 200g vinyl pressing, so for the most accurate
measurement, the felt mat should be removed and a standard pressing vinyl
used to add additional height.
Now you can switch on the Digital Stylus Gauge by tapping on the [ON / OFF]
area. After switching it on, all the elements of the display are displayed for
approximately 3 seconds before returning to ‘0.0’.
Place the tonearm with the cartridge on the red-marked measuring area, then
slowly lower the tonearm so that the stylus is centred on the red dot.
To avoid false measurements, the body of the cartridge should never contact
the Digital Stylus Gauge. The display now shows you the weight in grams.
For the Equinox cartridge, this should be between 2.2g and 2.4g depending on
listener preference. Lift the tonearm and correct the tracking force.
Check your nal adjustments of the tracking force again with the Digital Stylus
Gauge.
Note that horizontal placement of your Digital Stylus Gauge is required for
accurate measurement of tracking force. Do not touch the surface (calibration
area, showing the Solstice logo) during the measurement process to ensure an
accurate measurement.
Measuring
area
0.01g
9.2 Changing the batteries
If the Digital Stylus Gauge cannot be switched on, the batteries should be
replaced. To change the batteries, open the battery compartment by pressing
the lock and remove the cover. Make sure the polarity is correct when inserting
the batteries. Replace the cover and be careful not to apply any pressure to the
calibration or measurement surfaces.
9.3 Calibration
If the measurements shown seem inconsistent then the supplied calibration
weight can be used to recalibrate the Digital Stylus Gauge.
1. Place the Digital Stylus Gauge on a at, stable surface.
2. Hold down the [MODE] button for approximately 3 seconds: the display will
show ‘CAL’ and then the required calibration weight.
3. Place the 100g weight from the accessories box on the centre of the
calibration area (where the naim logo is shown) and wait 3 seconds.
4. Press [ON / OFF]. The calibration is completed.
9.4 Additional functions
Auto-O
If the device is not used for more than 3 minutes, it automatically switches o
to save the battery.
Overload indicator
If the capacity is exceeded, the display shows ‘O-LD’. Immediately remove the
load and check the functionality of the Digital Stylus Gauge with the enclosed
calibration weight. Please be aware that weights in excess of the measuring
range can permanently damage the Digital Stylus Gauge and invalidate the
warranty.
9.5 Technical data
Measuring accuracy: +/- 0.01g
Measuring range: 0 - 100g
Units: g, oz, ct, gn
Power source: 2x CR2032 Batteries
Auto-O: after 3 minutes
Weight: approx. 64g
Dimensions (HxWxD): 13.5mm x 89mm x 75.5mm
Warranty: 2 years (except batteries)