Page 2 of 3
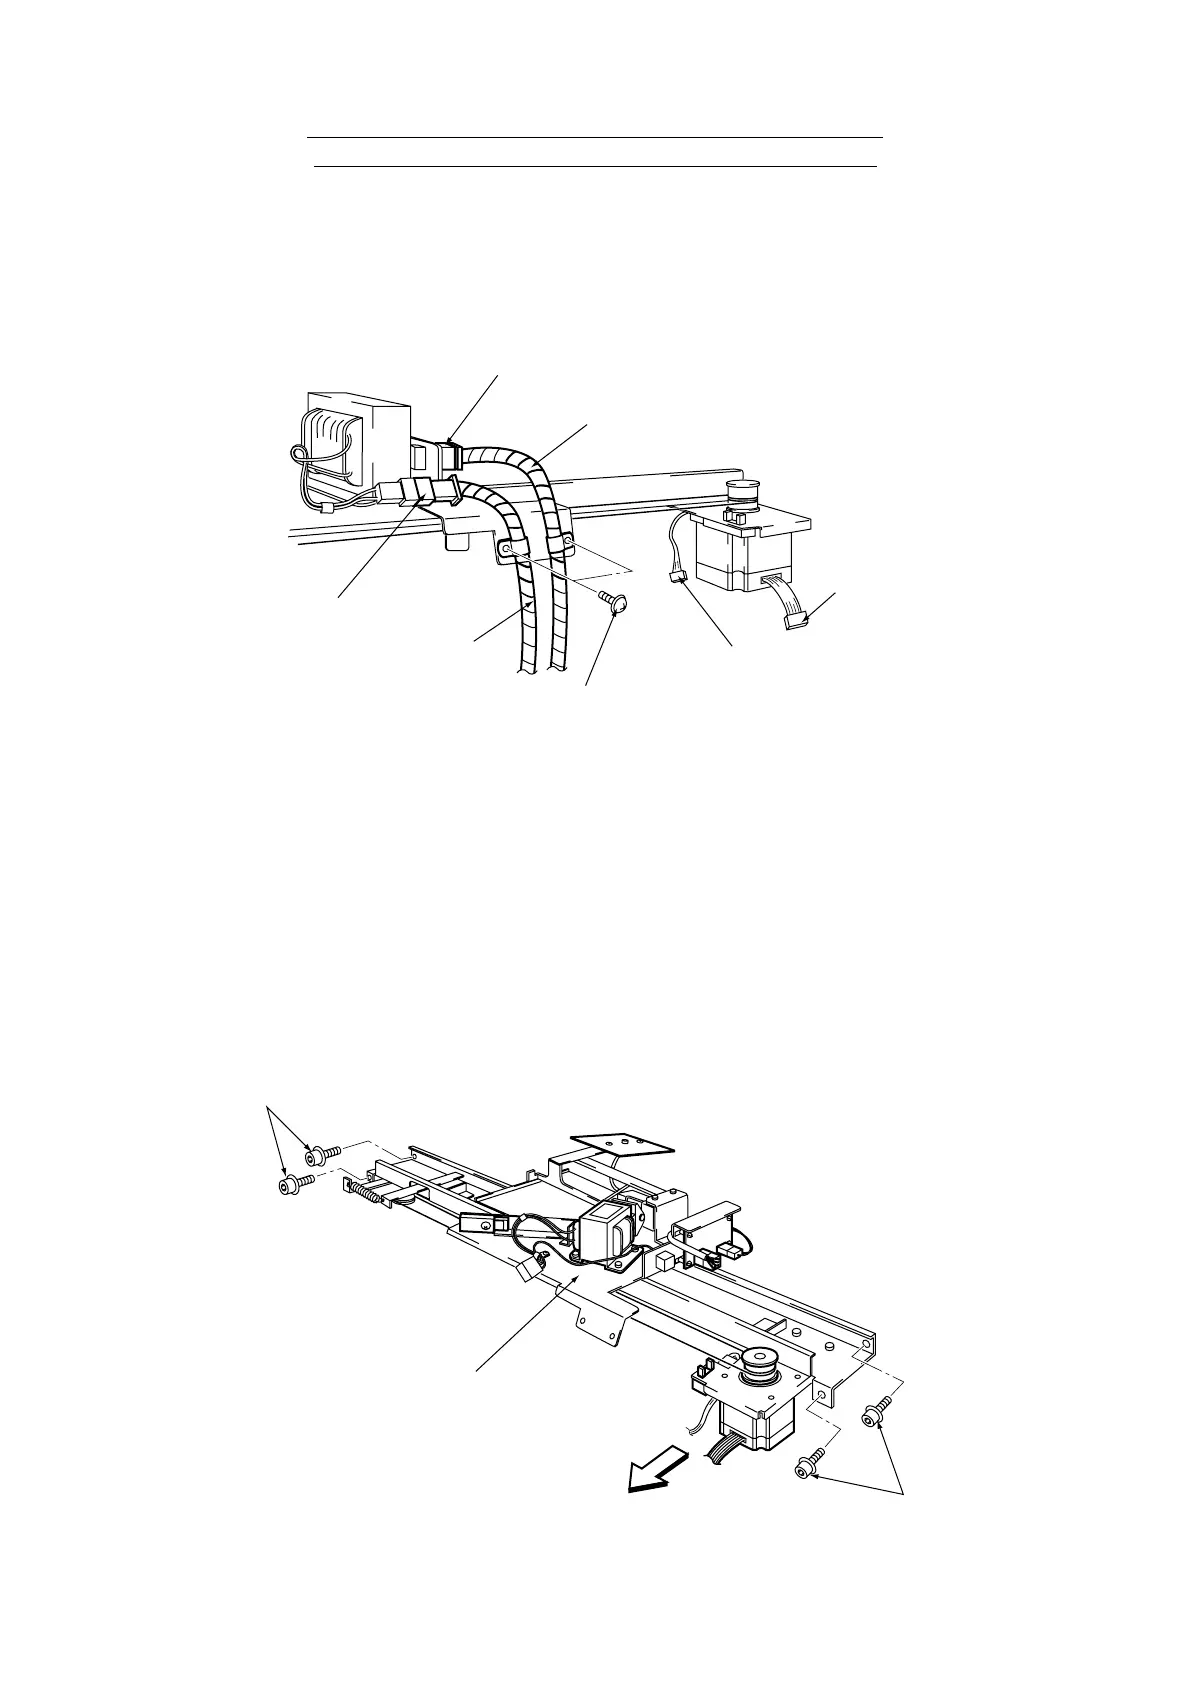
1. Remove the upper rear door from the Target Cabinet.
2. Disconnect the connectors (CN20) and (CN22), remove 2off pozi flange head screws
(M4x6) to release the harnesses.
3. Disconnect the connectors (CN21) and (CN29).
4. Remove 4off (2ea left and right) flange socket head screws (M5x8) and remove the
Flat Target Assy.
Note: When removing the Flat Target Assy from the cabinet, slide the motor side of
the Flat Target Assy in the direction of the arrow, as shown in the diagram
below, being careful that it does not come in contact with any other parts of the
Target Cabinet.
Connector
(CN22)
Harness
Connector
(CN21)
Connector
(CN29)
Pozi flange screws
(M4x6)
Harness
Connectors
(CN20)
Flange socket head screws
(M5x8)
Flange socket head screws
(M5x8)
Flat Target Assy
The Upper and Lower Target Assemblies are different.
Ensure that they are replaced in the correct positions
 Loading...