Do you have a question about the NANLITE PavoTube T8-7X and is the answer not in the manual?
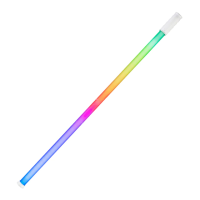
Illustrates the physical components of the PavoTube T8-7X.
Details rated power, input, color temperature range, CRI, and TLCI.
Identifies and illustrates key parts: Handle, Button, DIM Button, Reset Button, USB Port, LED Indicator, Mount Receiver, CCT/HUE Button.
Explains the function of each identified component like buttons, ports, and indicators.
Instructions for connecting the fixture to a power outlet via USB.
Details on connecting the fixture to the WC-USBC-C1 wire controller.
Guide for setting up channels, DMX modes, dimming curves, and smoothing.
Steps for connecting to DMX/RDM consoles using adapter cables and terminators.
Instructions for turning on/off, switching modes, and adjusting intensity/color.
Guidelines on handling, power, electrical safety, and storage.
Warnings regarding emitter viewing, object placement, environment, and maintenance.
Lists items included in the PavoTube T8-7X standard package.
Details items included in the 2KIT and 4KIT versions.
Provides basic troubleshooting for common issues like fixture not booting.
The Nanlite PavoTube T8-7X RGBWW LED Pixel Tube Light is a versatile lighting fixture designed for various photographic and video applications. This user manual provides a comprehensive guide to its features, operation, and maintenance, ensuring users can maximize its potential.
The PavoTube T8-7X is an RGBWW LED pixel tube light, meaning it can produce a wide spectrum of colors, including warm white and cool white, and offers individual pixel control for dynamic lighting effects. It is designed for both power input and firmware updates via a USB Type-C port, which also facilitates DMX signal input and output when connected with a USB-C to DMX cable splitter (sold separately). The fixture incorporates a built-in Bluetooth module, enabling remote control via a wire controller or a dedicated app, enhancing its flexibility in various shooting environments.
The PavoTube T8-7X offers intuitive controls for ease of use. The main button allows users to power the fixture on and off with a long press, and to switch between CCT (Correlated Color Temperature) and HSI (Hue, Saturation, Intensity) modes with a short press. The DIM button enables intensity adjustments in fixed intervals (0%, 20%, 40%, 60%, 80%, 100%), with the intensity resetting to 0% when pressed at 100%. The CCT/HUE button facilitates adjustments to CCT or HUE settings in fixed intervals. For CCT, users can cycle through 2700K, 3200K, 4300K, 5600K, 6500K, and 7500K. For HUE, the available settings are 0, 30, 60, 90, 120, 150, 180, 210, 240, 270, 300, 330, and 360. When the maximum value is reached, pressing the button again will return it to the minimum value.
The fixture can be powered by connecting it to a USB cable and a USB adapter with an output of 5V/2A or above. The built-in battery provides power once the fixture is charged, indicated by an LED indicator that flashes during charging and remains on when fully charged or in use. A 1/4"-20 mount receiver is integrated for attaching various accessories, expanding the fixture's utility.
For advanced control, the PavoTube T8-7X can be connected to a WC-USBC-C1 Wire Controller (sold separately). This controller allows for comprehensive adjustments in CCT mode, HSI mode, EFFECT mode, PIXEL FX mode, CHANNEL setting, LANGUAGE, DMX mode, DMX PIXEL, WIRELESS PROTOCOL, BLUETOOTH RESET, FIRMWARE UPDATE, and VERSION checking. This extensive control capability makes the fixture suitable for professional setups requiring precise lighting management.
The PavoTube T8-7X also supports DMX remote control. Users can connect the fixture to a DMX/RDM console using a DMX adapter cable (not included). The manual provides detailed pinout information for connecting the DMX adapter cable, ensuring proper signal transmission. It also highlights the importance of setting the channel before operating remote control via DMX and suggests using a DMX terminator for the last fixture in a DMX chain to prevent interference. A QR code is provided for easy access to the latest DMX reference guide.
The manual emphasizes several safety precautions and maintenance guidelines to ensure the longevity and safe operation of the PavoTube T8-7X. Users are advised not to look directly at the emitter when the fixture is on, and to avoid placing objects on or allowing liquid to flow inside the fixture. It is crucial to keep the fixture away from flammable or volatile substances like alcohol or gasoline.
For cleaning, strong detergents should be avoided; instead, a cloth with a neutral cleanser should be used to wipe off dirt. The fixture should be set up in a dry, well-ventilated place, away from humid, dusty, or overheated environments. Users are explicitly warned against disassembling the fixture for self-repair; any maintenance should be conducted by qualified professionals strictly following the operating procedures.
Before installation, it is important to verify that the power supply voltage matches the specified voltage for the fixture. The fixture should be turned off when not in use or before cleaning. Finally, it is recommended to store the fixture safely and out of reach of children.
The manual also includes a general fault detection and diagnosis section. If the fixture fails to boot up properly, users are advised to check the connection between the cable, power adapter, or fixture for any looseness. This proactive approach helps in troubleshooting common issues and maintaining the device's functionality.
| Shape | Tube |
|---|---|
| Battery Chemistry | Lithium-Ion |
| Light Source | LED |
| Type | LED Tube |
| CRI | 96 |
| Dimming | 0-100% |
| Length | 3.28 ft / 100 cm |
| Diameter | 1.5" / 3.9 cm |
| Weight | 1.1 lb / 0.5 kg |
| Power Source | Built-in battery or DC input |
| Charging Method | USB |
| Control | Bluetooth |
| App Compatibility | NANLINK app (iOS/Android) |
| Included Accessories | USB-C cable |