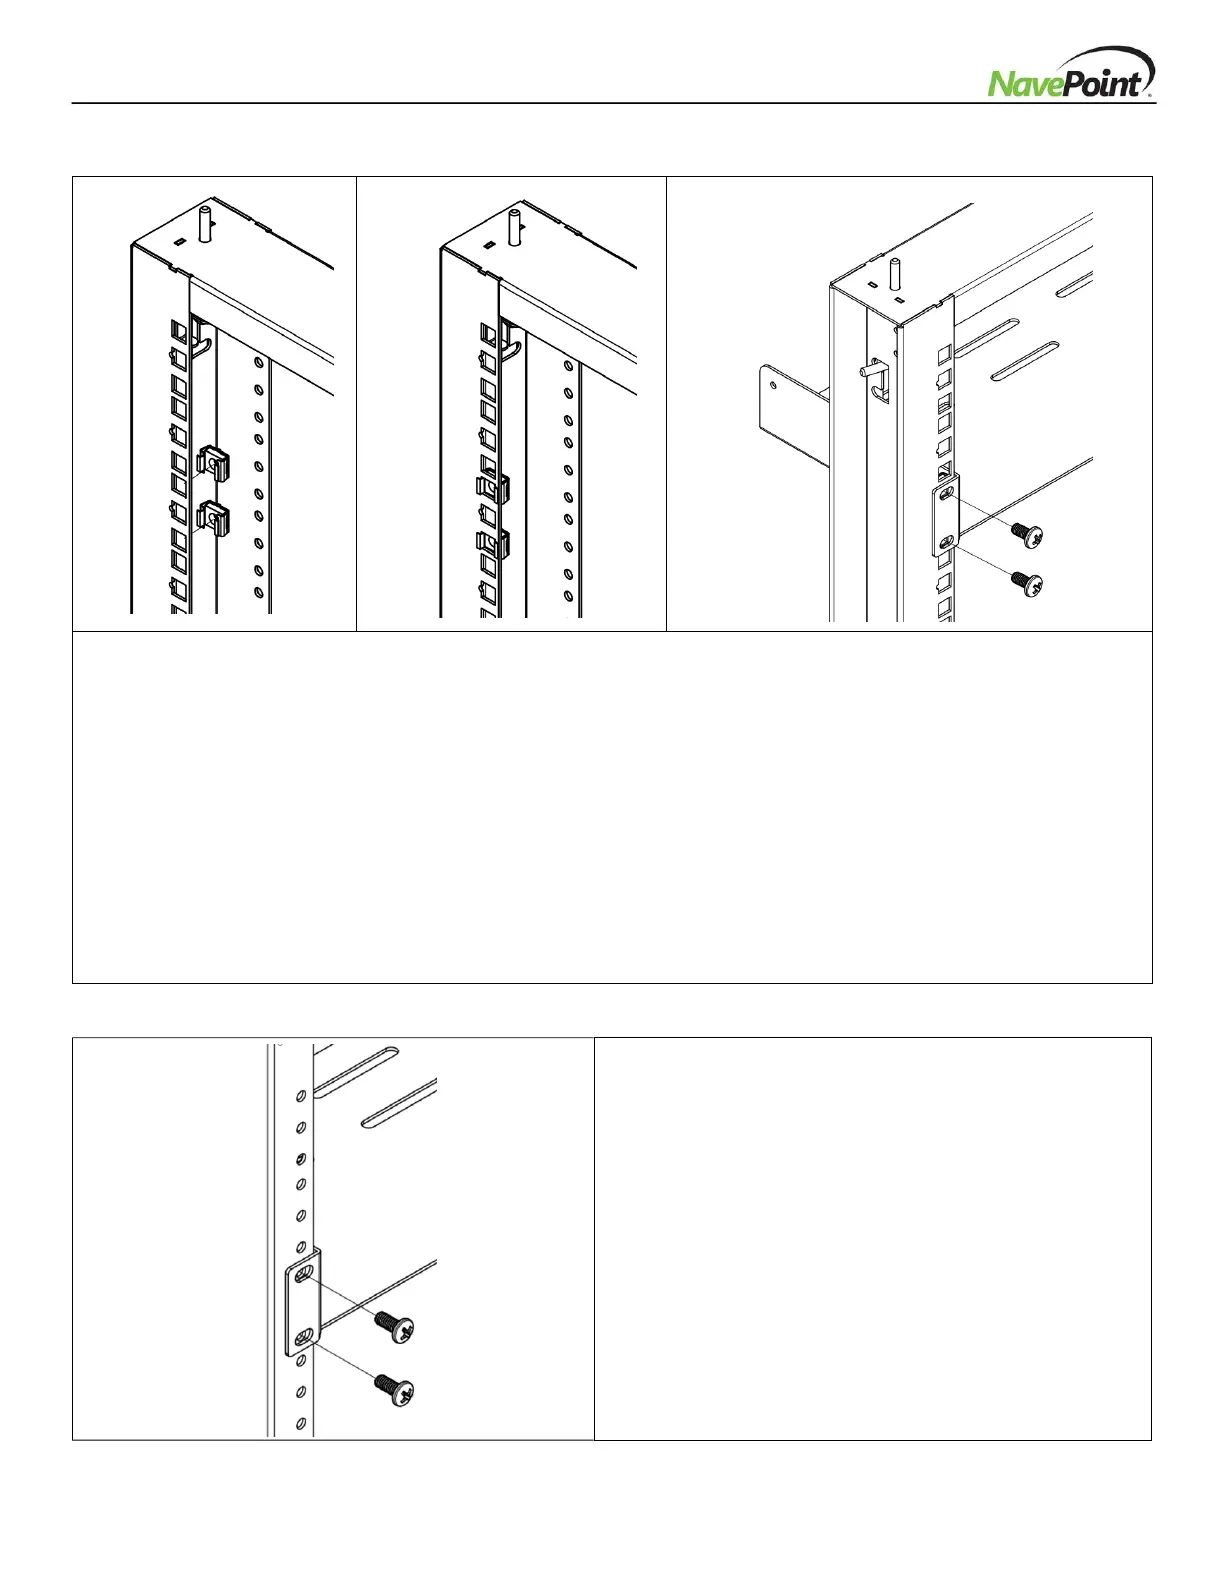
1 Locate the numbered square openings in the Equipment Mounting Frame (C) where you plan to install your
equipment. Install M6 Cage Nuts (I) into the square openings to provide an attachment point for the M6
Mounting Screws (H) . Note: Consult your equipment documentation to determine how many cage nuts will
be required and where they will need to be installed.
a- From the inside of the Equipment Mounting Frame (C), insert one of the flanges of the cage nut through
the square opening. Press it against the side of the square opening.
b- Compress the cage nut at the sides slightly to allow the remaining flange to fit through the square opening.
When the cage nut is properly installed, both flanges will protrude through the square opening and will be
visible on the outer surface of the mounting rail. Repeat steps 1a and 1b until all required cage nuts are
installed.
2 After installing the required cage nuts, use the included M6 Mounting Screws (H) to secure your equipment
into the installed M6 Cage Nuts (I).
Use the included 12-24 Mounting Screws (J) to secure
your equipment to the Equipment Mounting Frame (C).