English-17
English
Connecting a Personal Computer
Connecting your computer to your LCD monitor will enable you to display your computer’s screen image.
Some video cards with a pixel clock over 162MHz may not display an image correctly.
Your LCD monitor displays proper image by adjusting the factory preset timing signal automatically.
<Typical factory preset signal timing>
Resolution
Scanning frequency Remarks
Horizontal Vertical
640 x 480 31.5 kHz 60 Hz
800 x 600 37.9 kHz 60 Hz
1024 x 768 48.4 kHz 60 Hz
1280 x 768 48 kHz 60 Hz
1360 x 768 48 kHz 60 Hz
1280 x 1024 64 kHz 60 Hz
1600 x 1200 75 kHz 60 Hz Compressed image
1920 x 1080 67.5 kHz 60 Hz Recommended resolution
• If you use with a Macintosh PowerBook, set “Mirroring” to Off on your PowerBook.
Refer to your Macintosh’s owner’s manual for more information about your computer’s video output requirements and any
special identifi cation or confi guration your monitor’s image and monitor may require.
• Input TMDS signals conforming to DVI standards.
• To maintain display quality, use a cable that conforms to DVI standards.
Connecting a DVD Player or Computer with HDMI out
• Please use an HDMI cable with HDMI logo.
• It may take a moment for the signal to appear.
• Some video cards or drivers may not display an image correctly.
Connecting a Computer with DisplayPort
• Please use DisplayPort cable with DisplayPort compliance logo.
• It may take a moment for the signal to appear.
• Please note that DisplayPort connector does not supply power to the connected component.
• Please note that when connecting a DisplayPort cable to a component with a signal conversion adapter, an image may not
appear.
• Select DisplayPort cables feature a locking function. When removing this cable, hold down the top button to release the lock.
Quick Start Connection for Touch Panel model
1. Turn off the monitor.
2. Install the equipment.*
1
- Using slot 2 type PC:
Connect the slot 2 type PC into the option board slot.
NOTE: Please refer to the slot 2 type PC’s manual for
connection.
NOTE: When you set option board accessory other than
slot 2 type PC, touch function may not work.
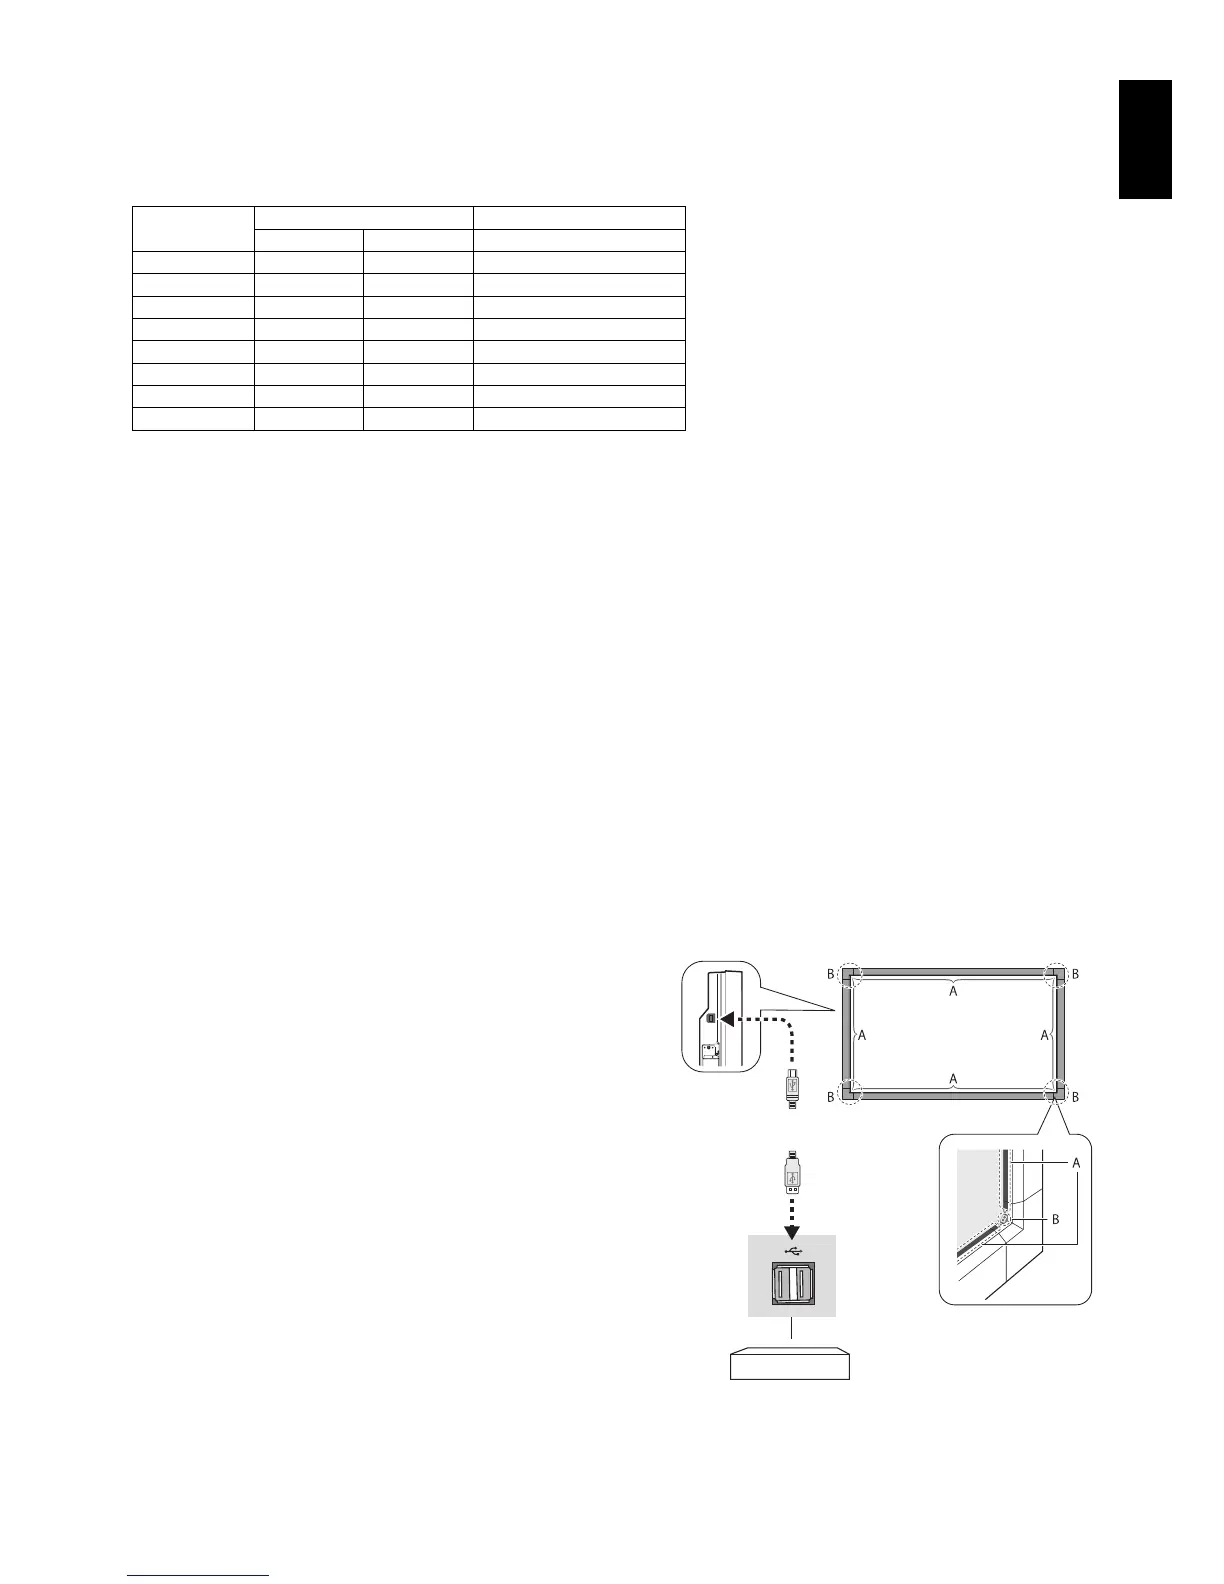
- Using external computer:
Connect the B type connector to the USB upstream port on the
left back side of the monitor and the A type connector to the
downstream port on the external computer (Figure 1).
3. Turn on the monitor.
*1: Please contact your NEC customer support for more detailed information.
Monitor Setting
Select the input signal.
- Using slot 2 type PC: Select [OPTION]
- Using external computer: Select the input signal which is
supplied by the PC connected to USB connector.
NOTE: Touch function does not work in PIP mode.
B Type
A Type
Computer
*
2
Camera module consists of an infrared light source and a sensor.
Figure 1
A: Refl ective bar
B: Camera module*
2