4
a
Quick start guide
Air Cooler
COOL115xx
For more information see the extended manual online:
ned.is/cool115cwt ned.is/cool115bk
Intended use
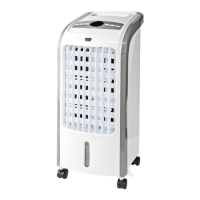
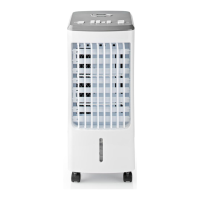
The Nedis COOL115xx is an air cooler with a 3 L water tank capacity.
The product is exclusively intended as an air cooler.
The product is intended for indoor use only.
The product is not intended for professional use.
Any modication of the product may have consequences for safety,
warranty and proper functioning.
Specications
Product Air Cooler
Article number COOL115xx
Dimensions (l x w x h) 280 x 250 x 560 mm
Weight 4.2 kg
Power input 220 – 240 VAC 50 – 60 Hz
Rated power 80 W
Water tank capacity 3 L
Air volume 270 m
3
/h
Automatic air swing Yes
Timer 0.5 h – 7.5 h shut-o
Remote control Yes
Main parts (image A)
1 Cover
2 Ice pack
3 Water tank
4 Air lter
5 Curtain paper
6 Air lter slot
7 Air cooler
8 Water tank lock
9 Water tank slot
10 Water hose
11 Power cable
12 Vertical air ow
control
13 Air outlet
14 Remote
15 Air ow on / o
16 Wind
17 Fan speed
18 Swing on / o
19 Cooler on / o
20 Timer
21 Cooler on / o
22 Swing on / o
23 Timer
24 Display
25 Wind
26 Fan speed
27 Air ow on / o
Safety instructions
-
WARNING
• Ensure you have fully read and understood the instructions in this
document before you install or use the product. Keep the
packaging and this document for future reference.
• Only use the product as described in this document.
• Do not use the product if a part is damaged or defective. Replace a
damaged or defective product immediately.
• Do not drop the product and avoid bumping.
• This product may only be serviced by a qualied technician for
maintenance to reduce the risk of electric shock.
• Do not expose the product to water or moisture.
• Disconnect the product from the power outlet and other
equipment if problems occur.
• Close supervision is necessary when the product is used by or near
children, animals or inrm persons. Do not allow children to play
with it or touch it.
• Do not use the product in rooms where ammable liquids or gases
are used or stored.
• Do not use the product in wet or damp environments.
• Avoid direct sunlight.
• Do not cover the product.
• Do not use the product without water in the tank.
• Do not use solvents to clean the product.
• Only plug the cable into a wall outlet. Do not use extension cords.
• Only use a power outlet rated 10 A or higher.
• Do not insert any objects into the product.
Setup
1. Place the product on a stable and at surface.
2. Plug the power cable A
11
into the power outlet.
Filling the water tank
1. Pull out the water tank A
3
.
2. Lift the cover A
1
.
3. Fill A
3
with water.
-
Do not ll the water tank above the “max” indicator.
-
Do not use the product if the water level is below the “min”
indicator.
4. Place A
1
back on A
3
.
5. Insert A
3
back into the water tank slot A
9
.
Using ice packs
4
The use of ice packs A
2
is optional.
4
Use A
2
if water does not provide enough cooling.
1. Place A
2
in the freezer until frozen.
2. Turn the water tank lock A
8
to unlock A
3
.
3. Pull out A
3
.
4. Lift A
1
.
5. Place A
2
in A
3
.
6. Make sure the water level is between “min” and “max”.
7. Place A
1
back on A
3
.
8. Place the water hose A
10
into A
3
.
9. Insert A
3
back into A
9
.
10. Turn A
8
to lock A
3
.
Using the fan
1. Press A
27
to switch on the fan.
2. Press A
26
to set the fan speed.
A
24
indicates the current fan speed.
3. Press A
27
to switch o the fan.
Using the cooling function
• Press A
21
to activate or deactivate the cooling function.
Setting air ow direction
1. Press A
22
to automatically swing the air ow from left to right.
2. Use A
12
to set the vertical air ow direction.
Setting the wind type
• Press A
25
to set the wind type.
A
24
indicates the current wind type
Using the timer
• Press A
23
to set the time to stand-by.
You can set the time to standby in 0.5 hr intervals from 0.5 – 7.5 hr.
A
24
indicates the time left to stand-by.
Using the remote
1. Press A
15
to switch the air ow on or o.
2. Press A
16
to set the wind type.
3. Press A
17
to set the fan speed.
4. Press A
18
to automatically swing the wind direction from left
to right.
5. Press A
19
to switch the cooling on or o.
6. Press A
20
to set the time to stand-by.