Do you have a question about the NEFF S58T69X0GB and is the answer not in the manual?
Dishwasher is intended for home use and domestic dishes only.
Children aged 8+ or those with limited abilities require supervision for safe appliance use.
Read operating and installation instructions carefully before use for proper installation and maintenance.
Check packaging for transit damage. Dispose of responsibly and keep away from children.
Ensure electrical connection matches rating plate; replace damaged cords only with authorized parts.
Install in a secured unit, avoid placement above microwaves, and do not install near heat sources or under hobs.
Covers water connection safety, daily use notes, damage handling, disposal, and injury risk warnings.
Warnings about solvent addition, hot water spray, and keeping children away from detergents and appliance.
Dispose of packaging and old appliances according to environmental guidelines and WEEE directive.
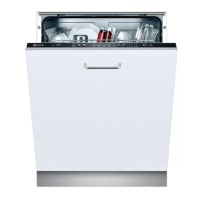
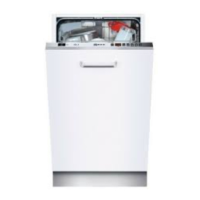
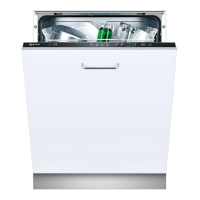
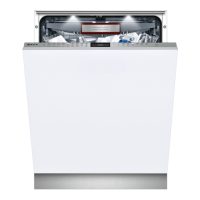
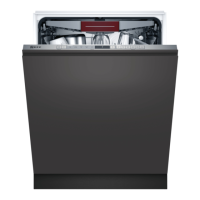
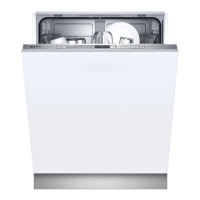
Diagrams of control panel features and interior components like baskets and dispensers are provided.
Dishwasher needs soft water; use special salt for hardness above 1.2 mmol/l to prevent limescale.
Adjust salt dispensing from 4:00 to 4:07. Check tap water hardness with your utility company.
Refill salt immediately before switching on appliance. Use only dishwasher salt, not table salt or tablets.
Salt may be omitted with combined detergents up to 21°dH. Use special salt for higher hardness.
Indicator can be deactivated if using combined detergents containing salt component.
Set rinse aid from 7:00 to 7:06. Level 7:04 provides good drying results; adjust for streaks or stains.
Indicator can be switched off if using combined detergents with rinse aid component.
Avoid wood, decorative glasses, heat-sensitive plastics, copper, tin, and items soiled with ash or grease.
Damage stems from glass type, detergent, and wash water temperature.
Place utensils securely, openings down, angled for drainage, and ensure they don't obstruct spray arms.
Empty from the bottom up to prevent dripping. Allow hot utensils to cool before handling.
Place cups and glasses in the top basket. Load heavily soiled items like pans into the bottom basket.
Load pans in the bottom basket for optimal cleaning due to stronger spray jets.
Arrange cutlery separately in the drawer for easier removal. The drawer is removable for convenience.
Fold down spikes to improve arrangement of pans, bowls, and glasses.
Light-weight plastic items like cups and lids can be securely held in this specialized holder.
Adjust the upper basket height in 3 stages to create more space in either the upper or lower basket.
Pour detergent into the dry dispenser. Dosage depends on soiling; use 20-25ml or one tablet for normal loads.
Use less detergent for light soiling. Suitable products available via website or customer service.
Function up to 21°dH; use salt/rinse aid above. Rinse program adjusts automatically.
Use solo detergents for best results. Tablets may not fully dissolve in short programs. Handle water-soluble covers with dry hands.
Select programs based on utensil type and soiling. Overview lists programs, soil types, and sequences.
Options like VarioSpeed+ reduce time; Half Load saves water/energy. Contact for test data.
HygienePlus for disinfection, Intensive Zone for tough soil, Extra Drying for plastics.
Details consumption values and the Aqua sensor's turbidity measurement for efficiency.
Steps to turn on the appliance and start the Eco 50° programme.
A light spot indicates operation. Do not open door until light is no longer visible.
Digital display shows remaining time, influenced by water temp, load, and soiling.
Delay the start of the programme in 1-hour steps up to 24 hours.
Programme completion indicated by 0:00 display and acoustic signal.
Appliance can auto-switch off after 1 or 120 minutes. Interior light works when door is open.
Manual steps to switch off the appliance after program completion and remove utensils.
Switch off to interrupt (program saved). Press START for 3 sec. to reset.
Programmes cannot be changed after starting; cancel (Reset) and restart instead.
Enhances drying with higher rinse temperature. May increase time and is delicate for some items.
Check spray arms, clean appliance with specific detergents, and maintain door seal hygiene.
Avoid steam cleaners; use damp cloths. Do not use abrasive sponges or detergents.
Monitor refill indicators 4 and 5; replenish salt and/or rinse aid as needed.
Check, unscrew, clean filters under running water, and re-install correctly after each wash.
Check nozzles for blockages, unscrew arms, clean them, and re-engage securely.
Fix common faults yourself. Repairs require technicians and original parts. Reset appliance if it stops.
Clear pump impeller of food remnants or foreign objects to resolve blockages.
Troubleshoot kinked hoses, closed taps, or blocked water supply filters indicated by display 3.
Addresses issues like soiled filters, blocked waste hose, loose pump cover, or low voltage.
Handles general error codes, door issues, and salt/rinse aid indicator faults.
Addresses water left due to blocked filters or incomplete programmes.
Covers problems with rinse aid, program selection, utensil arrangement, detergent, or drying activation.
Addresses drying specific to plastic and cutlery arrangement.
Interior moisture is normal due to condensation drying; it drains automatically.
Addresses utensil placement, spray arm obstruction, blocked nozzles, and dirty filters.
Troubleshoots dispenser blockages, tablet issues, and damp detergent.
Addresses droplet formation, coatings, and white limescale on plastic components.
Troubleshoots limescale, incorrect water hardness settings, or ineffective detergents.
Addresses residue from food or inadequate rinsing, suggesting detergent or program adjustments.
Handles colored film from vegetables or metallic components, often harmless.
Addresses discoloration from low rinse temp or intense pre-cleaning.
Troubleshoots streaks from rinse aid levels or dispenser issues.
Addresses irreversible clouding on non-dishwasher-safe glasses, suggesting specific glasses and settings.
Troubleshoot fuse, power cord, or door closure issues preventing appliance start.
Addresses difficulty opening/closing the door due to locks or installation issues.
Covers dispenser blockages by utensils, tablets, or damp detergent.
Troubleshoot door closure, tablet tray obstruction, or basket interference with door.
Addresses knocking, rattling from spray arms, or unusual foam from rinse aid issues.
Contact customer service for fault rectification. Provide appliance E-Nr. and FD production numbers.
Lists items included: Dishwasher, Instructions for use, Installation instructions, Warranty, etc.
Install according to dimensions, secure unit, connect waste-water hose ensuring clear drainage.
Details appliance specs like weight, voltage, and load. Minor water stains from factory checks are normal.
Connect fresh-water hose to tap, ensuring it's not kinked. Use new hose when replacing. Check pressure and rate.
Connect to hot water up to 60°C for energy efficiency. Set appliance for optimal hot water operation.
Connect to 220-240V, 50/60Hz socket with protective earth. Socket must be accessible.
Steps to remove: disconnect power/water, hoses, loosen screws, remove base panel.
Empty and secure parts. Drain thoroughly via highest temp program before transport.
If risk of frost, empty appliance completely. Refer to Transportation for draining steps.
Diagrams show how to activate, open with, and deactivate the childproof lock.
Use special spray head for large sheets/grilles. Remove top basket and insert head.
Covers water damage from defective Aqua-Stop system. Appliance must be connected to power supply.
| Door color | Not applicable |
|---|---|
| Cord length | 1.7 m |
| Control type | Buttons |
| Product size | Slimline (45 cm) |
| Built-in display | Yes |
| Inlet hose length | 1.4 m |
| Appliance placement | Fully built-in |
| Control panel color | Stainless steel |
| Cycle time | 185 min |
| Noise level | 44 dB |
| Delayed start timer | - |
| Dishwashing programs | Auto 45-65°C, Glass/delicate, Eco, Pre-rinse, Quick |
| Number of place settings | 10 place settings |
| Number of washing programs | 6 |
| Drying class | A |
| Annual water consumption | 2520 L |
| Annual energy consumption | 211 kWh |
| Backlight color | Red |
| Feet adjustment | 60 mm |
| Current | 13 A |
| Connected load | 2400 W |
| AC input voltage | 220 - 240 V |
| AC input frequency | 50 - 60 Hz |
| Power consumption (off) | 0.1 W |
| Water consumption per cycle | 9 L |
| Energy consumption per cycle | 0.75 kWh |
| Package weight | 37000 g |
| Depth | 550 mm |
|---|---|
| Width | 448 mm |
| Height | 815 mm |
| Weight | 36000 g |
| Depth with door open | 1155 mm |
| Installation compartment width | 450 mm |
| Installation compartment height (max) | 875 mm |