1
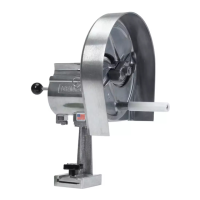
Easy Slicer ™ Vegetable Cutter
N55200AN Adjustable Cut N55200AN-1 3/16” Shredder
N55200AN-4 1/8” Fixed Cut N55200AN-2 5/16” Shredder
N55200AN-6 3/16” Fixed Cut
N55200AN-8 1/4” Fixed Cut
Operating and Maintenance Instructions
Important
1. To get the best operation and life from your machine, please read and comply with these instructions.
2. Clean machine thoroughly before and after each use using cleaning instructions below.
3. Minimize the use of alkaline cleaners as they may cause pitting and dulling of the finish.
Safety Instructions
1. Remember the blades are VERY SHARP; be careful when handling and operating the machine to keep hands away from the
blades.
2. Never operate the machine without the GUARD and COVER PLATE in proper position. Always push produce to the BLADES with the
PUSHER PLATE. Never push produce with the hand.
Preparation
1. Loosen screw in PUSH PLATE about 8 turns (or remove it completely)
2. Install PUSH PLATE in the grooves in the TROUGH AND LEG ASSEMBLY.
3. Place GUIDE under the head of the screw and tighten the screw.
4. If unit fails to operate properly when first used call NEMCO customer service at 1-800-782-6761
To Mount
1. Place the EASY SLICER on the work surface to establish a location that is convenient and comfortable for the operator. Draw an
outline of the MOUNTING BASE on the work surface.
2. Remove the MOUNTING BASE from the EASY SLICER and place within the outline drawn on the work surface. Draw circles where
the 4 holes are located and remove the MOUNTING BASE.
3. Drill ¼’ (or slightly larger) holes in work surface where holes in MOUNTING BASE were located – 4 holes.
4. Secure the MOUNTING BASE to the work surface with screws provided.
Note: The LEG can be repositioned by removing the 4 cap screws and installing with the LEG positioned as desired. This feature permits
mounting flexibility for convenience and for use of the EASY SLICER™ with a MOUNTING BASE that may already be installed for
mounting other NEMCO machines.
To Operate
1. Slide the EASY SLICER™ into the MOUNTING BASE, with the extension containing the LOCKING SCREW going in last. Tighten the
LOCKING SCREW to secure the machine.
2. If using the ADJUSTABLE SLICING UNIT, check slice thickness setting and adjust if necessary (see TO ADJUST).
3. Pull PUSHER HANDLE and raise COVER PLATE and place produce into the TROUGH.
4. Close COVER PLATE and gently push on PUSHER HANDLE KNOB while turning the HANDLE on the ROTARY CUTTING UNIT in a
clockwise direction. Maintain uniform pressure on the PUSHER HANDLE.
To Adjust
1. The ADJUSTABLE SLICING UNIT is easily adjusted by holding the HANDLE stationary and by turning the ADJUSTING SCREW at the
end of the ADJUSTING SHAFT ASSEMBLY.
2. The thickness of the slice is indicated by the alignment of the pin in the slot and the lines on the recessed portion of the MAIN SHAFT.
These lines are 1/16” apart; so 2 lines = 2/16” or 1/8”, 3 lines = 3/16”, etc., up to ½”.
Operating Tips
1. For slice uniformity, turn the ROTARY SLICING UNITS slower as the slice width increases. This will help assure that the produce is
fully advanced to the ADJUSTING PLATE before the next BLADE begins to cut.
2. After placing produce in the TROUGH, turn the HANDLE about ¼ turn counter-clockwise before turning in the cutting direction. This
will permit a “running start” as the blade makes its first cut. It will be easier and will provide more uniform slices.
3. Do not apply heavy pressure on the PUSHER HANDLE. It is unnecessary and will not improve the slicing or shredding action.
4. Do not force produce that is too large into the TROUGH. It will be difficult to push into the CUTTING BLADE and will result in poor
uniformity of the cut.
5. Keep the BLADES sharp.