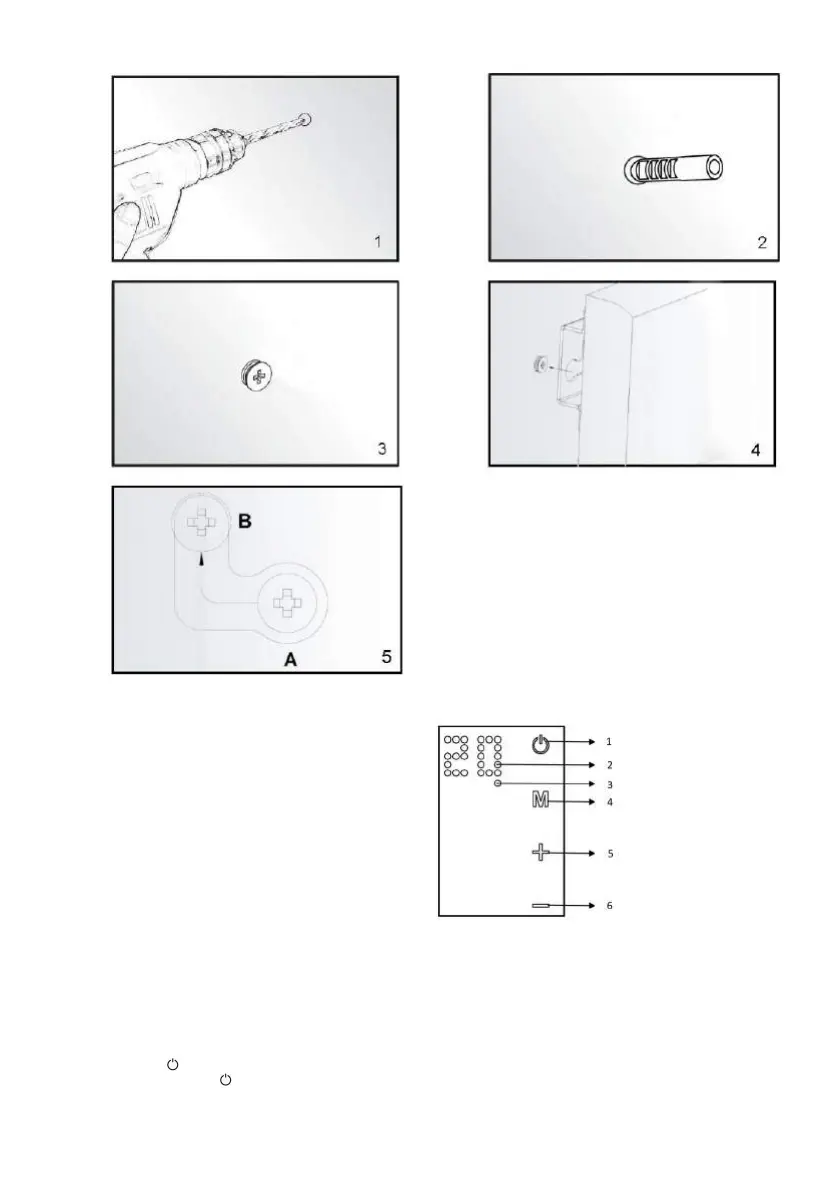
4. Lift the heater and aim the four round holes on the brackets at back of the heater to the 4 screws on the wall (picture 4), and slide the screw
from Position A to Position B by moving the heater slightly (picture 5).
5. Make sure the distance between the bottom of the heater and the floor is no less than 20cm when the heater is installed.
CONTROL SYSTEM DESCRIPTION
Control Panel:
1. Power on/off switch
2. Display
3. Week timer start indicator light
4. Timer button
5. Temp./Timer UP key
6. Temp./Timer DOWN key
OPERATING INSTRUCTIONS
The heating panel can be controlled either from the device, via the touch panel located in the upper left corner of the device, or via the remote
control.
Use and Working:
1. Check the heater to be sure it is not damaged
2. Insert the plug in the socket
3. Press the button: the heater will start working. The display will show the room temperature.
4. After use, press the button first in order to switch the device off. Finally remove the plug from the socket.
Thermostat:
1. When you press the + or - button on the heating panel, the temperature setting on the display will flash 10 times.
2. You can adjust the temperature setting by pressing the + or -key while it is flashing. With each key press, the temperature will be
increased (+) or decreased (-) by one degree.
 Loading...