EasyManua.ls Logo

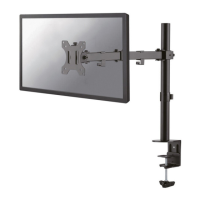
NeoMounts SELECT NM-D775BLACKPLUS User Manual

NeoMounts SELECT NM-D775BLACKPLUS
8 pages
To Next Page IconTo Next Page
Page #1 background imageLoading...
Page #1 background image
NM-D775BLACKPLUS
IT
EN
NL
DE
FR
ES
PT
DK
Monitor desk mount
Monitor bureausteun
Monitor Tischhalterung
Support moniteur de bureau
Supporto da scrivania per monitor
Soporte de escritorio para monitor
Suporte de mesa para monitor
Bordbeslag skærm
NO
SE
FI
PL
CS
SK
RO
Bordstativ til skjerm
Skrivbordsfäste för bildskärm
Näytön pöytäteline
Uchwyt nabiurkowy do monitora
Stolní držák monitoru
Držiak na monitor
Suport de birou pentru monitor
WWW.NEOMOUNTS.COM
INSTRUCTION MANUAL
±90°
±180°
min270mm-max600mm
75mm
100mm
115mm
-45°
+45°
75mm
100mm
115mm
206mm
70mm
min255mm-max320mm
±90°
min10mm-max45mm
±90°
±180°
min10mm-max45mm
Question and Answer IconNeed help?

Do you have a question about the NeoMounts SELECT NM-D775BLACKPLUS and is the answer not in the manual?

NeoMounts SELECT NM-D775BLACKPLUS Specifications

General IconGeneral
Product TypeDesk Mount
Number of screens supported1
Rotation360°
ColorBlack
Cable ManagementYes
Max Screen Size49 inches
VESA Compatibility75x75, 100x100 mm
MaterialSteel
Mounting TypeClamp/Grommet

Summary

Installation Steps

Step 1: Clamp Installation

Install the clamp to the desk for desktop thickness between 10-45 mm.

Step 1: Grommet Installation

Install the grommet through the desk for desktop thickness between 10-45 mm.

Step 2: Attach Lower Arm to Base

Attach the lower arm to the base of the monitor mount.

Step 3: Attach Upper Arm

Attach the upper arm to the lower arm of the monitor mount.

Step 4: Attach VESA Plates to Screen

Attach the VESA plates to the screens using appropriate screws.

Step 5: Install Monitor onto Mount

Install the monitor onto the VESA plates of the arm.

Step 6: Adjust Gas Spring Tension

Adjust the gas spring tension for smooth screen movement.

Step 7: Remove Cable Cover

Remove the cable cover to manage wires.

Step 8: Route Cables Through Cover

Route cables through the designated cable management cover.

Step 9: Balance Screen Position

Keep the screen in a balanced position for stability.

Step 10: Final Mount Adjustment

Adjust the mount to the desired position and tighten screws.

Important Safety Precautions

Related product manuals