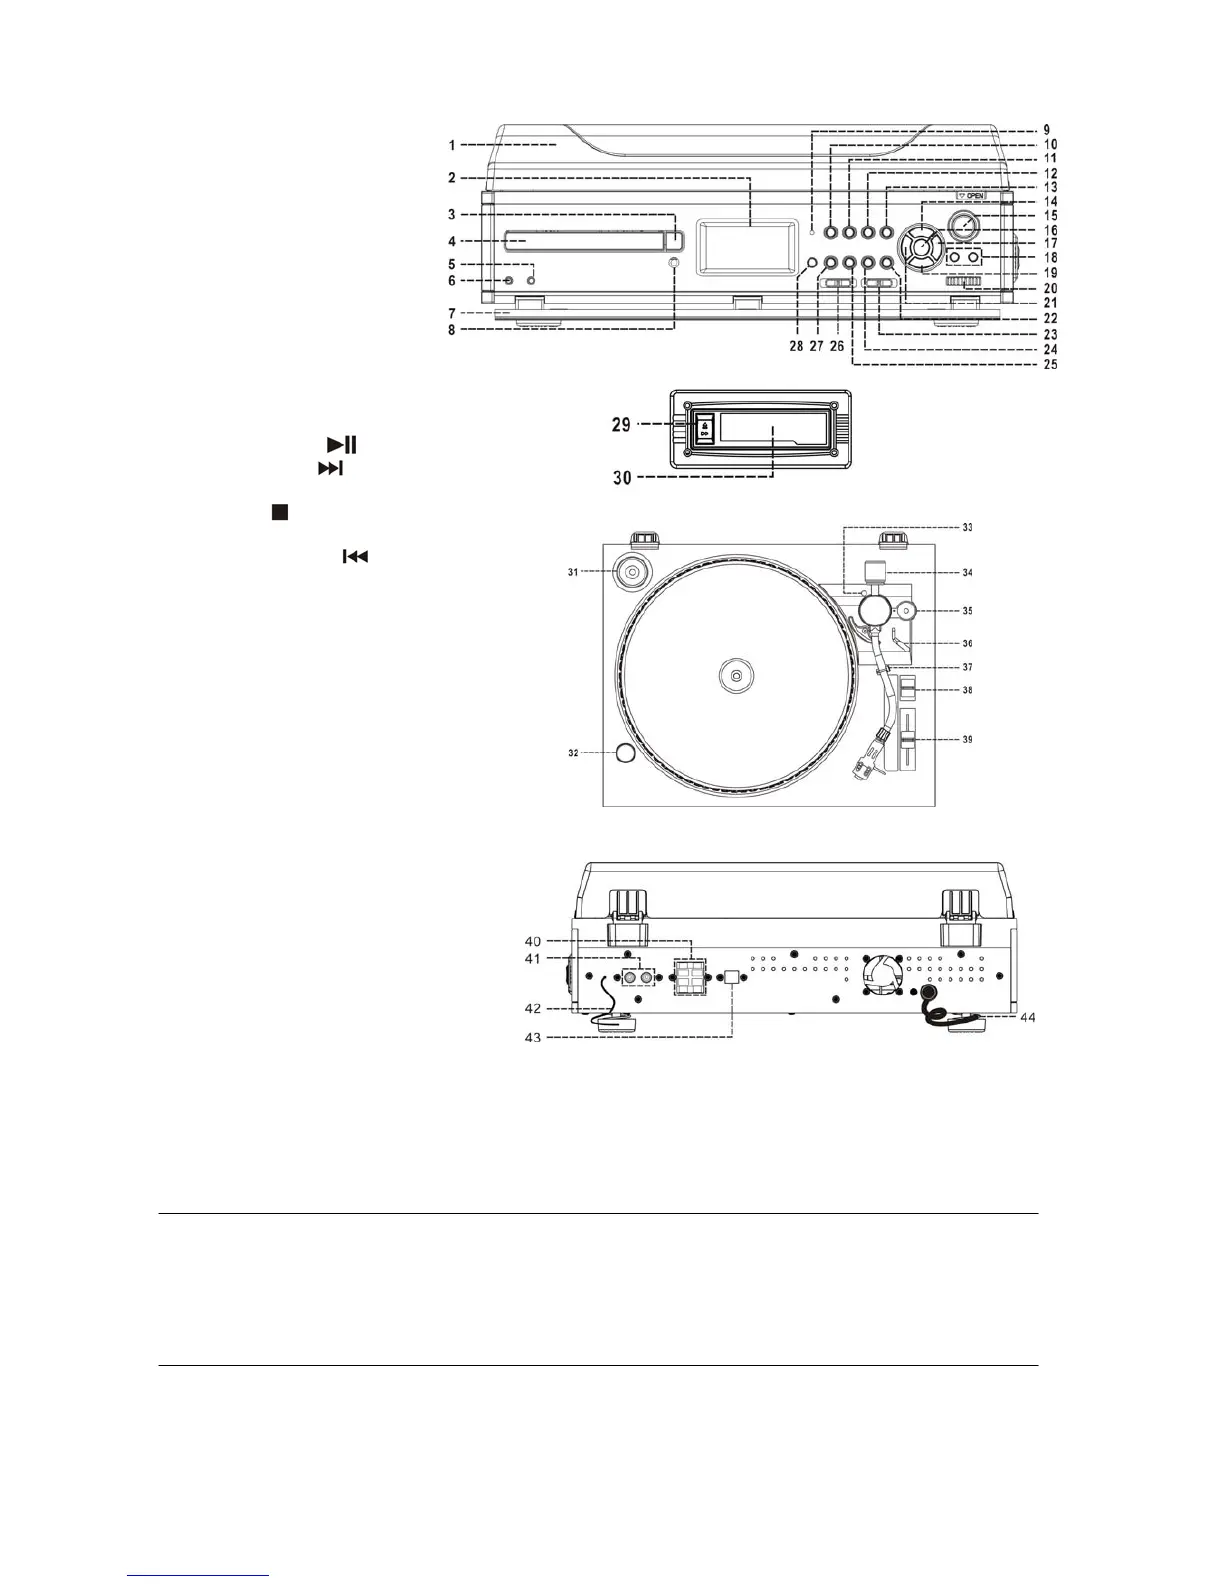
Location of controls
1) Turntable cover
2) LCD display
3) CD tray open button
4) CD tray
5) Aux in jack
6) Earphone jack
7) Panel cover
8) Remote sensor
9) Power LED indicator
10)
Power button
11) Finalize button
12) Erase button
13) Track separation button
14) Record button
15) Eject button
16) CD play/pause
button
17) Skip/search up
button
18) Vol +/- button
19) CD stop
button
20) Tuning knob
21) Skip/search down
button
22) Tape button
23) Band switch
24) Aux button
25) Phono button
26) Function switch
27) CD button
28) Extra bass button
29) Cassette forward/eject knob
30) Cassette slot
31) Spindle adaptor
32) Strobe illuminator
33) Alignment screw with rubber cover
34) Counter weight
35) Anti skating
36) Cueing lever
37) Tone-arm lock
38) Turntable speed selector
39) Pitch adjustment
40) Speaker terminal
41) Line out jack
42) FM antenna
43) USB port for computer connection
44) AC line cord
Caution:
Usage of controls or adjustments or performance of procedures other than those specified herein may result in hazardous
radiation exposure.
This unit should not be adjusted or repaired by anyone except qualified service personnel.
Precautions for use
Installation
Unpack all parts and remove protective material.
Do not connect the unit to the mains before checking the mains voltage and before all other connections have been
made.
Do not cover any vents and make sure that there is a space of several centimeters around the unit for ventilation.
Installation of counter weight
1. Slide in the counter weight completely into the rear of the tone arm until it reaches the end Then turn it clockwise until it
clicks with pin inside.
2. Twist the counter weight clockwise & backward until it reaches the white line as in figure 2.
3. Twist the counter marking until it reaches position “ 1 “.
4. Twist the counter weight anti-clockwise & inwards until it reaches the appropriate working pressure.
E-1
 Loading...