7
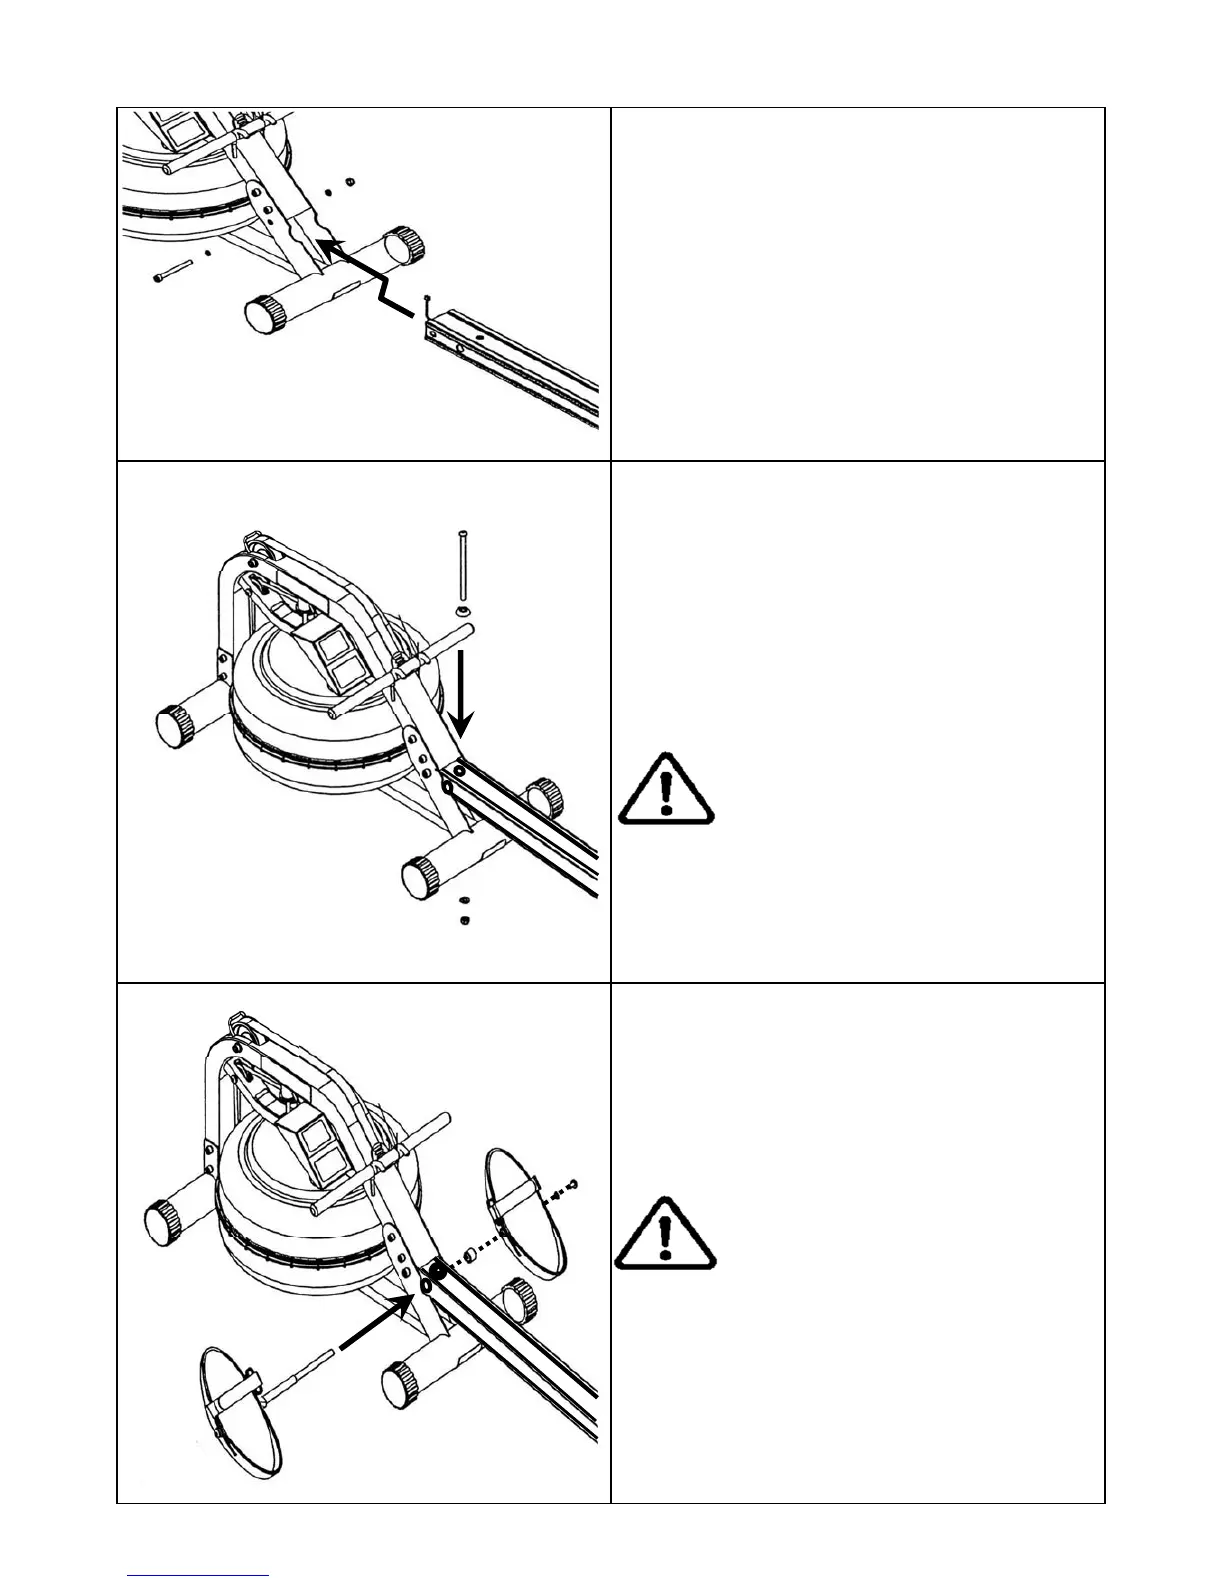
Note: Do not tighten the Vertical
Frame Tensioning Bolt. See the
“Fine Tuning Your Rower” page for
details once assembly is complete
Tip: When mounting the Footplate as-
sembly onto the rower, it is only neces-
sary to remove one side, and leave the
other intact as shown here.
Note: 2 Allen keys of the same size
are provided for this portion of the as-
sembly.
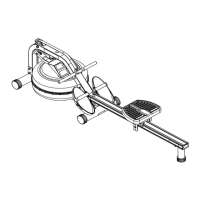
Sensor Lead
Install the Seat Rail onto the Mainframe.
Attach Sensor Lead from Seat Rail to the
Mainframe, then align the front Seat Rail
holes with Mainframe and install, using
1x M10x95mm Bolt[8], 2x 11x21x2T
Washers[9] and 1xM10 Nylock Nut[6].
Install the M10x180mm[4] Vertical Frame
Tensioning Bolt with the Plastic Dome
Cap[5] through the top of the Seat
Rail and secure from underneath with
M10 Washer[7] and Nylock Nut[6].
Install the Footplate[10] onto the Rower.
Footplate assembly left side. For ease
of assembly, leave the left side of the
Footplate and Seat Rail Spacer in place
as shown.
 Loading...