Step 3: Replace the NVDIMM battery
To replace the NVDIMM battery, you must remove the failed battery from the controller module and install the
replacement battery into the controller module. See the FRU map inside the controller module to locate the
NVDIMM battery.
The NVDIMM LED blinks while destaging contents when you halt the system. After the destage is complete,
the LED turns off.
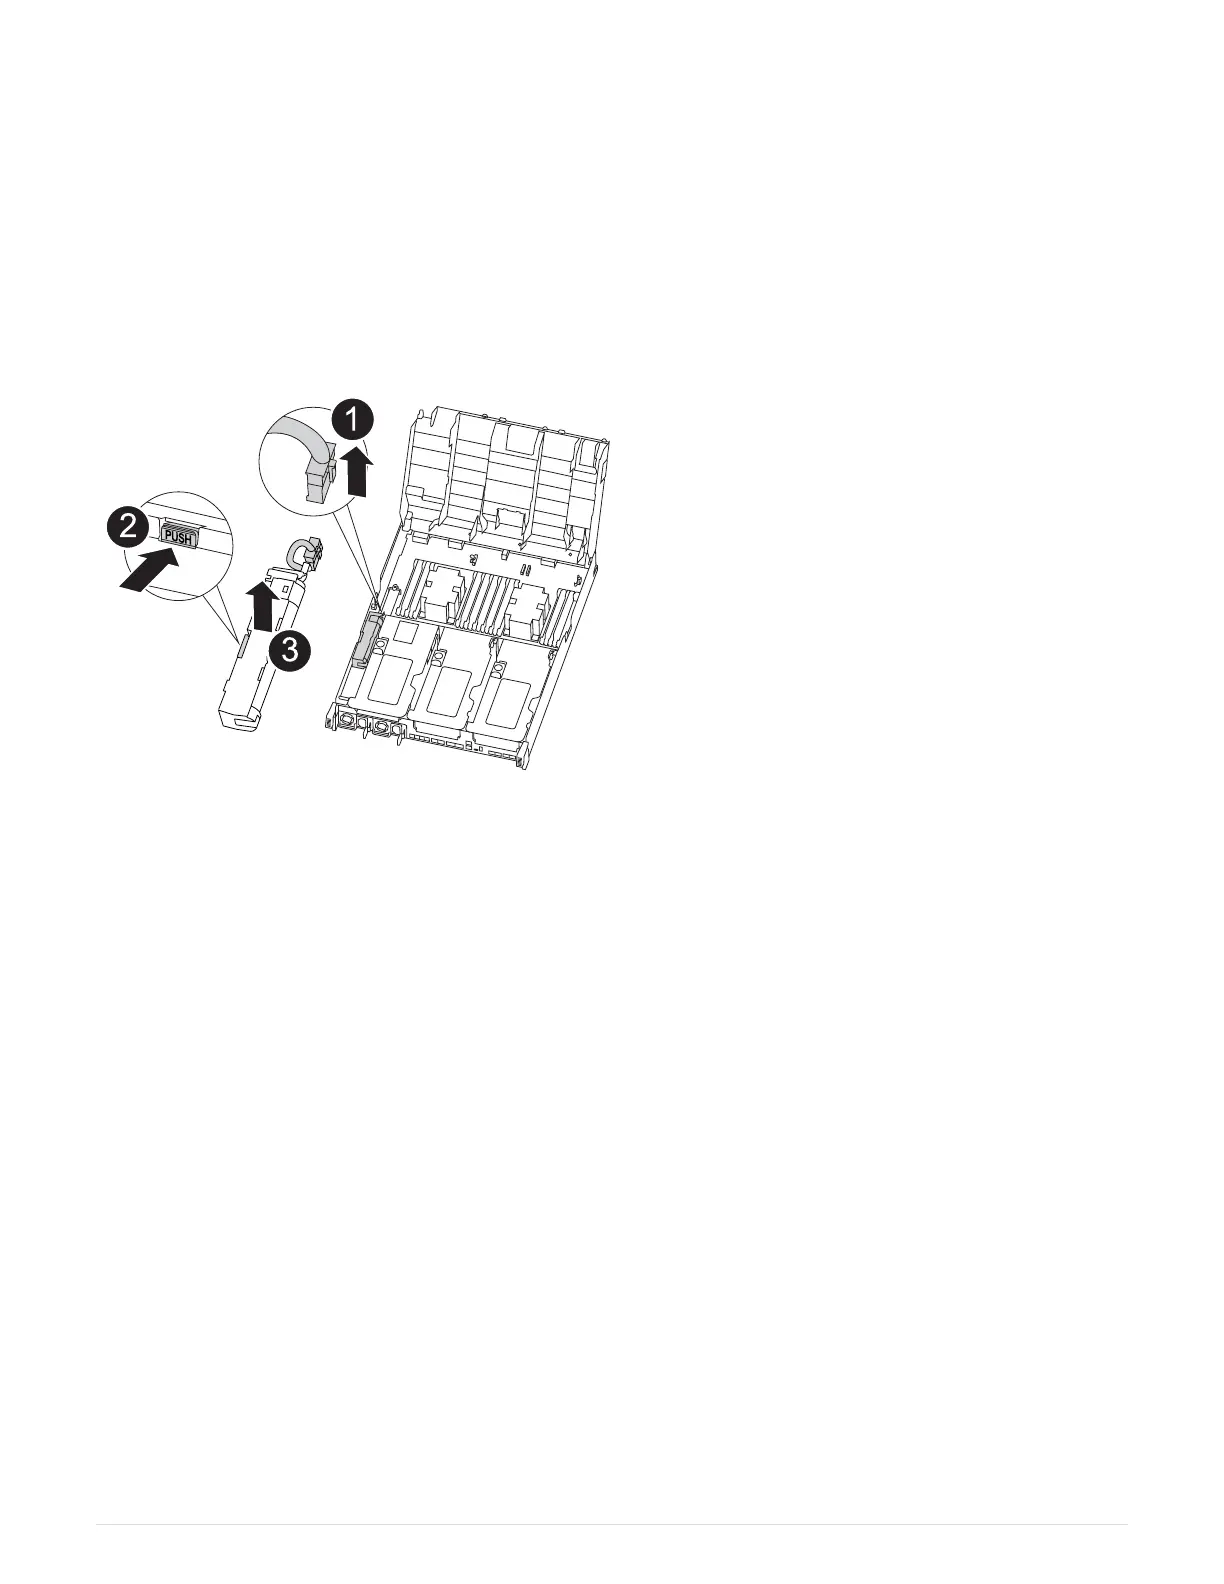
You can use the following animation, illustration, or the written steps to replace the NVDIMM battery.
Animation - Replace the NVDIMM battery
1. Open the air duct:
a. Press the locking tabs on the sides of the air duct in toward the middle of the controller module.
b. Slide the air duct toward the back of the controller module, and then rotate it upward to its completely
open position.
2. Locate the NVDIMM battery in the controller module.
3. Locate the battery plug and squeeze the clip on the face of the battery plug to release the plug from the
socket, and then unplug the battery cable from the socket.
4. Grasp the battery and press the blue locking tab marked PUSH, and then lift the battery out of the holder
and controller module.
5. Remove the replacement battery from its package.
6. Align the battery module with the opening for the battery, and then gently push the battery into slot until it
locks into place.
7. Plug the battery plug back into the controller module, and then close the air duct.
Step 4: Install the controller module
After you have replaced the component in the controller module, you must reinstall the controller module into
the chassis, and then boot it to Maintenance mode.
You can use the following animation, illustration, or the written steps to install the controller module in the
chassis.
Animation - Install the controller module
399



 To Next Page