Step 5: Complete system setup and configuration
You can complete the system setup and configuration using cluster discovery with only a
connection to the switch and laptop, or by connecting directly to a controller in the system
and then connecting to the management switch.
Option 1: Complete system setup if network discovery is enabled
If you have network discovery enabled on your laptop, you can complete system setup
and configuration using automatic cluster discovery.
Steps
1. Use the following animation to set one or more drive shelf IDs
Setting drive shelf IDs
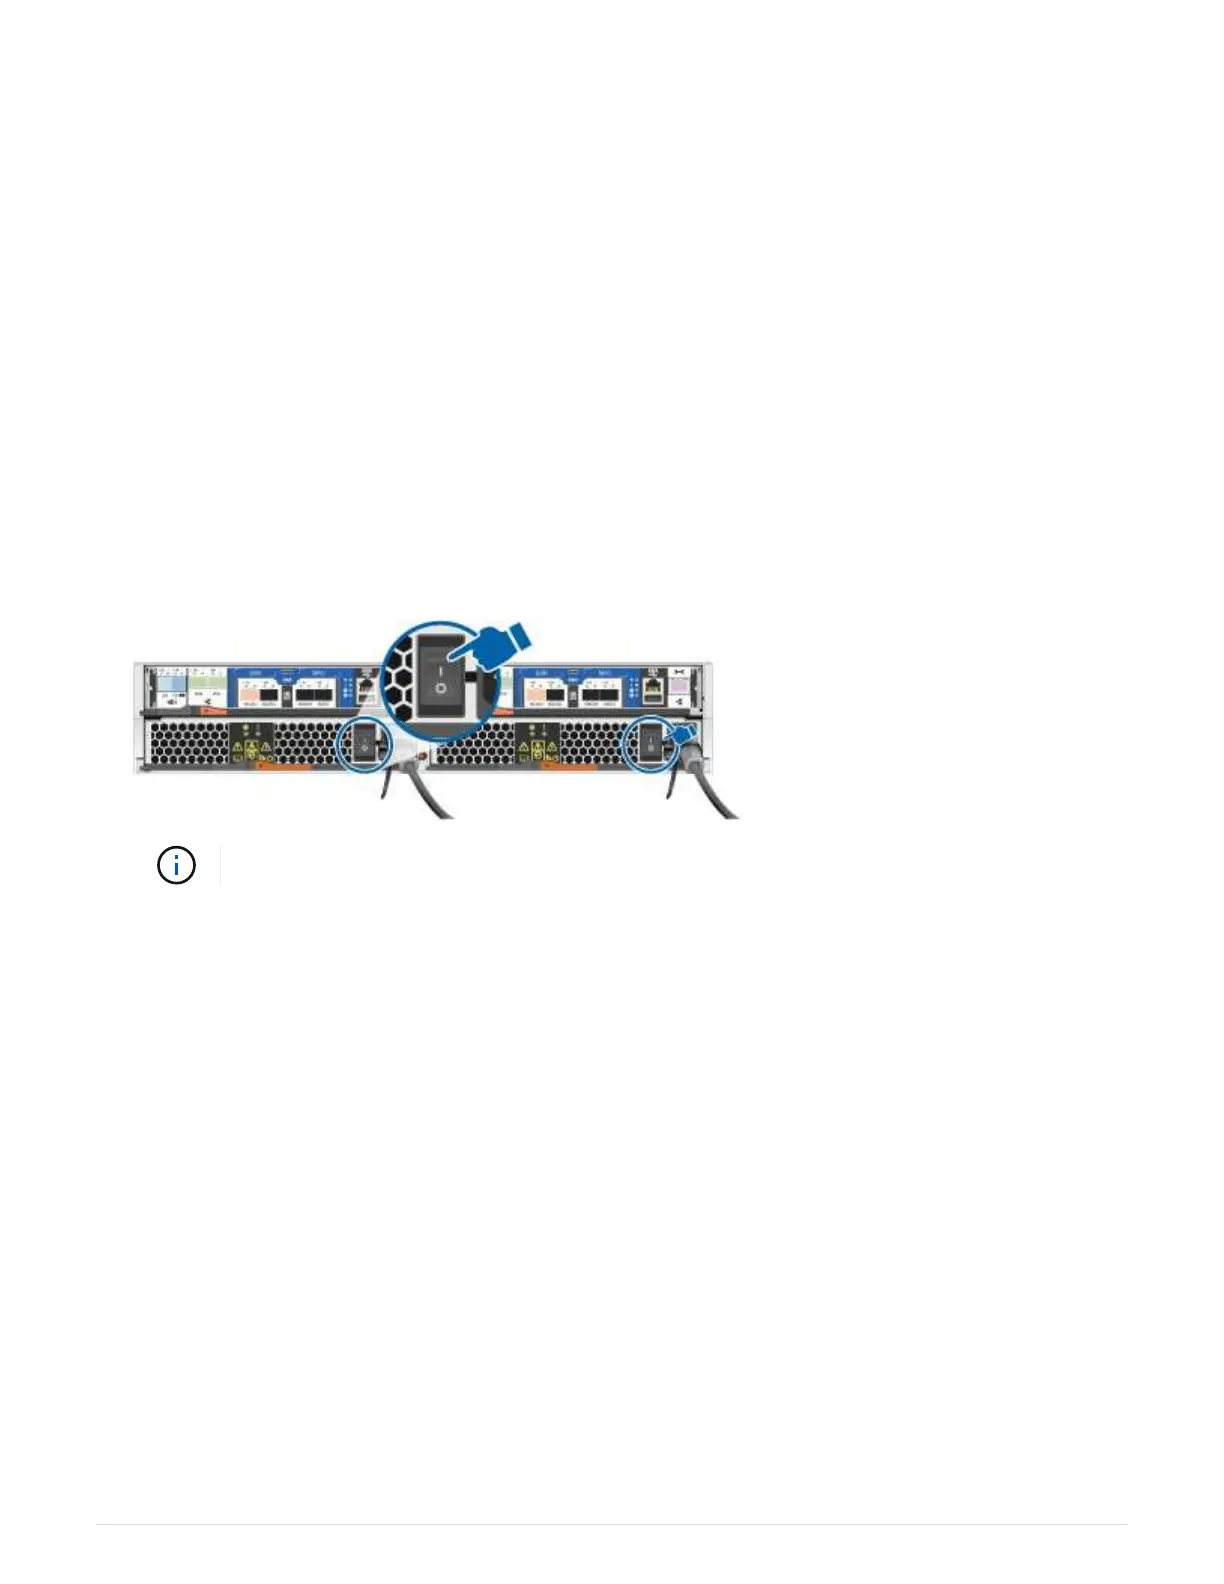
2. Plug the power cords into the controller power supplies, and then connect them to power sources on
different circuits.
3. Turn on the power switches to both nodes.
Initial booting may take up to eight minutes.
4. Make sure that your laptop has network discovery enabled.
See your laptop’s online help for more information.
5. Use the following animation to connect your laptop to the Management switch.
Connecting your laptop to the Management switch
6. Select an ONTAP icon listed to discover:
15