Complete system setup and configuration | Stage 4
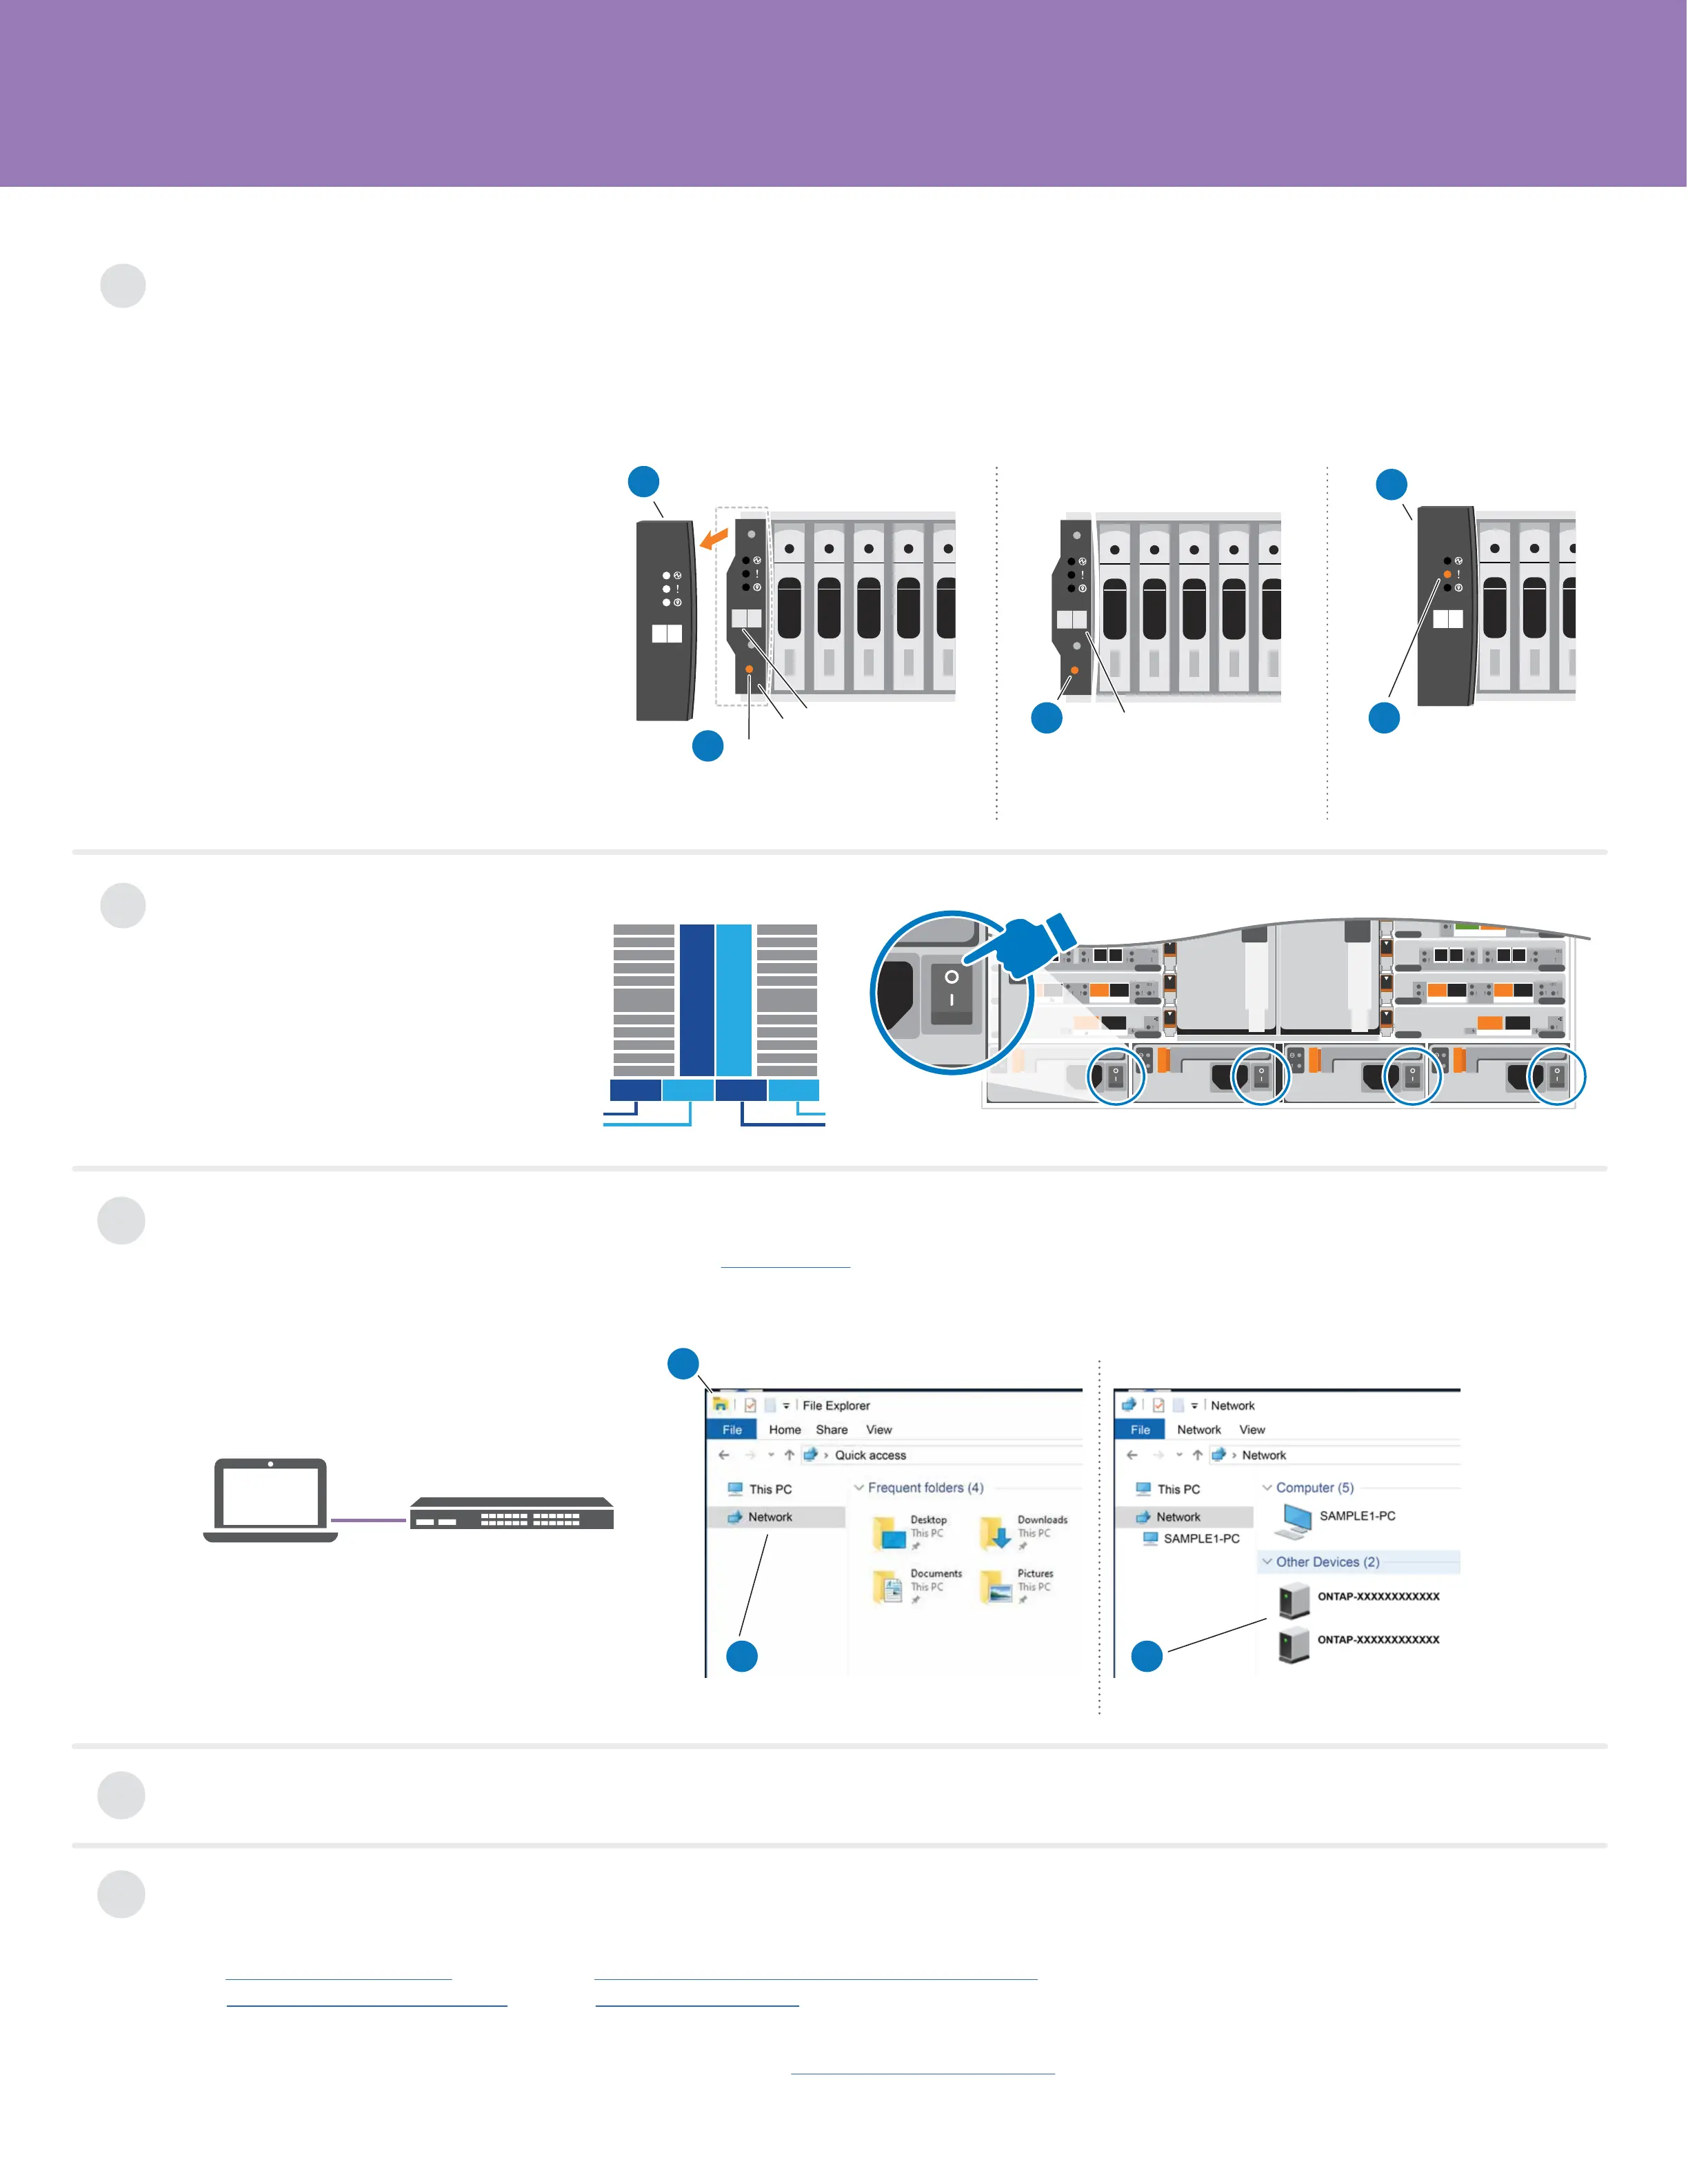
3
Complete initial cluster setup with network discovery:
Note: If your laptop does not support network discovery, see the Detailed guide.
Connect your laptop to the management switch and access the network computers and devices.
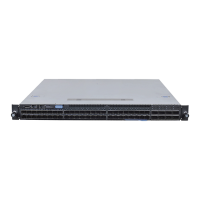
Power on the shelves and set shelf IDs:
Note: For NS224 drive shelves, shelf IDs are pre-set to 00 and 01. If you want to change the shelf IDs, use the straightened end of a paperclip,
or narrow tipped ball point pen to access the shelf ID button behind the faceplate.
1. Plug the power cords into the shelf power supplies, and then connect them to power sources on different circuits.
Note: NS224 shelves have no power switch and will begin to boot. For all other shelf models, turn on the power switch to boot the shelves.
2. If you need to change the
shelf IDs, continue with substeps
a through e; otherwise, skip to
“Power on the controllers” below.
Repeat these steps for any
remaining drive shelves.
1
a
Open File Explorer
c
Double-click either ONTAP icon.
Note: Accept any certificates displayed on your screen.
b
Click network in the left pane.
Then right click and select refresh.
Laptop
Management Switch
5
Completing setup:
1. Click...
a) mysupport.netapp.com c) Download and install Active IQ Config Advisor
b) Create/log in to your account d) Register your system
2. Verify the health of your system by running Config Advisor.
3. After you have completed the initial configuration, go to the NetApp ONTAP Resources
page for information about configuring additional features in ONTAP.
4
Use System Manager Guided Setup to configure your cluster.
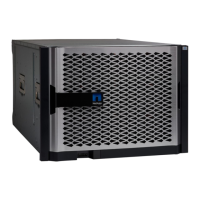
2
Turn on the power
switches to all nodes:
PSU 1 and PSU 3 provide
power to all side A FRUs,
PSU 2 and PSU 4 provide
power to all side B FRUs.
Remove end cap
Shelf ID number
0 0
a
Shelf ID number
0 9
c
Press and hold shelf ID button until 2nd
digit blinks, then push to advance to 0-9.
Note: The first digit stops blinking, and
the second digit continues to blink.
Wait 10 seconds for the
Amber LED (!) to appear,
then power-cycle the drive
shelf to set shelf ID.
e
0 9
Replace end cap
d
Shelf ID button
Faceplate
Press and hold shelf ID button until 1st digit
blinks, then push to advance to 0-9.
Note: The first digit continues to blink.
b
A
PSU 1 PSU 2 PSU 3 PSU 4
B
2nd
power
source
1st
power
source
B5
B6
B4
B3
B2
B1
B10
B9
B8
B7
B11
A5
A6
A4
A3
A2
A1
A10
A9
A8
A7
A11
a b c d
a b c d
6-2
6-1
a b c d
a b c d
a b
a b
a b c d
a b c d
6-2
6-1
a b c d
a b c d
a b
a b
a b
a b
a b
a b
a b
a b
PSU 1 PSU 2 PSU 3 PSU 4
 Loading...