As you insert the connector, you should feel it click into place; if you do not feel it click, remove
it, turn it around and try again.
Steps
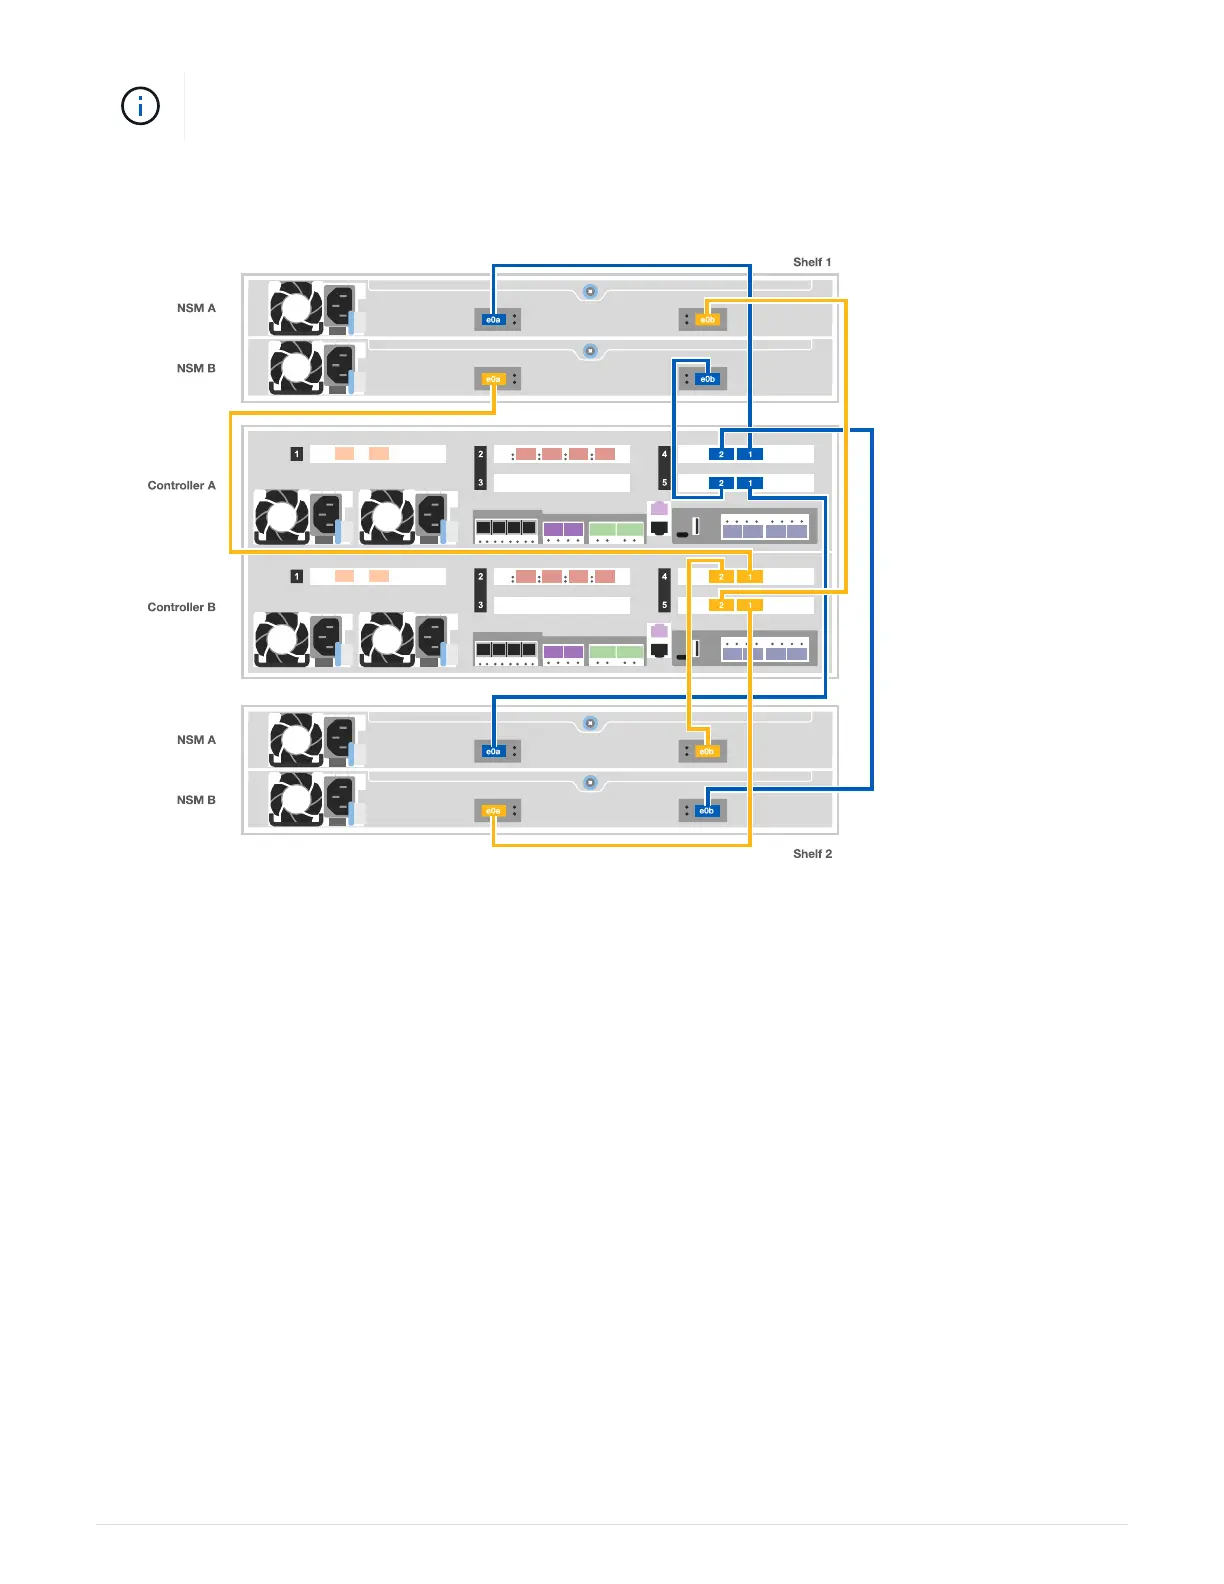
1. Use the following illustration to cable your controllers to two drive shelves.
2. Go to Step 5: Complete system setup and configuration to complete system setup and configuration.
Step 5: Complete system setup and configuration
You can complete the system setup and configuration using cluster discovery with only a connection to the
switch and laptop, or by connecting directly to a controller in the system and then connecting to the
management switch.
Option 1: Completing system setup and configuration if network discovery is enabled
If you have network discovery enabled on your laptop, you can complete system setup and configuration using
automatic cluster discovery.
1. Use the following animation to power on and set shelf IDs for one or more drive shelves:
For NS224 drive shelves, shelf IDs are pre-set to 00 and 01. If you want to change the shelf IDs, use the
straightened end of a paperclip, or narrow tipped ball point pen to access the shelf ID button behind the
faceplate.
Animation - Set drive shelf IDs
2. Plug the power cords into the controller power supplies, and then connect them to power sources on
different circuits.
8