Valve installation
Valve installation
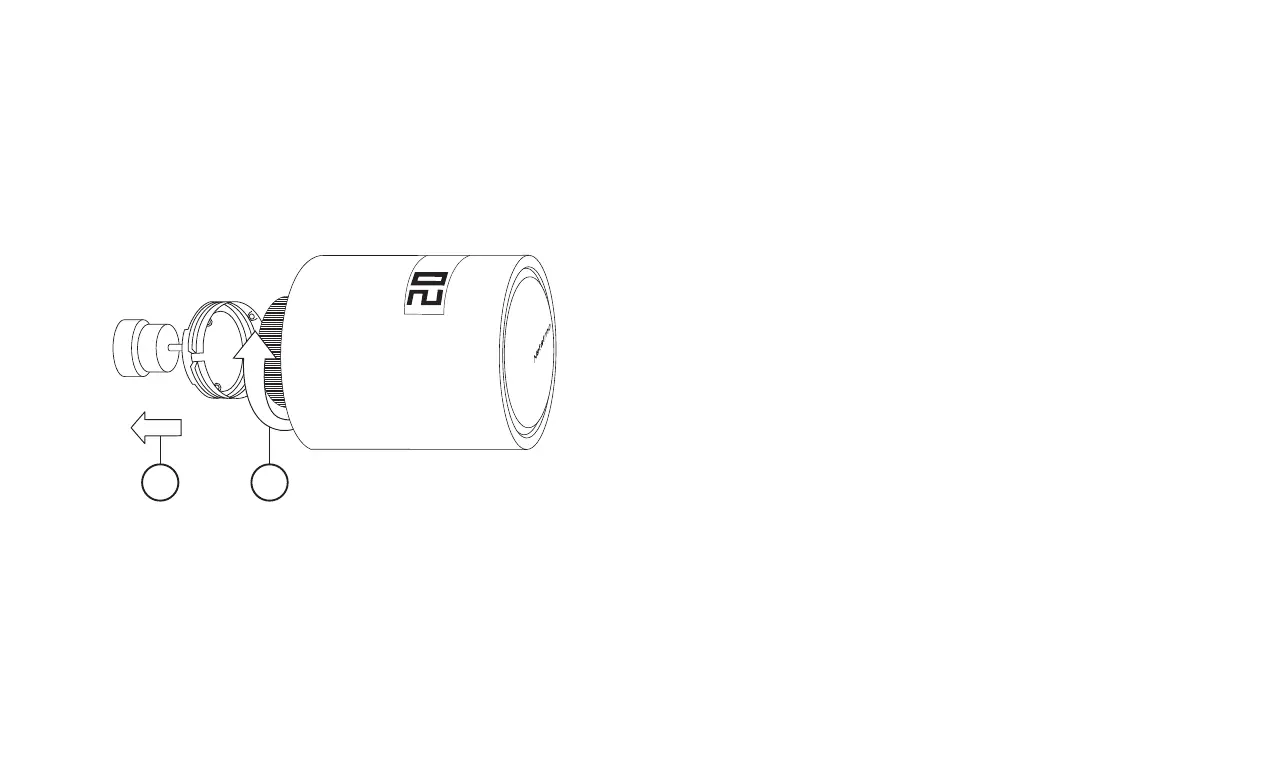
Fit the suitable adaptor (1) onto the valve body. Then, screw the Netatmo
Valve onto the adaptor (2) while turning it to ensure the display faces
the right direction. Do not use a wrench.
EN
Installation de la Tête
Vissez l’adaptateur (1) qui convient sur le robinet du radiateur.
Puis vissez la Tête Netatmo sur l’adaptateur (2) en orientant l’écran dans le sens
qui convient. Ne pas utiliser de pince.
FR
DE
ES
IT
PT
Installation des Heizkörperthermostats
Schrauben Sie den Adapter (1) auf den Anschluss des Heizkörpers.
Schrauben Sie dann den Netatmo-Heizkörperthermostat auf den Adapter (2)
und drehen Sie ihn, bis das Display in die richtige Richtung zeigt.
verwenden Sie keine Zange.
Instalación de la Válvula
Coloca el adaptador adecuado (1) en el cuerpo de la válvula.
Enrosca la Válvula Netatmo en el adaptador (2) mientras la giras para
asegurarte de que la pantalla mire en la dirección correcta. No utilizar alicate.
Installazione Valvola
Posizionare l’adattatore adeguato (1) sul corpo della valvola. Poi, avvitare
la Valvola Netatmo all’adattatore (2) ruotandolo per assicurarsi che il display
sia posizionato nella giusta direzione. Non utilizzare pinze.
Instalação da Cabeça
Encaixe o adaptador adequado (1) no corpo da válvula. Em seguida,
aparafuse a Cabeça Netatmo no adaptador (2) rodando-a de modo
a que o ecrã fique virado para o lado certo. Não usar alicate.
2
1