Product ManualXG-7100
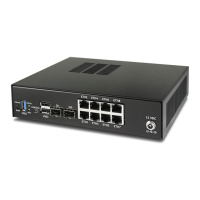
Now ETH1-4 act as a switch for the VLAN 4081 LAN and ETH5-8 act as a switch for the VLAN 4091 LAN.
2.5.3 Trunking VLAN tagged traffic
For expanding on the previous example, let’s assume there is a management VLAN of 4000 where devices are already
tagged on this VLAN prior to hitting pfSense. Devices on this VLAN may come through on ETH8 but there may also
be untagged client traffic.
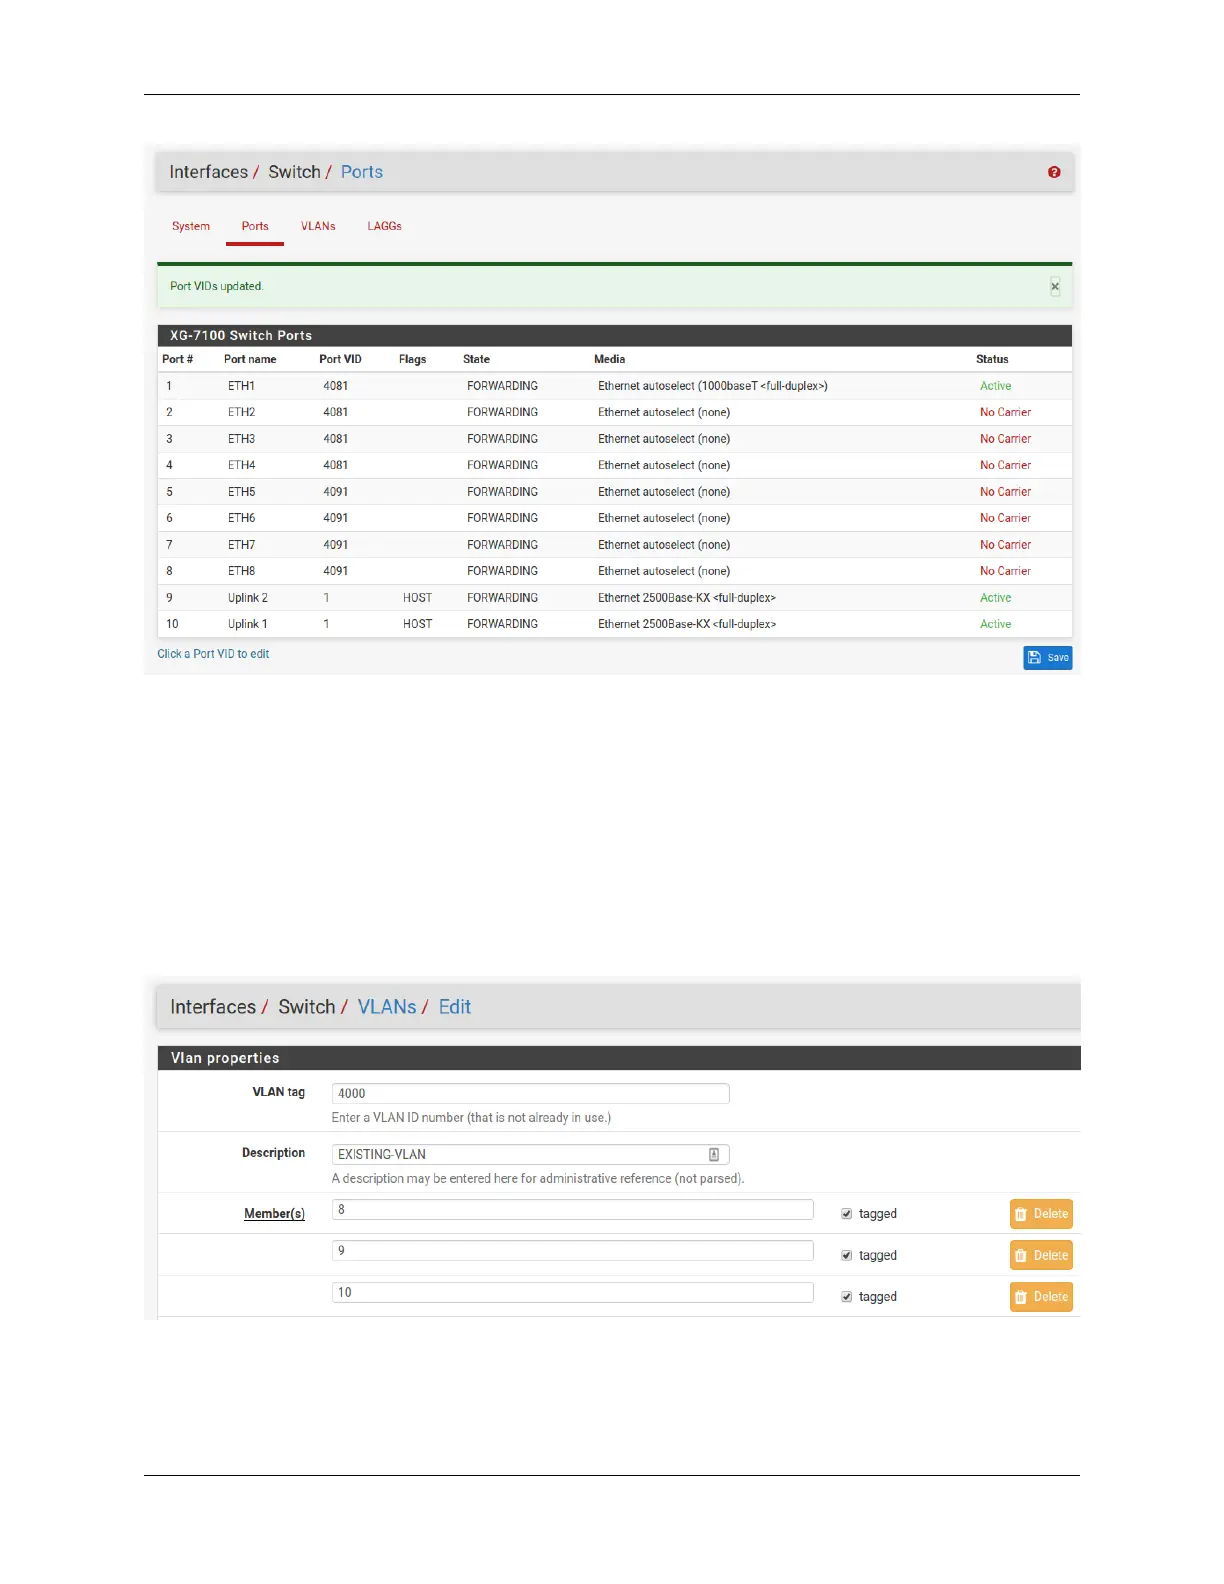
First, create the management VLAN of 4000 in pfSense using the same steps in the previous example (up to the
switch configuration part). Next, add the VLAN to the switch under Interfaces -> Switches -> VLANs. ETH8 and
PORT9-10 should be added as members and all three will be marked as tagged:
Once it’s added, the final result should look like this:
2.5. Switch Configuration Examples 22
 Loading...