29
EN
5.3. Drainage and storage
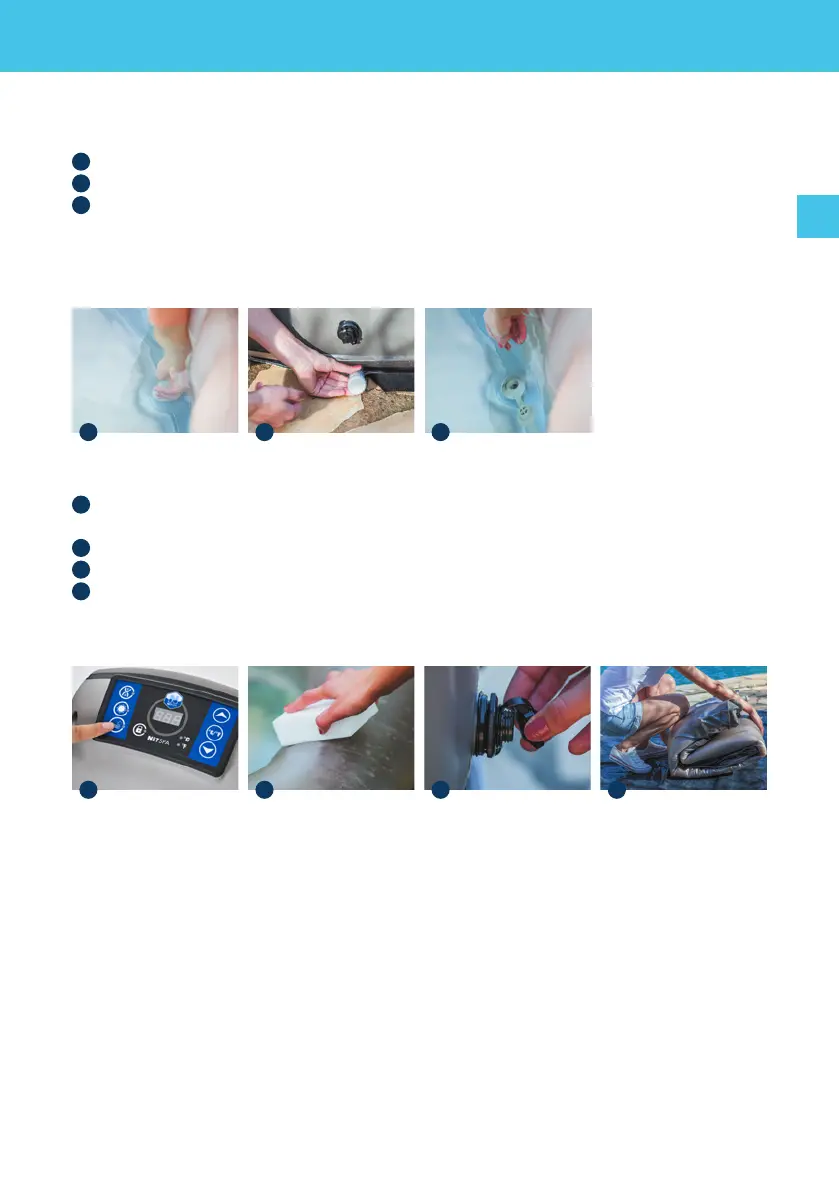
Drainage
1
Check the stopper on the bottom of the pool and the drain cap.
2
Unscrew the drain cap.
3
Remove the stopper on the bottom of the pool. Completely drain all water from the
spa pool.
Once empty, the pool can be cleaned with soap and water.
Storage
5
Press the bubbling button to blow out the water inside the jet holes. Unplug the
pump, remove the lter cartridge from the inner wall of the pool.
6
Use a towel to wipe o the pool, dry 24 hours.
7
Unscrew the valves to deate the pool.
8
Fold the pool.
It is recommended that store the SPA in its original package in a warm dry place.
5.4. Repair kit
Little holes or puncture can be repaired with the repair kit included and glue reserved to
pool liner.
1. Find the leak.
2. Thoroughly clean the area surrounding the leak.
3. Cut a piece of repair material in round shape, which should be larger than the dam-
aged area.
4. Apply adhesive to the underneath side of the patch and around the area to be re-
paired.
5. Put the patch on the damaged area and press down rmly. Allow 12 hours for repair
to dry. After patch has dried, apply glue around the edges for a complete seal (dry 4
hours).
1
5
2
6
3
7 8


 To Next Page