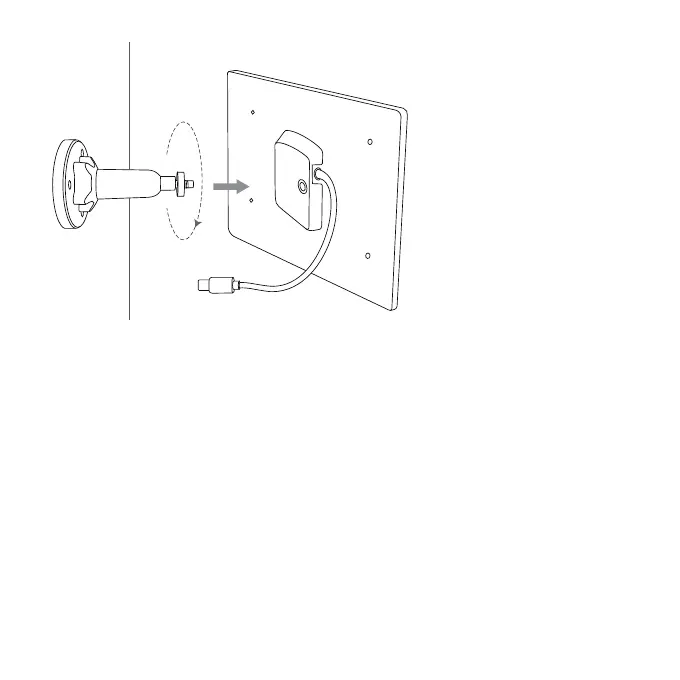
Step 3: Align the bracket screw with the screw hole on the back of the Solar Lite, and
then turn it clockwise to tighten it.
Schritt 3: Richten Sie die Halterungsschraube mit dem Schraubenloch auf der
Rückseite des Solar Lite aus und drehen Sie sie dann im Uhrzeigersinn, um sie
festzuziehen.
Étape 3: Alignez la vis du support avec le trou de vis à l'arrière du Solar Lite, puis
tournez-la dans le sens des aiguilles d'une montre pour la serrer.
Etapa 3: Alinee el tornillo del soporte con el orificio del tornillo en la parte posterior
del Solar Lite y luego gírelo en el sentido de las agujas del reloj para apretarlo.
Passo 3: Allineare la vite della staffa con il foro della vite sul retro del Solar Lite, quindi
ruotarla in senso orario per serrarla.
24