EasyManua.ls Logo

New Braunfels 11201699 User Manual

New Braunfels 11201699
16 pages
To Next Page IconTo Next Page
Page #1 background imageLoading...
Page #1 background image
Product Guide
Model 11201699
Tools needed for assembly:
Pliers
Adjustable wrenches
FOR OUTDOOR USE ONLY
CAUTION:
Read and follow all safety statements, assembly
instructions, and use and care directions before attempting
to assemble and cook.
INSTALLER/ASSEMBLER:
Leave this manual with consumer.
CONSUMER:
Keep this manual for future reference.
WARNING:
Failure to follow all manufacturer’s instructions could
result in serious personal injury and/or property
damage.
CAUTION:
Some parts may contain sharp edges – especially as
noted in the manual! Wear protective gloves if
necessary.
WARNING:
CARBON MONOXIDE HAZARD
Burning charcoal indoors can kill you. It gives off carbon
monoxide, which has no odor. NEVER burn charcoal inside
homes, vehicles, or tents.
CAUTION:
THIS UNIT IS HEAVY! DO NOT attempt to
assemble without a helper.
Serial Number
Date Purchased
IMPORTANT: Fill out the product record information below.
Hondo Classic
Estimated Assembly Time: 1 Hour
The following are trademarks registered by W.C. Bradley Co. in the U.S. Patent and Trademark Office: Caldera®; Charcoal2Go®; Char-Broil®; American
Gourmet®; Bandera®; Brush Hawg®; CB 940®; Char-Diamonds®; Char-Broil Charcoal/Gas®; Everybody Grills®; Grill 2 Go®; Grill 2 Go® Express®; Grill
Lovers®; Infrared Grilling That’s All About U®; Keepers of the Flame®; Magneto®; New Braunfels Smoker Company®; Patio Bistro®; Patio Caddie®; Patio
Kitchen®; Pro-Sear®; RED®; Quantum®; Santa Fe®; Sear and Grill®; Sierra®; Signature Series®; Sure2Burn®; The Big Easy®; U®; Wild West
Tradition®; and the following marks:
® ®
The following are trademarks of W.C. Bradley Co.:America's Legendary Barbeque Company™; Advantage Series™; Auto-Clean™;Chef Tested™;
Commercial Series™; Designer Series™;; Diamond Flame™; Double Chef™; Everybody Outside™; FastStart™; FlavorMaster™; Front Avenue™; Grill 2
Go® Advantage™; Grill 2 Go® Ice™; Hog and Yard Bird™; H20 Smoker™; Infrared. Grilling’s Juicy Little Secret™; Incredible Taste. Infallible Results™;
Infrared Inside™; Let’s Grill Something Together™; Longhorn™;; Precision Flame™; Quick2Burn™; QuickSet™; Ready When You Are™; Season, Set, And
Savor™; Sizzle On The Grill™; SureFire™; Torchfork™; Trentino™; Universal Grill Parts™; You Bring the Party™ TEC™ is a trademark of Tec Infrared
Grills.
TM REVISION 08
Offset Smoker
If you have questions or need assistance during assembly, please call .
To insure your satisfaction and for follow-up service, register your appliance online at www.charbroil.com/register
1-800-241-7548
42804630 - 01/10/11
Question and Answer IconNeed help?

Do you have a question about the New Braunfels 11201699 and is the answer not in the manual?

New Braunfels 11201699 Specifications

General IconGeneral
BrandNew Braunfels
Model11201699
CategorySmokers
LanguageEnglish

Summary

Preparing and Using Your Smoker

GRILLING

Learn how to use charcoal or wood for grilling. Do not build too large of a fire.

SMOKING AND SLOW COOKING

Use wood or charcoal for smoking. Control temperature with dampers and avoid exceeding 450 degrees.

Grilling with Wood Chips/Wood Chunks

Enhance smoke flavor with wood chips or chunks. Use seasoned hardwood for best results.

COOKING TIPS

Building Your Fire

Step-by-step guide on stacking and lighting charcoal briquettes or wood for initial fire.

Know When Your Fire is Ready

Tips for determining coal readiness, adjusting fire temperature, and managing flare-ups.

GRILL MAINTENANCE

HELPFUL HINTS

Tips for food cooking, ash removal, warming side dishes, preventing flare-ups, and water squirt bottle use.

LIMITED WARRANTY

DISCLAIMER OF IMPLIED WARRANTIES and LIMITATION OF REMEDIES

Details limitations on warranties, remedies, and manufacturer's liability, including consequential damages.

ASSEMBLY

Step 1: Attaching Legs to Firebox

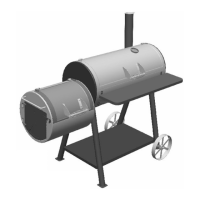
Instructions for attaching the long and short legs to the firebox using screws.

Step 2: Installing Bottom Shelf and Tightening Legs

Attaching the bottom shelf to the legs and securely tightening all leg screws.

Step 3: Attaching Wheels to Axle

Mounting wheels onto the axle and securing it to the short legs with a cotter pin.

Step 4: Attaching Firebox to Smoke Chamber

Aligning and securing the firebox to the smoke chamber using screws and nuts.

Step 5: Installing Smoke Stack Assembly

Inserting and securing the smoke stack assembly through the smoke chamber opening.

Step 6: Attaching Handle Assembly

Securing the handle assembly to the grill lid and firebox lid with screws and nuts.

Step 7: Attaching Front Shelf

Mounting the front shelf to the smoke chamber using screws and nuts.

Step 8: Installing Grease Cup Clip

Hanging the grease cup clip on the smoke chamber for collecting drippings.

Step 9: Placing Grates in Smoke Chamber

Inserting wire fire grates and cast iron cooking grates into the smoke chamber.

Step 10: Placing Grates in Firebox

Placing a wire fire grate and cast iron cooking grates into the firebox.