A Name You Can Trust
5
ASSEMBLY INSTRUCTIONS
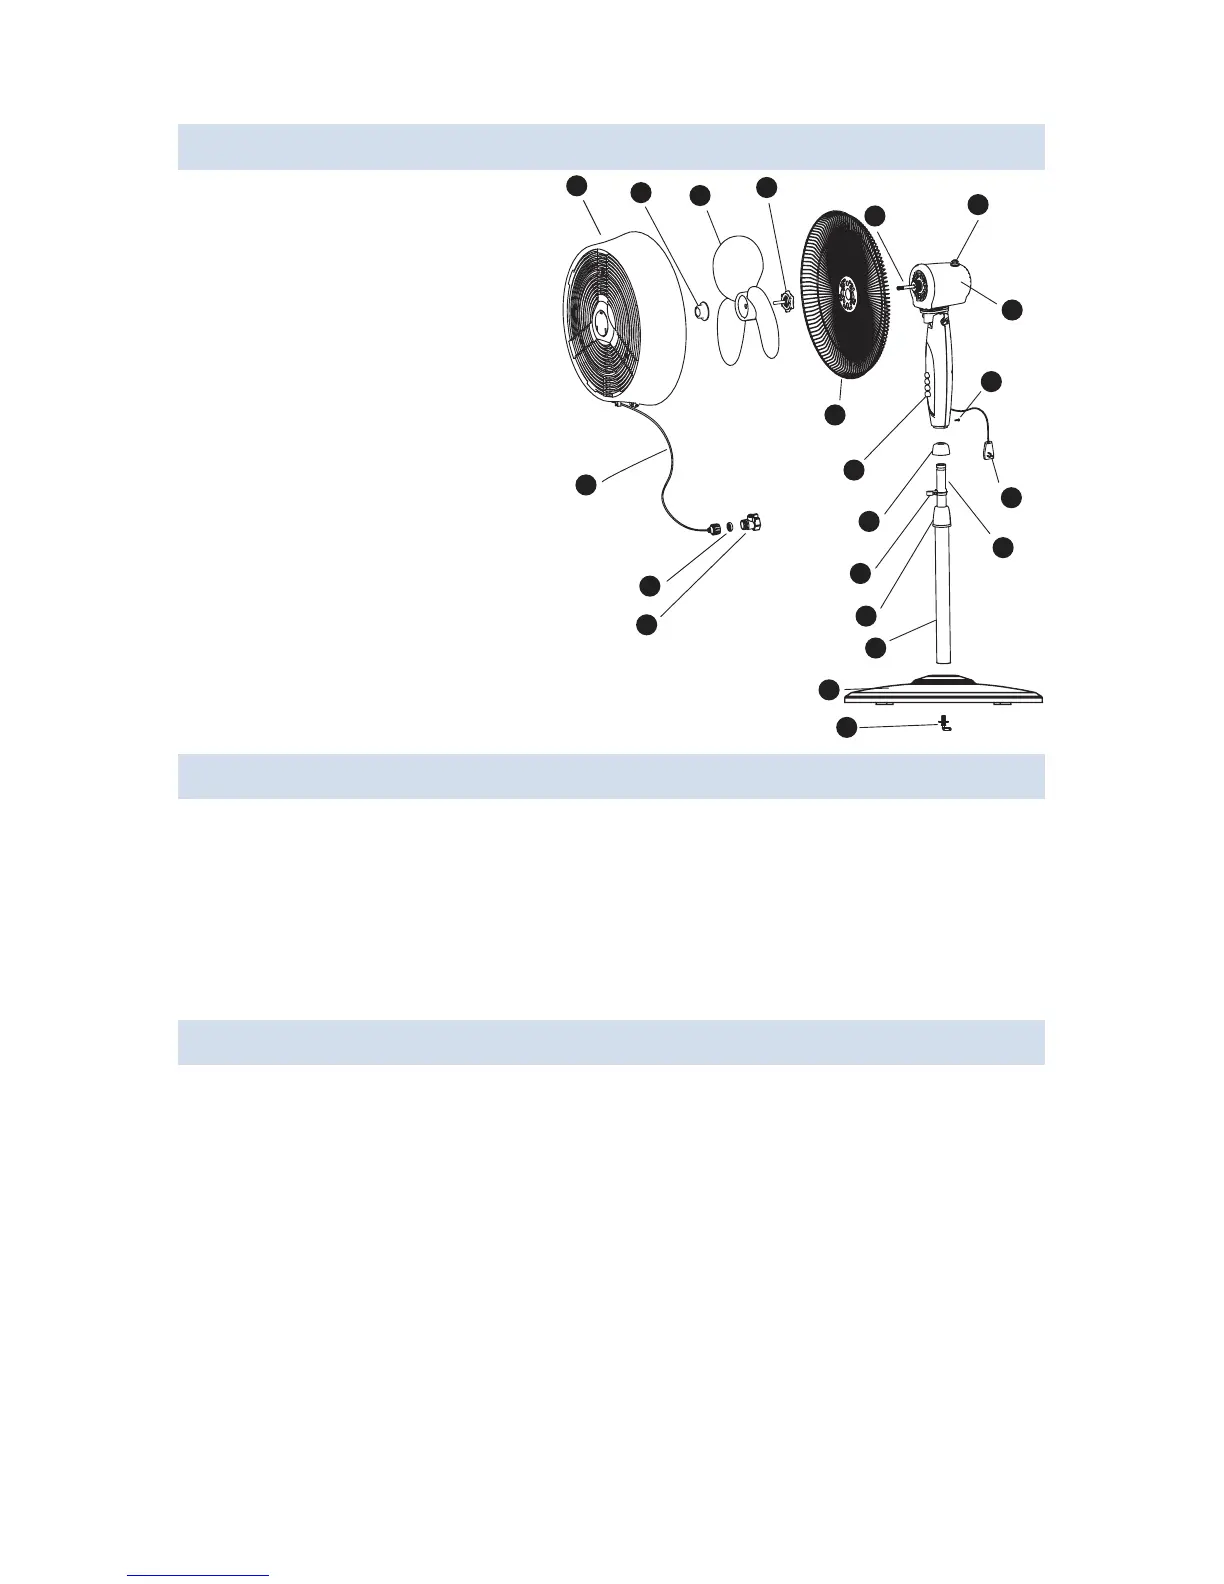
PARTS LIST
A. Front grill
B. Blade cap
C. Fan blade
D. Plasc nut
E. Rear grill
F. Motor sha
G. Clutch Knob
H. Motor housing
I. Push buon
J. Thumb screw
K. Power cord
L. Waterproof cover
M. Misng line holder
N. Internal pole
O. Height adjustment knob
P. External pole
Q. Misng line
R. Filter washer
S. Valve
T. Base
U. "7" finger screw
A
B
C
D
F
G
E
I
H
J
T
U
S
R
Q
L
M
P
O
K
N
PREPARATION
Before beginning assembly of product, make sure all parts are present. Compare
parts with package contents list and diagram above. If any part is missing or
damaged, do not aempt to assemble the product. Contactcustomer service for
replacement parts.
Esmated Assembly Time: 15 minutes
Tools Required for Assembly: Phillips Screwdriver (NOT INCLUDED)
Step 1. Fan Base Assembly (Fig. 1)
1. Unscrew the "7" finger screw (U) from the external pole (P) and aach the
external pole (P) to the base (T) by ghtening the "7" finger screw (U).
2. Remove the height adjustment knob (O) by unscrewing it counterclockwise.
3. Use your finger to pull out the internal pole(N), slide height adjustment
knob (O) over internal pole (N). Fasten it to external pole (P) by turning the
knob while holding the pole. Make sure the knob (O) is ghtly fastened before
final assembly.