EasyManua.ls Logo

newell Rubbermaid 2119055 User Manual

newell Rubbermaid 2119055
16 pages
To Next Page IconTo Next Page
Page #1 background imageLoading...
Page #1 background image
Thank you for purchasing this Rubbermaid
®
deck box. This dependable product was designed to look
great outdoors and help keep your deck or patio organized. We want your experience to be a good one.
Please read these instructions thoroughly before assembling the deck box.
2P37
26.75 in
67.95 cm
27.5 in
69.85 cm
55.492 in
140.95 cm
134 GALLON EXTRA LARGE DECK BOX
Assembly Instructions
COFFRE DE TERRASSE TRÈS GRAND DE 507 LITRES
Instructions d’assemblage
CAJA DE CUBIERTA EXTRA GRANDE DE 507 LITROS
Instrucciones de armado
2134430
Merci d’avoir acheté ce coffre de terrasse Rubbermaid
®
. Ce produit fiable a été conçu pour avoir une
belle apparence à l’extérieur et vous aider à garder votre terrasse en ordre. Veuillez lire ces instructions attentivement
avant d’assembler le coffre de terrasse.
Gracias por comprar esta caja de cubierta Rubbermaid
®
. Este producto confiable fue diseñado para lucirse en exteriores y ayudar
a mantener su terraza o patio organizados. Queremos que tenga una buena experiencia. Antes de montar la caja de cubierta, lea
atentamente estas instrucciones.
Question and Answer IconNeed help?

Do you have a question about the newell Rubbermaid 2119055 and is the answer not in the manual?

newell Rubbermaid 2119055 Specifications

General IconGeneral
Brandnewell
ModelRubbermaid 2119055
CategoryOutdoor Storage
LanguageEnglish

Summary

134 Gallon Extra Large Deck Box Assembly

Product Identification and Dimensions

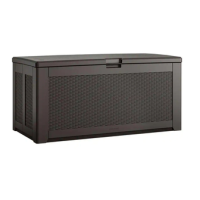
Identifies the 134 Gallon Extra Large Deck Box and provides its physical dimensions.

Preparation and Safety Guidelines

Before You Begin Assembly

Outlines essential steps to take before starting the assembly process.

Warnings, Use, and Care

Covers crucial safety warnings and maintenance advice for product use.

Tools Required for Assembly

Lists all necessary tools for a successful and efficient assembly process.

Component Identification

Parts List and Quantities

Details all parts included in the kit with their respective labels and quantities.

Assembly Steps

Step 1: Lid Attachment Preparation

Attaches initial components to the deck box lid, preparing for further assembly.

Step 2: Lid Support Installation

Installs lid supports onto the deck box lid for proper functionality.

Step 3: Hinge Post and Connector Setup

Attaches hinge posts and clears holes for connector installation.

Step 4: Floor Panel Integration

Connects the floor panel to the side panels of the deck box.

Step 5: Front Panel Integration

Attaches the front panel to the assembled base structure.

Step 6: Side Panel Connections

Connects the side panels using brackets and pins.

Step 7: Lid and Support Assembly (Part 1)

Attaches the lid to the box using hinge brackets.

Step 7: Lid and Support Assembly (Part 2)

Secures the lid supports to the deck box.

Completion and Support

Final Check and Customer Service

Confirms assembly completion and provides customer service contact for assistance.