NEWERTECH VOYAGER S3
SYSTEM SETUP
3
SYSTEM SETUP
2.1 Power and Computer Connection
1. Plug the power supply into the power input on the Voyager S3 (see Section 1.4,
number 2), then plug the other end into a power outlet.
2. Connect the included USB 3.0 cable between the Voyager S3 and your computer. If
connected to a USB 2.0 port, the Voyager S3 will operate at USB 2.0 speeds.
2.2 Drive Connection
1. Make sure that the Voyager S3 is turned off by checking the blue power LED. If the LED
is illuminated, press the power button once to turn off the Voyager S3.
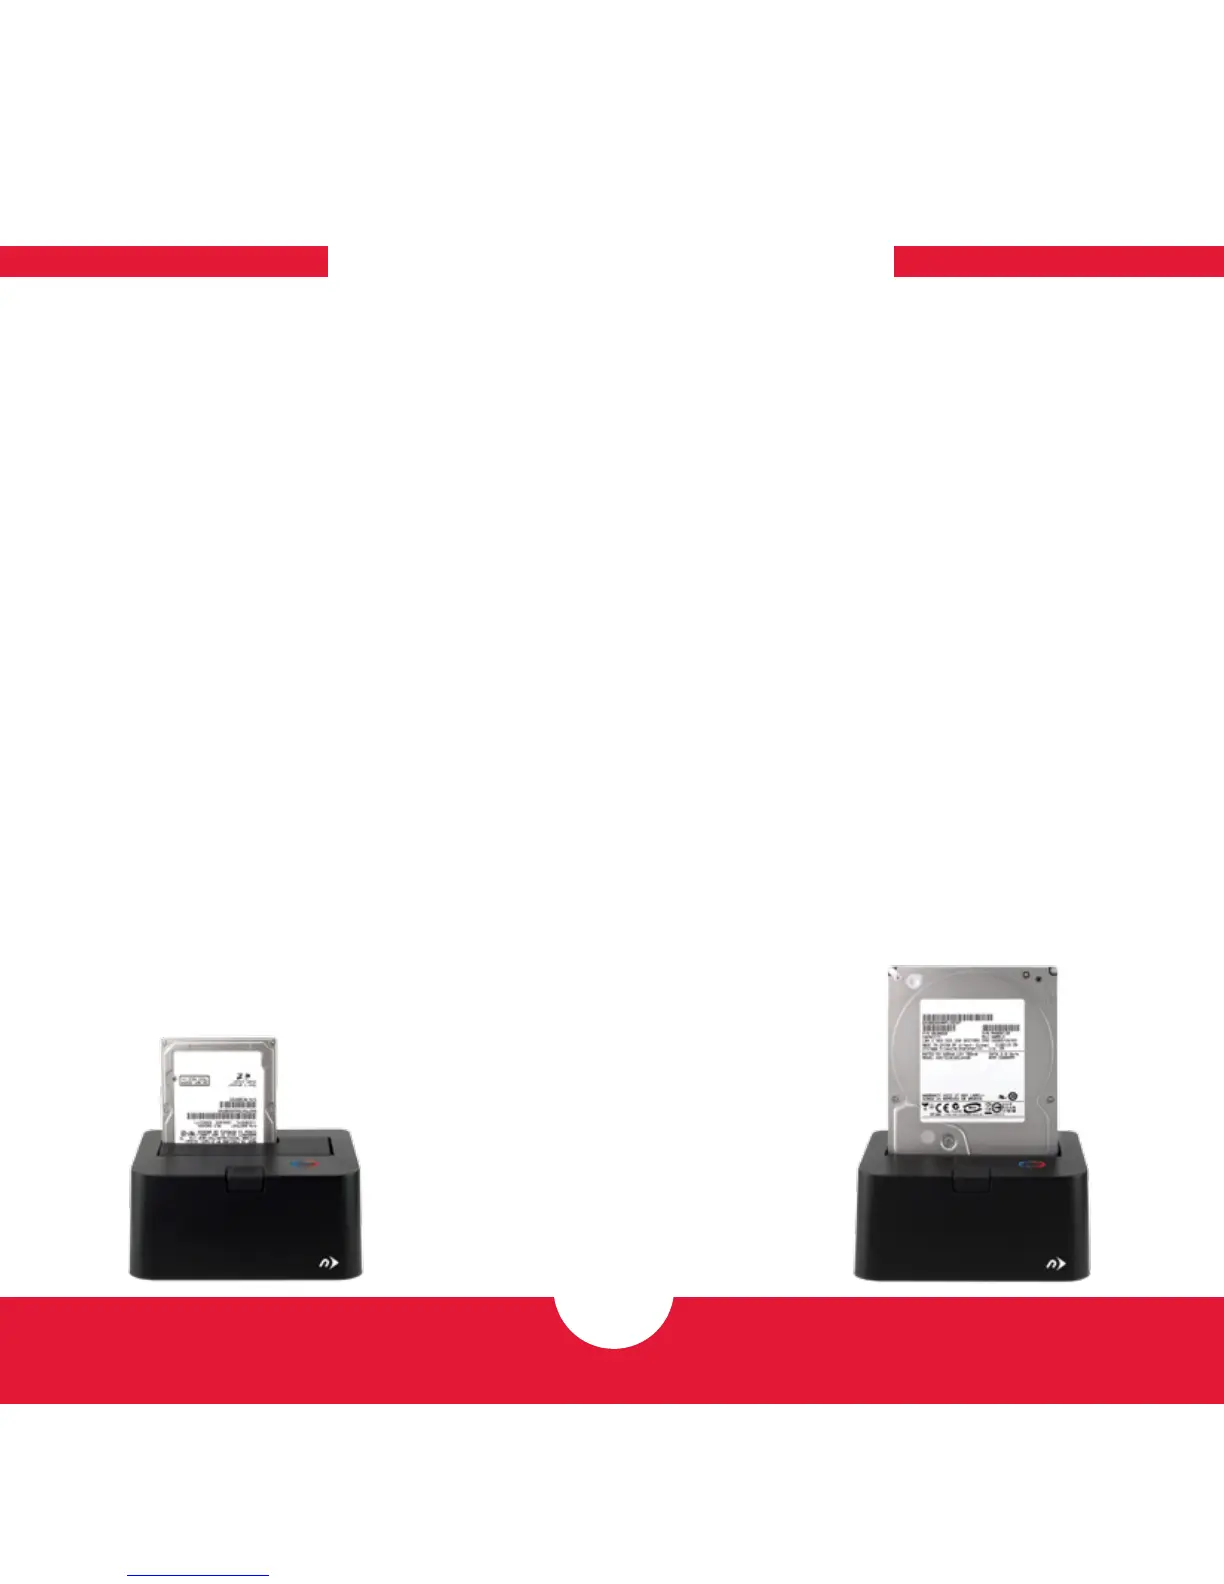
2. Install a 2.5” or 3.5” SATA hard drive or solid state drive (SSD) into the top of the Voyager
S3, as shown in the pictures below. Make sure that the SATA connector on the drive
lines up with the SATA connector in the Voyager S3 (see Section 1.3, number 1).
3. Turn on the Voyager S3 by pressing the power button once. The drive inside the
Voyager will now be able to communicate with the computer.
2.5” SATA
3.5” SATA
 Loading...