4.
3.
2.
1.
4.
3.
2.
1.
4.
3.
2.
1.
4.
3.
2.
1.
ON DIP
ON DIP
ON DIP
ON DIP
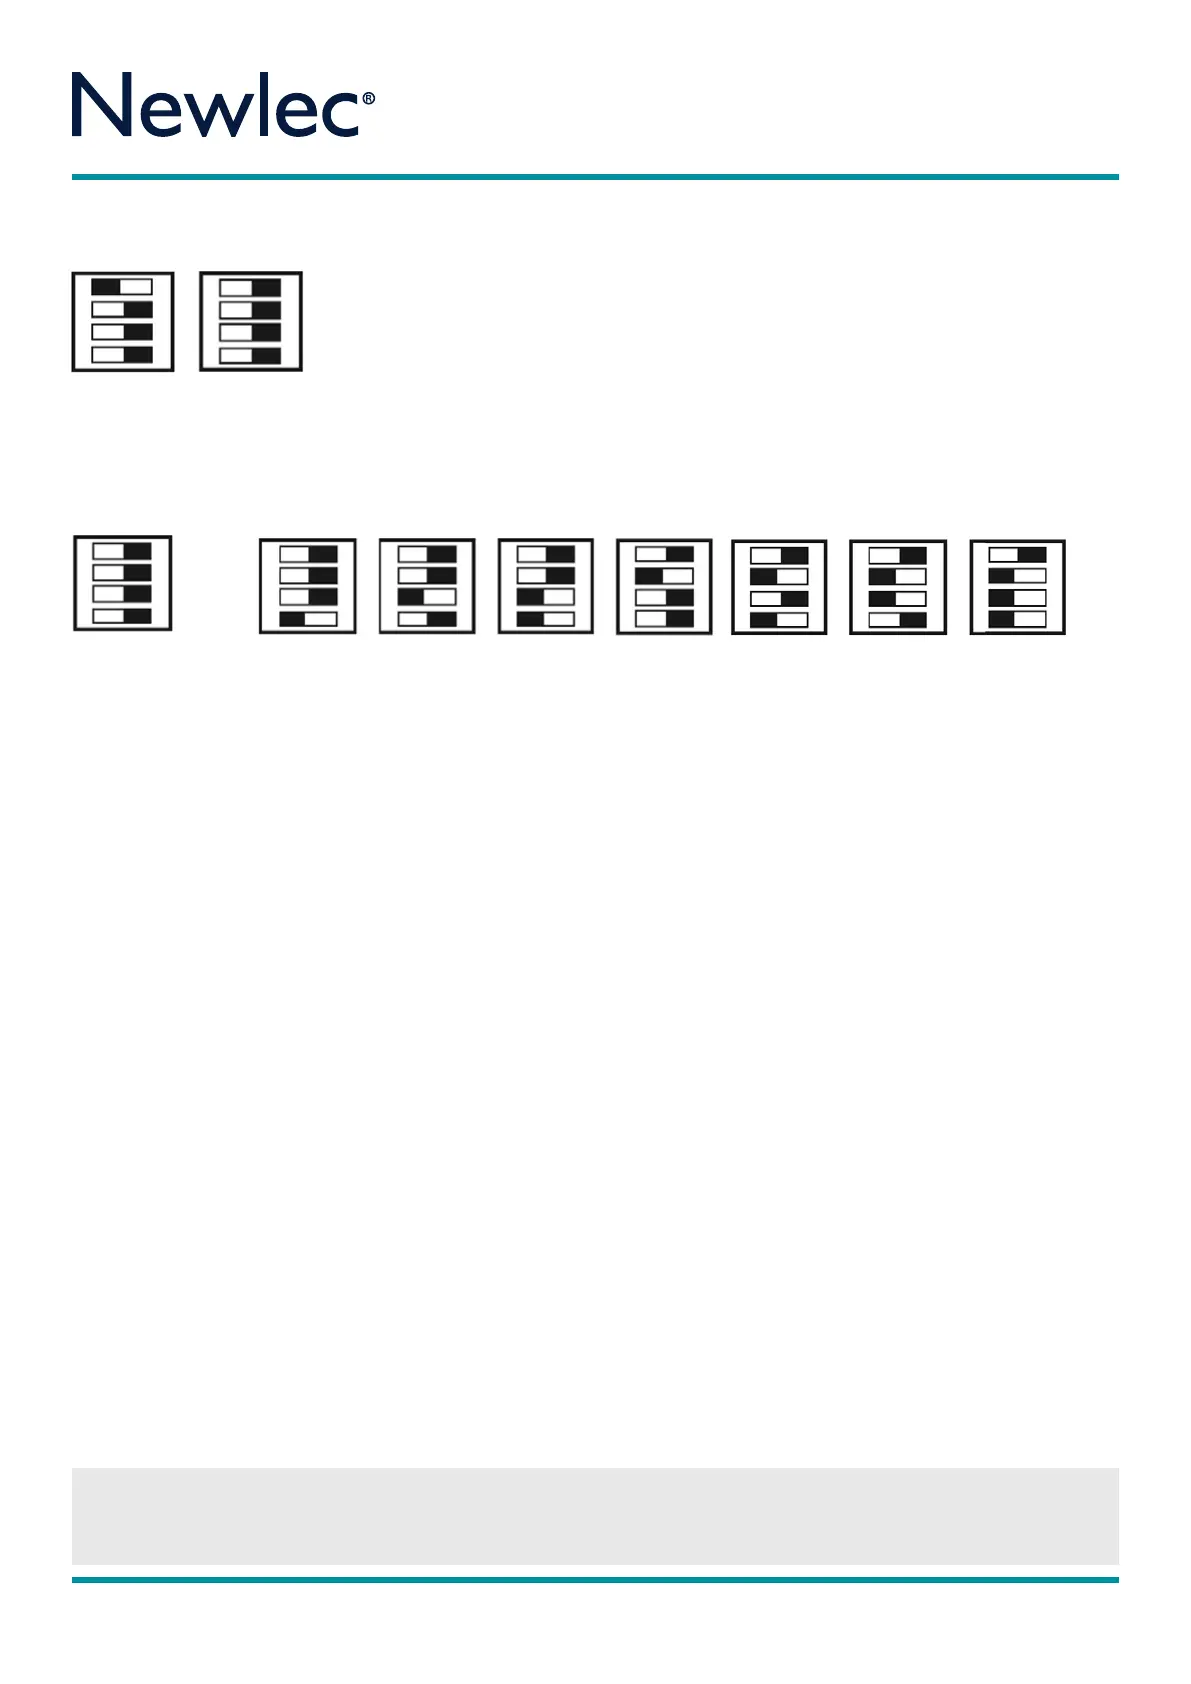
2 mins 5 mins 10 mins 15 mins
4.
3.
2.
1.
4.
3.
2.
1.
4.
3.
2.
1.
ON DIP
ON DIP
ON DIP
20 mins 30 mins 60 mins
4.
3.
2.
1.
ON DIP
Test Mode
10 Sec s
STEP 6 To adjust sensitivity turn anti-clockwise to the Hih (H) settin to increase sensitivity and clockwise to the Low (L) to decrease
sensitivity.
STEP 7 To set time please utilise the dip switch timin diaram above. The black bar denotes dip switch position. Replace fascia rin
by turnin anti clockwise (See Diaram 4).
STEP 8 The Occupancy Detector will take approximately 2½ minutes to initialise and will flash rapidly after the mains power is first
applied to allow the sensor to learn its environment. The load will be ON after 7 seconds initially, then switch o after 2½ minutes if
there is no detection in the zones.
OPERATION
In standard operation the Occupancy Detector will now sense infra red heat when a person or source of heat passes throuh the
detection zone. Each time the Occupancy Detector is triered it will reset the timer back to the start of the timin period. The unit will
then wait 5 seconds before allowin the Occupancy Detector to sense and re trier the timin period aain.
If no one is present in the room or the detection zone is not passed throuh, durin its set time period, the timer will time out, turnin
o the lihts or appliance.
The Occupancy Detector unit will only trier the lihts or appliance if the ambient liht level is below that set on the lux level
adjustment.
POSITIONING
CAREFUL POSITIONING IS ESSENTIAL TO OBTAIN OPTIMUM PERFORMANCE
Use the detection rane to determine a suitable location for the sensor. When locatin the position of the units, ensure the sensor is
not subjected to briht or direct sunliht or in areas with hih reflective surfaces. Do not site units on a vibratin surface, or near forced
air heatin and ventilation. They should not be placed within 1 metre of the load. Sensors work when objects move across their field of
view. Position the sensor where people will be detected walkin across the zones rather than towards the zones identified in diaram 1.
Adjust sensitivity to suit the area that the sensor has been installed in.
Diaram 3
Diaram 4
IMPORTANT NOTICE
All wirin should be carried out by a competent person or a qualified electrician and should be fitted to IEE Wirin reulations BS7671.
The circuit should be isolated before carryin out any work. Failure to adhere to the instructions will invalidate the warranty.
Please note that the black bar
denotes the position of the dip
switch. Dip switch 4 is only used
for Settin Automatic (150 Lux)
or Manual Lux ONLY.
Time Settins (Test Mode to 60 mins)
Instructions
Newlec Helpline: 0800 783 6909
4.
3.
2.
1.
ON DIP
Manual Lux
4.
3.
2.
1.
ON DIP
Auto Lux
RPM 377
 Loading...