5 — Nexsan E-Series E48/E60/E48X/E60X Quick Start Guide
1
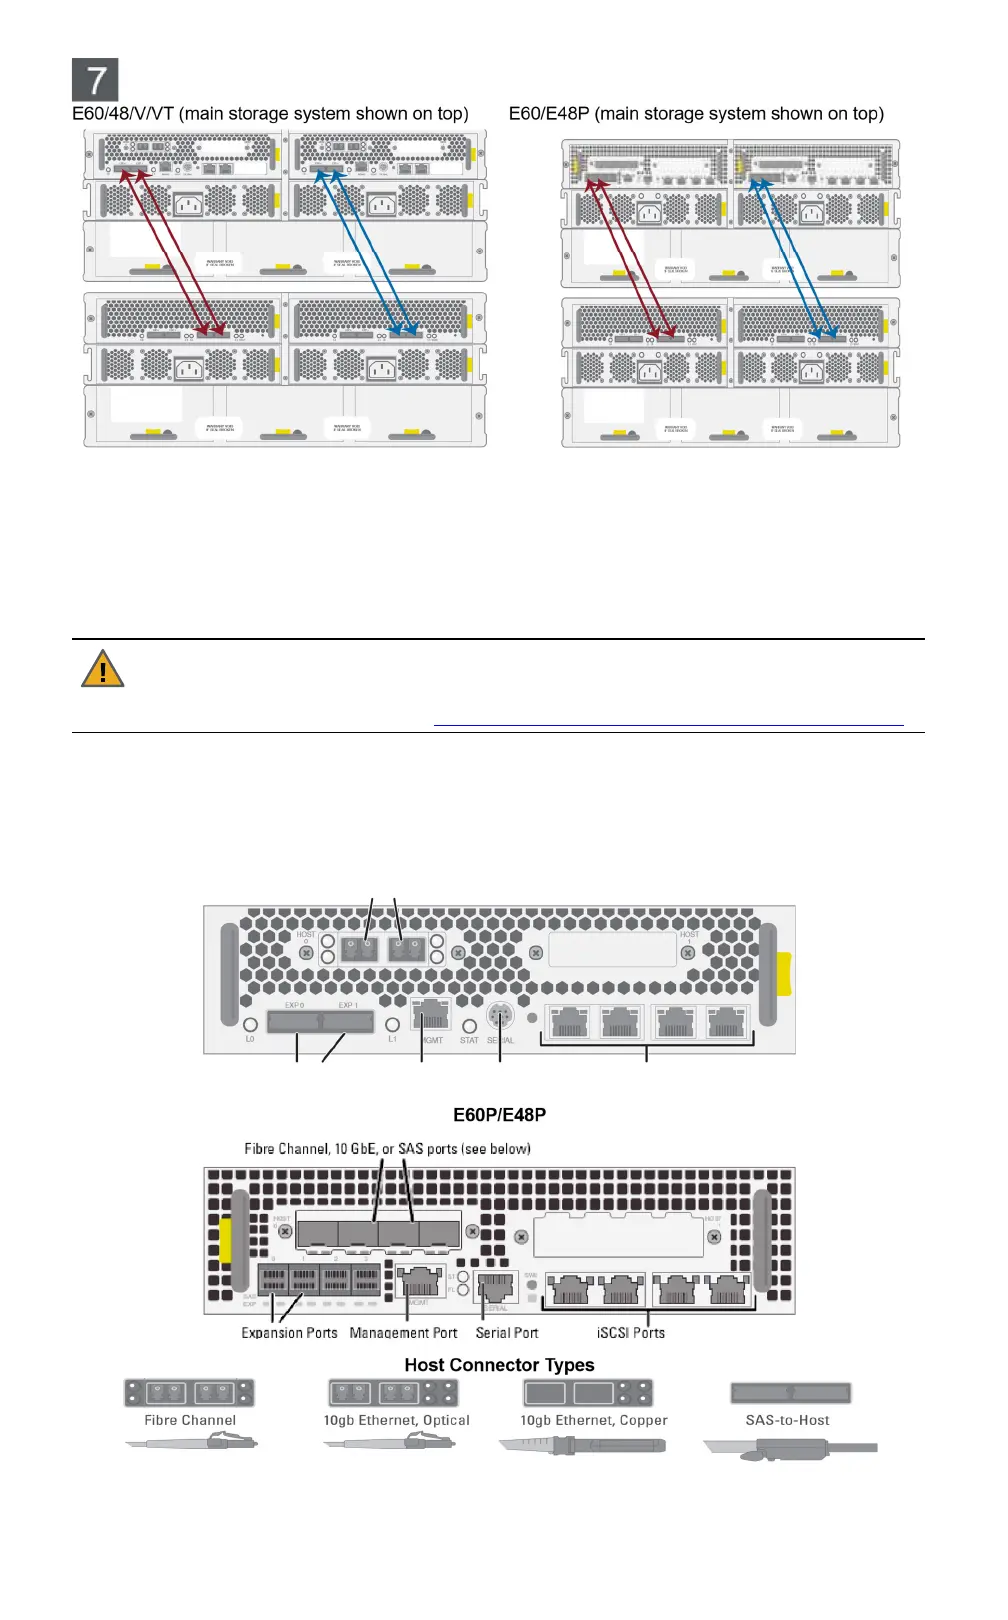
Connecting to E60/E48/V/VT: Insert one mini-SAS cable into each expansion port on the first RAID
Controller of the main storage system (labeled EXP0 and EXP1).
Connecting to E60P/E48P: Insert one mini-SAS HD cable into each of the left-most expansion ports
(labeled SAS EXP 0 and 1) on the first RAID Controller of the main storage system.
2
Insert the other ends of the SAS cables into the EXP IN 0 and 1 expansion ports on the left Expansion
Controller in the Nexsan storage expansion.
3
Repeat Step 1 and Step 2 for the second RAID Controller and Expansion Controller.
CAUTION: If you are installing two storage expansions onto a single main storage system, or if you
need to “hot-add” the storage expansion to a running main storage system, you MUST follow the
instructions under “Attach Expansion Unit to Main Storage Units” in the Nexsan E60X/E48X and
E60XV/E48XV Installation Guide, at
https://helper.nexsansupport.com/esr_downloads.html
.
Nexsan E60/E48/V/VT/P
Connect all necessary communication cables (Fibre Channel/10GbE iSCSI/SAS, Ethernet, expansion,
serial) to the appropriate connectors on the RAID Controller. For detailed instructions, see the Nexsan
E60E48 Installation Guide.
E60/E48/V/VT
Fibre Channel, 10 GbE, or SAS ports (see below)
Expansion Ports Management Port Serial Port iSCSI Ports
Attaching cables to the storage expansion (if applicable)