4 — Nexsan E-Series E48/E60/E48X/E60X Quick Start Guide
Replacing the PSUs
CAUTION: Handle the PSUs and RAID Controllers/Expansion Controllers ONLY by the
handles and outer coverings. DO NOT touch any internal components or connectors.
Doing so may harm the electronics inside.
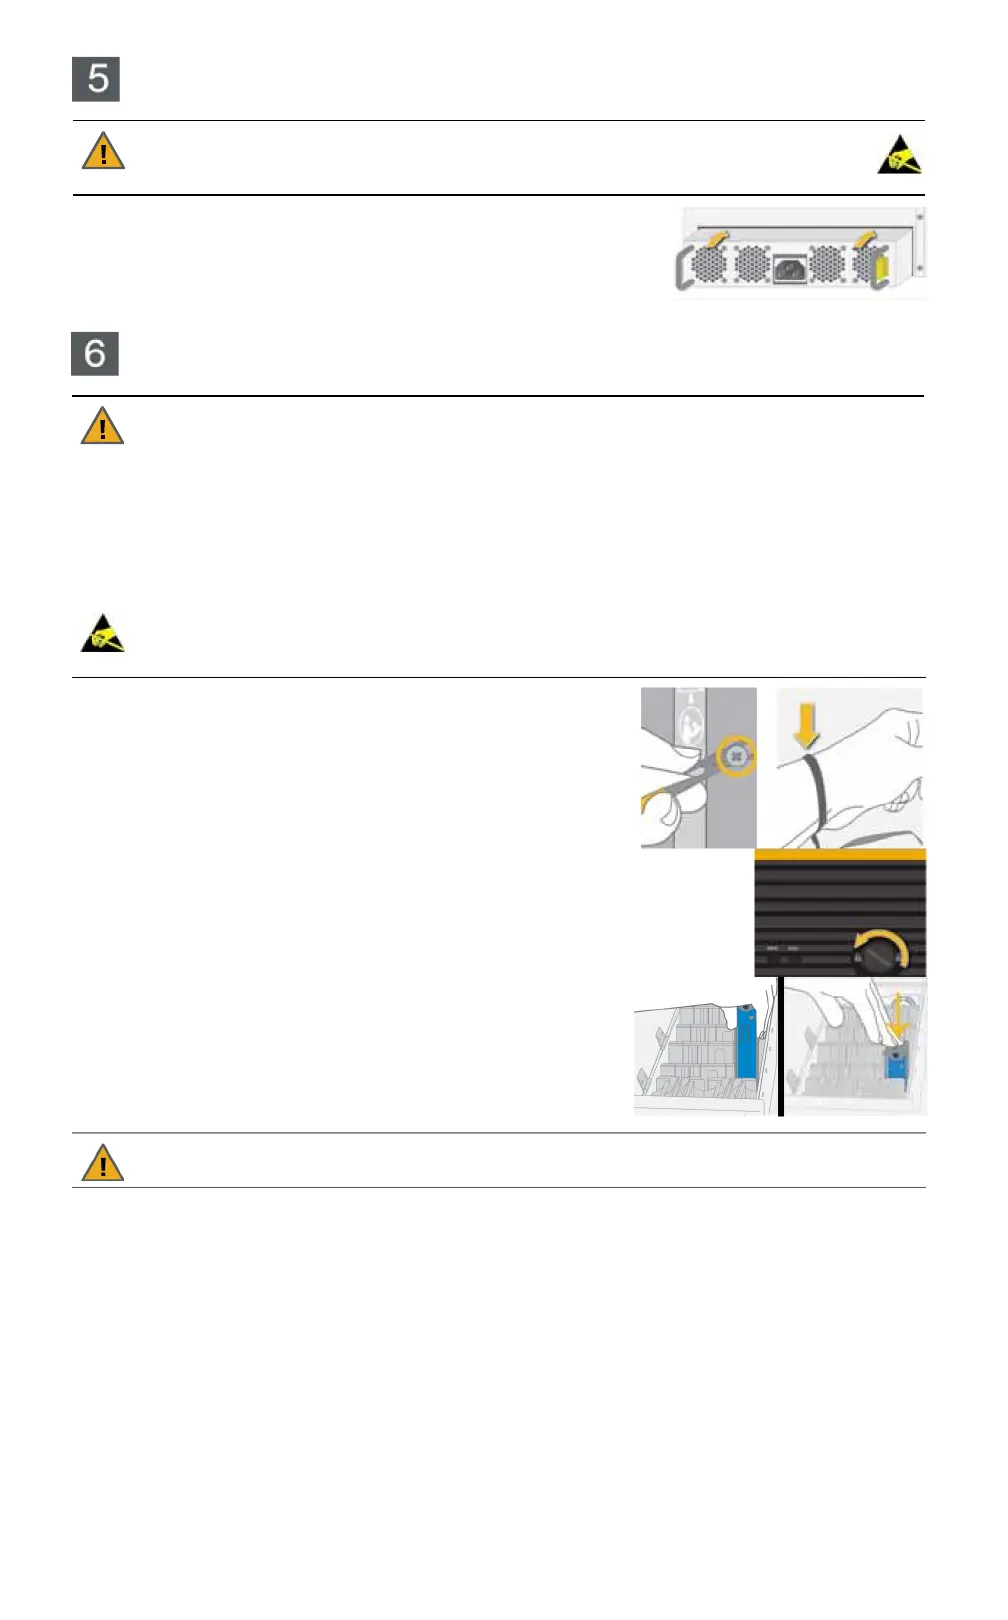
Replace the two Power Supply Units (PSUs), sliding them into the PSU
slots until the lock tab clicks.
NOTE:
Make sure that the PSU is right side up. The spring lock tab
should be on the right.
NOTE:
DO NOT connect the power cords to the PSUs at this time.
Only open ONE drawer at a time. Close and lock each drawer before opening another one.
Failure to do so may overbalance the rack, causing equipment damage or injury to personnel.
Do not lean on or place any heavy object on an open drive drawer. Doing so may damage the
drawer slide mechanism or overbalance the rack.
Before opening any drive drawers on the Nexsan storage enclosure, be sure that the internal
temperature is 10°C (50°F) or above. If the enclosure has been shipped or stored in low
temperatures, allow the system to come to room temperature to prevent component damage.
Computer components and disk drives are sensitive to electrostatic discharge (ESD). Be sure
to ground any electrostatic charge from your person before touching components with your
hands or tools. While installing the drives, use the included anti-static wrist-strap.
1
Ground any electrostatic charge from your person by touching
a metal part of the rack or any properly grounded conductive
object (such as the ground point at an anti-static workstation).
2
Attach the clip end of the anti-static wrist strap to the rack’s ESD
grounding pin or to any bare metal part of the rack. Secure the
loop end around your wrist.
3
Turn the lock counter-clockwise to unlock the drawer.
4
Carefully slide the drawer all the way out.
5
Open the drive drawer lid.
6
Starting at the front of the drawer, and using the drive guides
to help you orient the disks, carefully load each disk drive into
a drive slot. Make sure that each disk is fully seated.
CAUTION: ALWAYS load disk drives in rows of four. Do NOT leave large gaps between disk
drives as this decreases cooling efficiency and may result in some disk drives overheating.
NOTE:
You can mix SAS and SATA drives, and drives with different speeds in the same drawer, but it is
recommended that the SAS/faster drives are loaded toward the front of the drawer.
7
Close the drive drawer lid.
8
Carefully slide the drawer back into the enclosure, making sure that it is flush with the rest of the front
panel.
9
Turn the lock clockwise to lock the drawer.
10
Repeat Step 3 through Step 9 for the other two drive drawers.
Loading disk drives
CAUTION:
 Loading...