Do you have a question about the Nidek Medical CP-690 and is the answer not in the manual?
Safety precautions to take before performing servicing.
Safety precautions to take while performing servicing.
Troubleshooting steps for when the initialization process fails to begin.
Steps to diagnose and resolve issues with the chart or mask motors not functioning.
Troubleshooting guide for when the chart and mask motors fail to stop correctly.
Procedures to follow if the projector lamp fails to illuminate.
Steps to fix issues where the projected chart image is obstructed.
Guide to address problems with incorrect chart brightness levels.
Steps to resolve uneven brightness across the projected chart.
Troubleshooting procedures for a blurry or unclear projected chart image.
Steps to diagnose why the projected chart fails to change via remote control.
Guide to troubleshoot when the polarized chart image does not vanish as expected.
Troubleshooting steps for when the unit's LED indicator fails to illuminate.
Instructions for safely removing the external covers of the projector.
Detailed steps for replacing the main BA01 circuit board.
Procedure for replacing the BA02 IR board.
Steps for replacing the BA14 resistor board.
Guide for replacing the chart sensor component.
Procedure for replacing the mask sensor component.
Steps for cleaning the chart and mask components.
Instructions for cleaning the condenser lens.
Procedure for cleaning the holder assembly.
Steps to adjust the initial position of the projector's components.
Instructions for setting the voltage selector on the instrument.
How to configure the display of visual acuity information.
Steps to select and adjust the chart illumination brightness.
Procedure for setting the volume of the unit's beep sound.
Guide to configuring the DIP switch settings for various functions.
How to set switch codes when using multiple CP-690 units together.
Schematic diagram illustrating the internal wiring of the projector.
Instructions and visual guide on how to correctly perform wiring tasks.
List of essential tools and measuring devices required for servicing.
List of other necessary consumables and materials for maintenance.
| Brand | Nidek Medical |
|---|---|
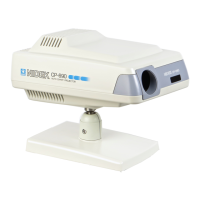
| Model | CP-690 |
| Category | Projector |
| Language | English |