14 NIKON D5000: FROM SNAPSHOTS TO GREAT SHOTS
top of your camera, which rests just above the eyepiece. This bracket is used
for attaching a more powerful fl ash to the camera [see Chapter 8 and the
bonus chapter].)
• Pre: Indicates that you are using a customized white balance that is adjusted for
a particular light source. This option can be adjusted using an existing photo you
have taken or by taking a picture of something
white or gray in the scene.
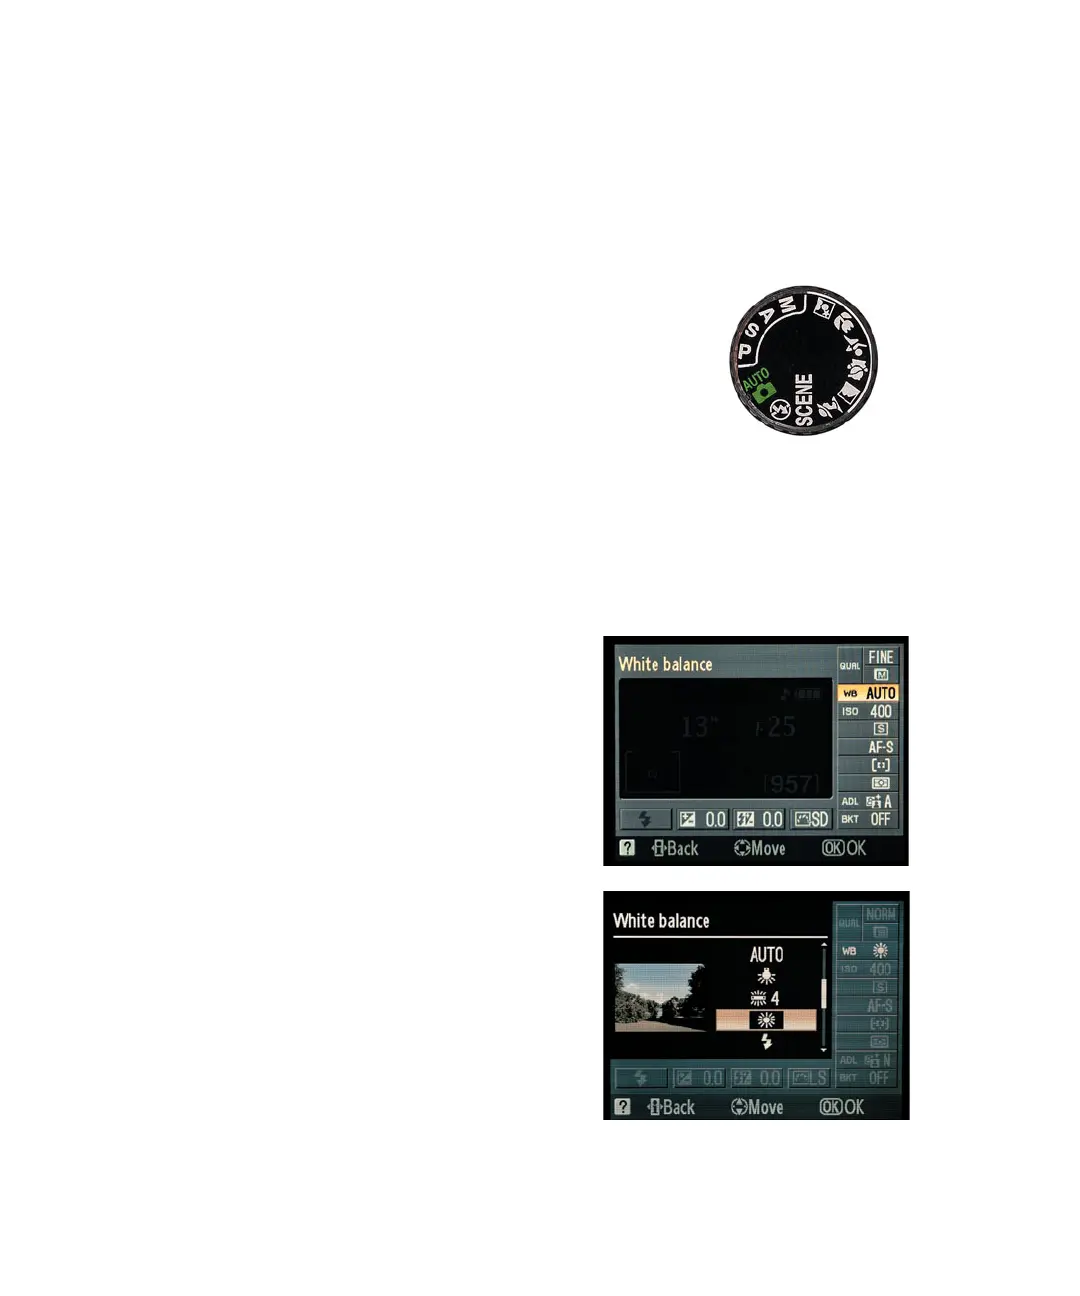
Your camera has two different “zones” of shooting
modes to choose from. These are located on the Mode
dial, which are separated into automatic scene modes
and what I refer to as the professional modes. All of the
automatic modes, which are identifi able by small icons,
are automatic in nature and do not allow for much, if
any, customization, which includes white balance. The
professional modes, defi ned by the letter symbols M, A,
S, and P, allow for much more control by the photogra-
pher (Figure 1.3).
SETTING THE WHITE BALANCE
1. After turning on or waking the camera,
select one of the professional shooting
modes such as P (you can’t select the
white balance when using any of the
automatic modes).
2. Press the i button on the back of the
camera to activate the cursor in the
information screen.
3. Use the Multi-selector to highlight the
White Balance mode and press the OK
button (A).
4. Using the Multi-selector, select the
appropriate white balance and then
press the OK button (B).
5. Press the i button to return to the
regular information screen.
■
FIGURE 1.3
The camera’s shooting modes
are divided into the automatic
scene modes and the profes-
sional modes.
P
R
O
A
U
T
O
A
B