Chapter 1 ■ Quick Setup Guide 3
monitor, and then use the multi selector to scroll down to the Setup menu (it’s
marked with a wrench icon), press the multi selector button to the right, and
then press the down button to scroll down to Time Zone and Date, and press
the right button again. The options for setting the 24-hour clock will appear
on the screen that appears next.
Mounting the Lens
If your D800 has no lens attached, you’ll need to mount one before shooting:
1. Select the lens and loosen (but do not remove) the rear lens cap.
2. Remove the body cap on the camera by rotating the cap away from the
shutter release button.
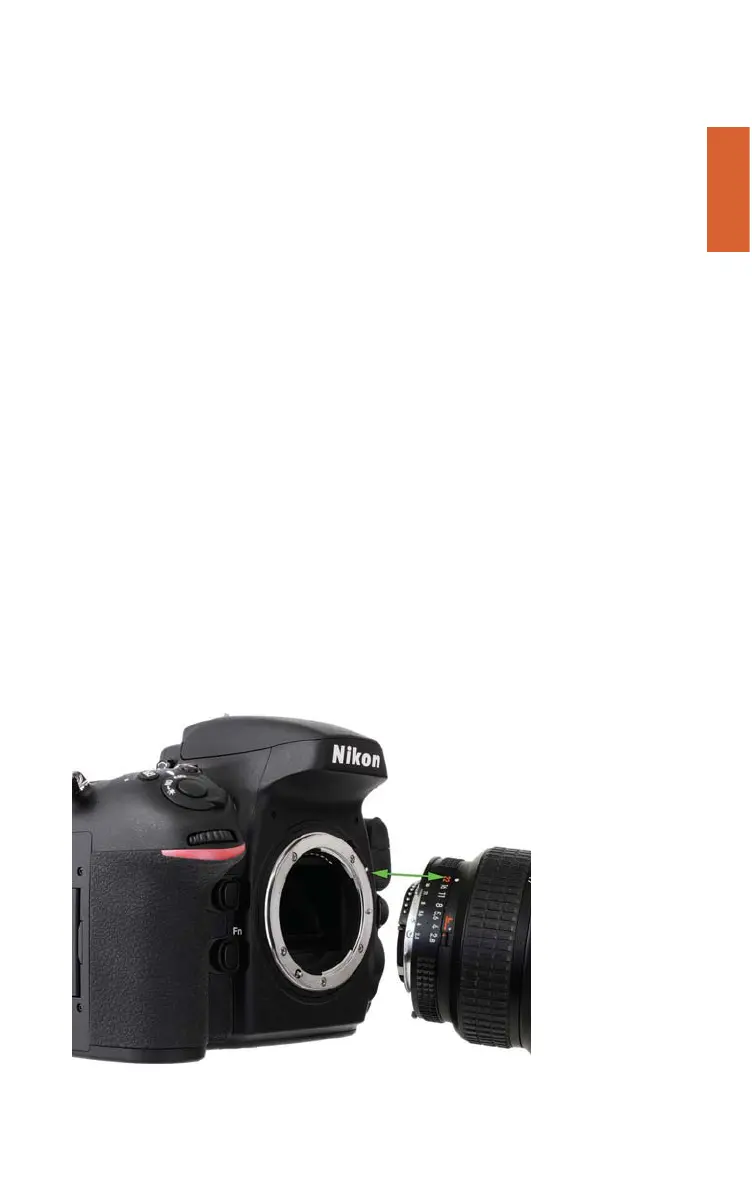
3. Once the body cap has been removed, remove the rear lens cap from the
lens, set it aside, and then mount the lens on the camera by matching the
alignment indicator on the lens barrel with the white bump on the cam-
era’s lens mount (see Figure 1.3). Rotate the lens toward the shutter release
until it seats securely.
4. Set the focus mode switch on the lens to AF or M/A (Autofocus). If the
lens hood is bayoneted on the lens in the reversed position, twist it off and
remount with the “petals” (if present) facing outward. A lens hood pro-
tects the front of the lens from accidental bumps, and reduces flare caused
by extraneous light arriving at the front of the lens from outside the pic-
ture area.
Figure 1.3
Match the indica-
tor on the lens
with the white
dot on the camera
mount to prop-
erly align the lens
with the bayonet
mount.
(c) 2014 Cengage Course Technology. All Rights Reserved.