David Busch’s Compact Field Guide for the Nikon D800/D800E2
Introducing Menus and the Multi Selector
You’ll find descriptions of most of the controls used with the Nikon D800 in
Chapter 2, which provides a complete “roadmap” of the camera’s buttons and
dials and switches. However, you may need to perform a few tasks during this
initial setup process, and most of them will require the MENU button and the
multi selector pad.
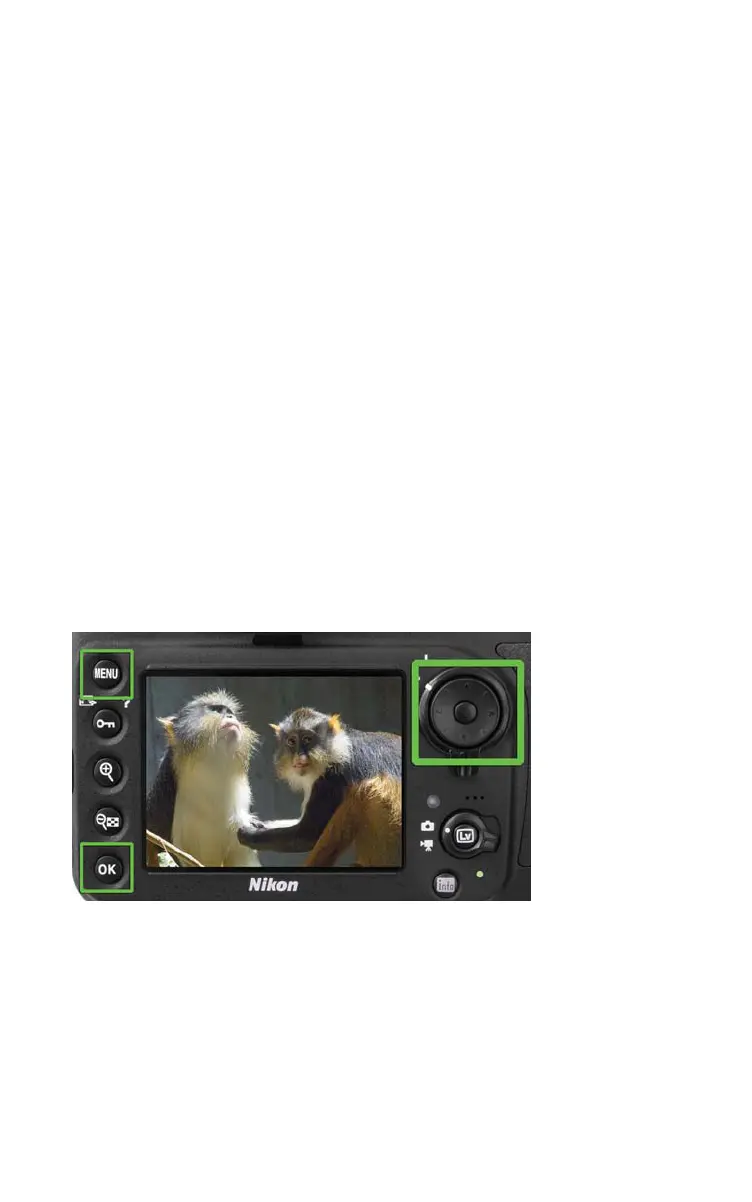
■ MENU button. It’s the top button to the left of the LCD monitor. When
you want to access a menu, press it. To exit most menus, press it again.
■ OK button. Located at the bottom of the column containing the MENU
button, OK is used to confirm your choices.
■ Multi selector pad. A thumbpad-sized button with projections at the
north, south, east, and west “navigational” positions, plus a button in the
center (see Figure 1.2). With the D800, the multi selector is used exclu-
sively for navigation; for example, to navigate among menus on the LCD
monitor or to choose one of the 51 focus points, to advance or reverse
display of a series of images during picture review, or to change the kind
of photo information displayed on the screen. The center button is used to
confirm your choices and send the image currently being viewed to the
Retouch menu for modification.
Figure 1.2
The MENU but-
ton (upper left),
OK button (lower
left), and multi
selector pad
(right).
Setting the Clock
The in-camera clock might have been set for you by someone checking out
your camera prior to delivery, but if you do need to set it, the flashing CLOCK
indicator roughly in the center of the monochrome control panel on top of the
camera will be the giveaway. Press the MENU button to the left of the
(c) 2014 Cengage Course Technology. All Rights Reserved.