11
Jp
En
Fr
Es
Nl
Dk
Pl
Hu
Ro
Cz
De
Se
Fi
Ru
No
It
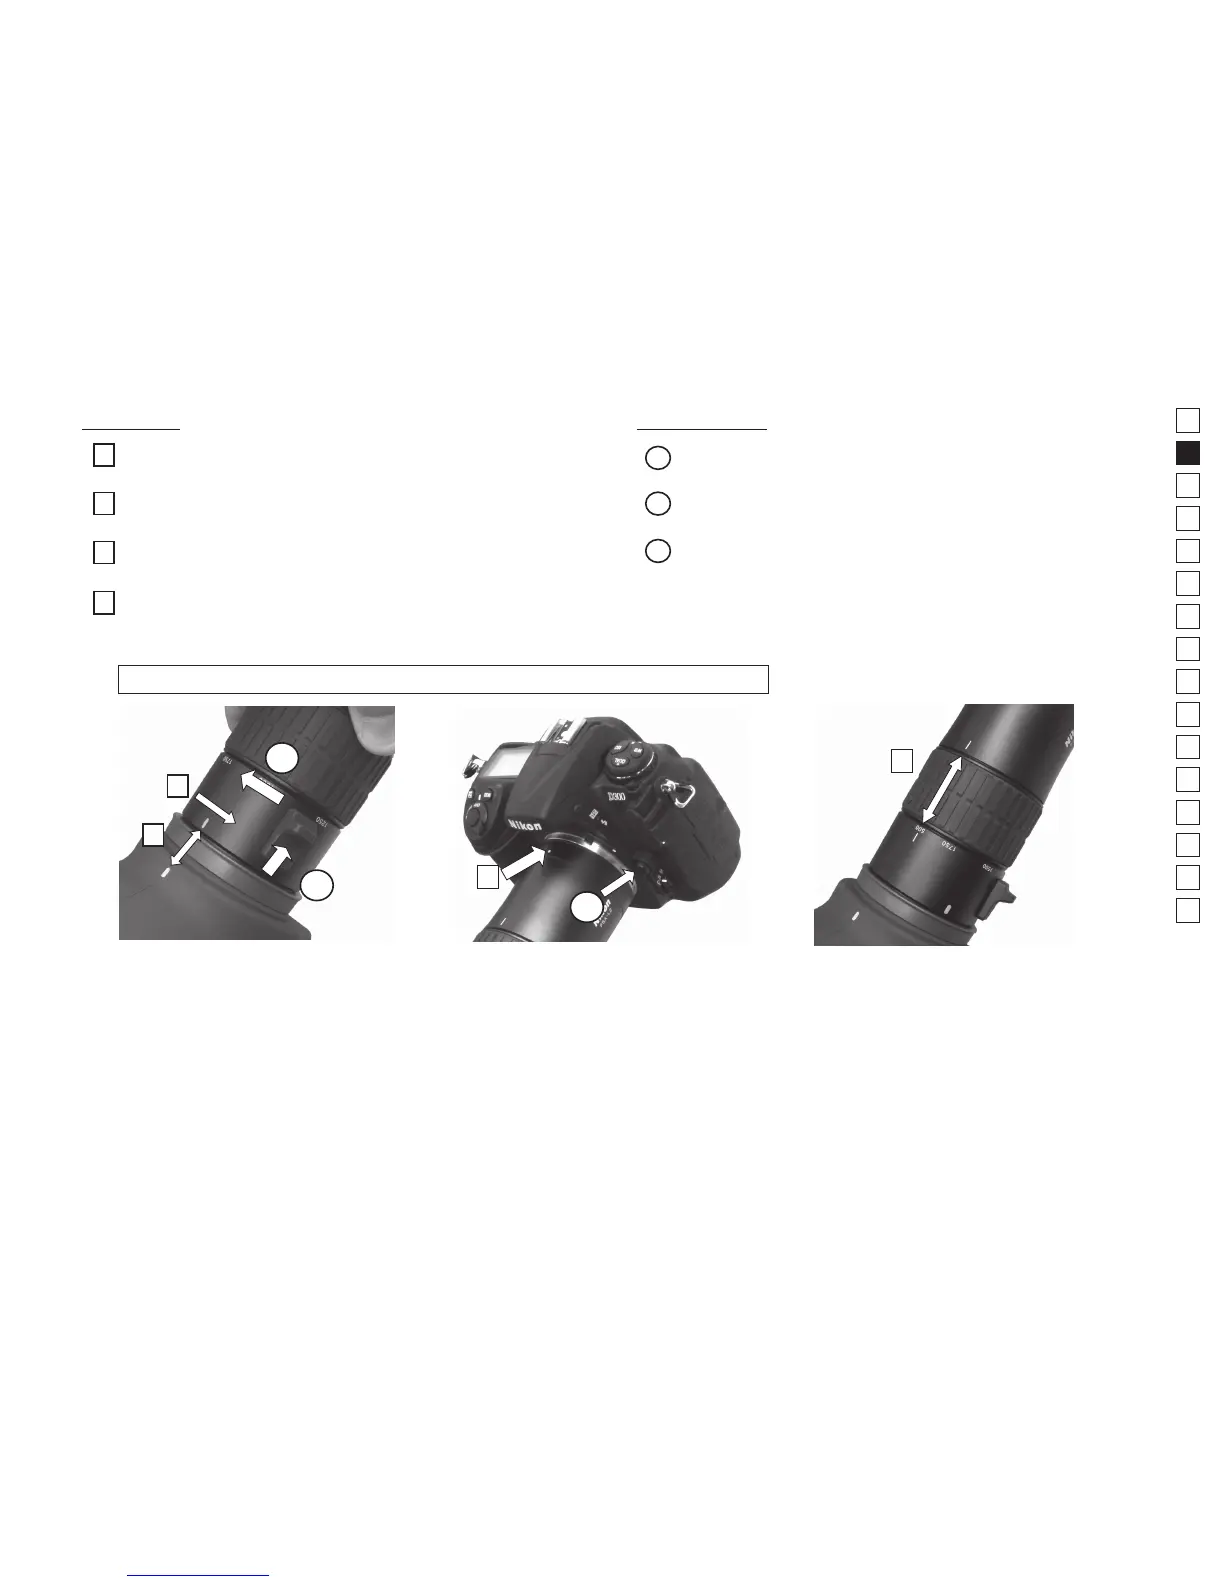
Mounting and dismounting
Mounting
Insert the FSA-L2 into the EDG Fieldscope aligning the
mounting/dismounting indexes of both sides.
2
1
3
4
First loosen the clamp screw. Then align the two camera
position indexes, and tighten up the clamp screw to
make the camera position horizontal.
Attach the camera to the FSA-L2, alignng the camera
mounting/dismounting indexes.
Screw in the FSA-L2 in the direction of the arrow until
you hear a click.
Shooting precautions
・
Depending on the shooting conditions, vignetting may occur. Vignetting may not completely disappear.
・
Focus using the focusing ring on the Fieldscope while viewing the camera's nder.
・
With high-magnication shooting, the focal depth is low. Be sure to focus carefully.
・
With high-magnication shooting, you can prevent vibrations by using a self-timer or a remote controller.
・
Camera position may become misaligned during camera operation. Before releasing the shutter, adjust the camera if
necessary.
・
Do not use ash when shooting.
3
1
4
2
2
3
1
*Please refer to the complete image showing correct mounting on page 2.
Dismounting
Rotate the body in the direction of the arrow, and
remove the FSA-L2.
Slide the mounting/dismounting lever in the
direction of the arrow, and keep it in position.
Remove the camera by pressing the lens
mounting/dismounting button.
2
3
1