Chapter 3 Assembling
33
7
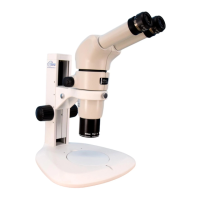
Attach an epi fluorescence attachment. (for the DIA + EPI-FL system)
ttach the P2-EFLM Motorized Epi Fluorescence Attachment or the P2-EFLI Epi Fluorescence Attachment to the
zooming body.
The attachment procedure is the same for all epi-fluorescence attachment types.
(1) Completely loosen the M4 set screw for the
illuminator at the top front of the zooming body using
the hex driver (nominal designation: 2).
(2) Align and fit the positioning groove at the far end of
the round dovetail at the bottom of the epi
fluorescence attachment with the positioning pin at
the far end of the round dovetail groove on top of the
zooming body, and then tighten the fixing screw.
P2-EFLM
MADE IN JAPAN
CUS
LISTED
4N75
INSPECTION
EQUIPMENT
SMZ25
MADE IN JAPAN
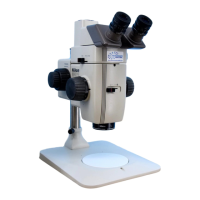
Attaching the epi fluorescence attachment
CUS
LISTED
4N75
INSPECTION
EQUIPMENT
SMZ25
MADE IN JAPAN
Tightening the screw for epi fluorescence
attachment
Connecting signal cables
Connect the signal cable that comes from the bottom of the epi fluorescence attachment to the connector “FL” on
the motorized focus unit or relay box. In case of the motorized unit, connect it inside the left cover of the intelligent
nosepiece. (See “[4] Connect signal cables.”)
Attaching the HG fiber
Loosen the M4 set screw for the HG fiber on the top of the
HG fiber attachment hole on the rear side of the epi
fluorescence attachment using the hex driver (nominal
designation: 2).
Insert the emission side tip of the HG fiber to the
attachment hole until it reaches the limit and tighten the
fixing screw.
Firmly insert the source side connector to the HG fiber
attachment hole of the C-HGFI or C-HGFIE HG
Precentered Fiber Illuminator. Refer to the instruction
manual supplied with the light source for details.
Attaching the HG fiber by tightening the screw
 Loading...