SK
vacuum metal objects such
as coins, screws, nails,
tacks, etc.
• Make sure to check that
the wheels and the brush
on the nozzle are clean in
order to avoid scratching of
sensitive fl oors.
• Empty the product after
each use. Keep it free of
dust, lint, hair, or anything
that reduces airfl ow.
• Keep hair, loose clothing,
and body parts away from
openings or moving parts,
especially the part of the
product where there is suc-
tion.
• Never place the vacuum
nozzle near your face, es-
pecially eyes and ears,
during operation.
• Do not use the product
without the fi lters and the
dust container in place.
• Take care when using the
product on stairs in order to
prevent falls.
• The battery charging termi-
nals on the vacuum cleaner
and the charging base
must be kept clean and
free of debris.
• Only use the charging base
and AC adapter provided
with the product. Do not
use any parts not provided
or recommended by Nilfi sk.
3. Instructions for Use
3.1 Start and Stop
3.1.1 Start
Switch ON the unit by switching the On/Off button
downwards. Note: Li-lon models have two speed
levels. Middle position = low speed, bottom posi-
tion = high speed.
Please fully charge the battery before using the
product for the fi rst time.
• NiMH models: The battery is fully charged
after 16 hours. Prolonged charging can reduce
the life time of the battery and is not optimal
for the environment.
• Please switch OFF the product when the bat-
tery is empty. The battery will be damaged if
the product is stored in “ON” position.
3.1.2 Stop
Switch OFF the unit by switching the On/Off but-
ton upwards.
3.2 Prepare your Vacuum Cleaner
Make sure the switches are in “OFF” Position.
1. Straighten up the foldable handle to ‘Click’.
2. Connect the fl oor brush to ‘Click’.
3. Assemble the charging base.
4. Insert the vacuum unit in stick body.
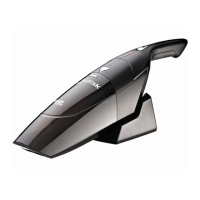
5. Place the Nilfi sk Handy 2-in-1 in the charging
stand for fi rst charging. (Refer to the charging
section)
3.3 Using your vacuum cleaner
During short pauses in vacuuming, the vacuum
cleaner can be left standing by leaning it slightly
forward until it rests on the fl oor brush.
Caution ! Always switch off the vacuum cleaner
when left standing because the brush can dam-
age the fl oor or the carpet.
3.4 Indication light (Li-lon models)
Battery full Blue light on
Battery below 20% Blue light fl ashing
Battery low Red light fl ashing
4. Charging the Battery
Make sure to charge the battery in the following
situations:
• When using the product for the fi rst time after
purchase
• When the battery is low or the suction power
reaches an insuffi cient level

 Loading...