EM-106
< UNIT DISASSEMBLY AND ASSEMBLY >
[VQ40DE]
ENGINE UNIT
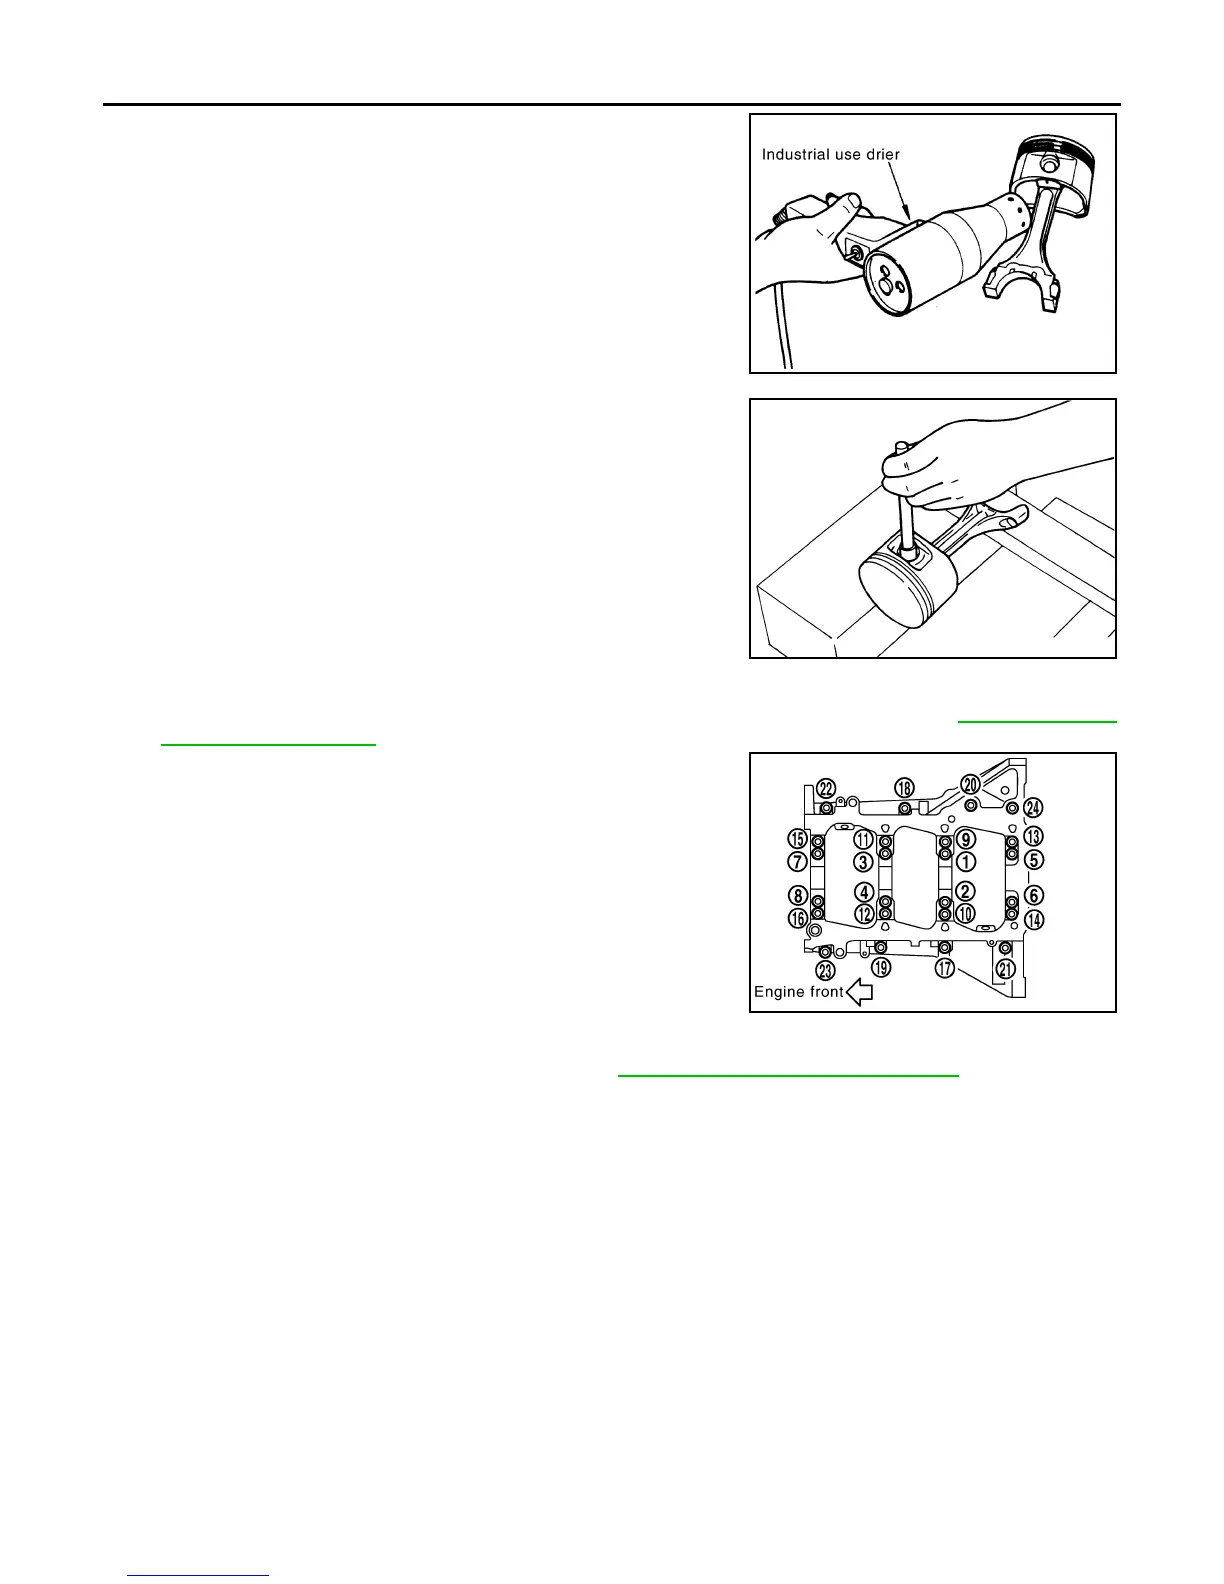
b. Heat piston to 60° to 70°C (140° to 158°F) with industrial use
drier or equivalent.
c. Push out piston pin with drift which has an outer diameter of
approximately 20 mm (0.79 in).
17. Remove lower cylinder block bolts.
• Before loosening lower cylinder block bolts, measure the crankshaft end play. Refer to EM-112, "Inspec-
tion After Disassembly".
• Loosen lower cylinder block bolts in reverse order as shown in
several different steps.
NOTE:
Use socket (size E14) for bolts No. 1 to 16 (M10 bolt).
18. Remove lower cylinder block.
• Cut liquid gasket for removal using Tool. Refer to EM-4, "Precaution for Liquid Gasket"
.
CAUTION:
Be careful not to damage the mounting surfaces.
19. Remove crankshaft.
20. Pull rear oil seal out from rear end of crankshaft.
NOTE:
When replacing rear oil seal without removing lower cylinder block, use a suitable tool to pull the rear oil
seal installed between crankshaft and cylinder block out.
CAUTION:
Be careful not to damage crankshaft or cylinder block.
21. Remove main bearings and thrust bearings from cylinder block and lower cylinder block.
CAUTION:
• Do not drop main bearing, and to scratch the surface.
• Identify installation positions, and store them without mixing them up.
22. Remove oil jet.
ASSEMBLY
PBIC1639E
PBIC0262E
PBIC2941E
Tool number : KV10111100 (J-37228)
Revision: January 2013 2013 Xterra