EM-36
< REMOVAL AND INSTALLATION >
[VQ40DE]
OIL PAN AND OIL STRAINER
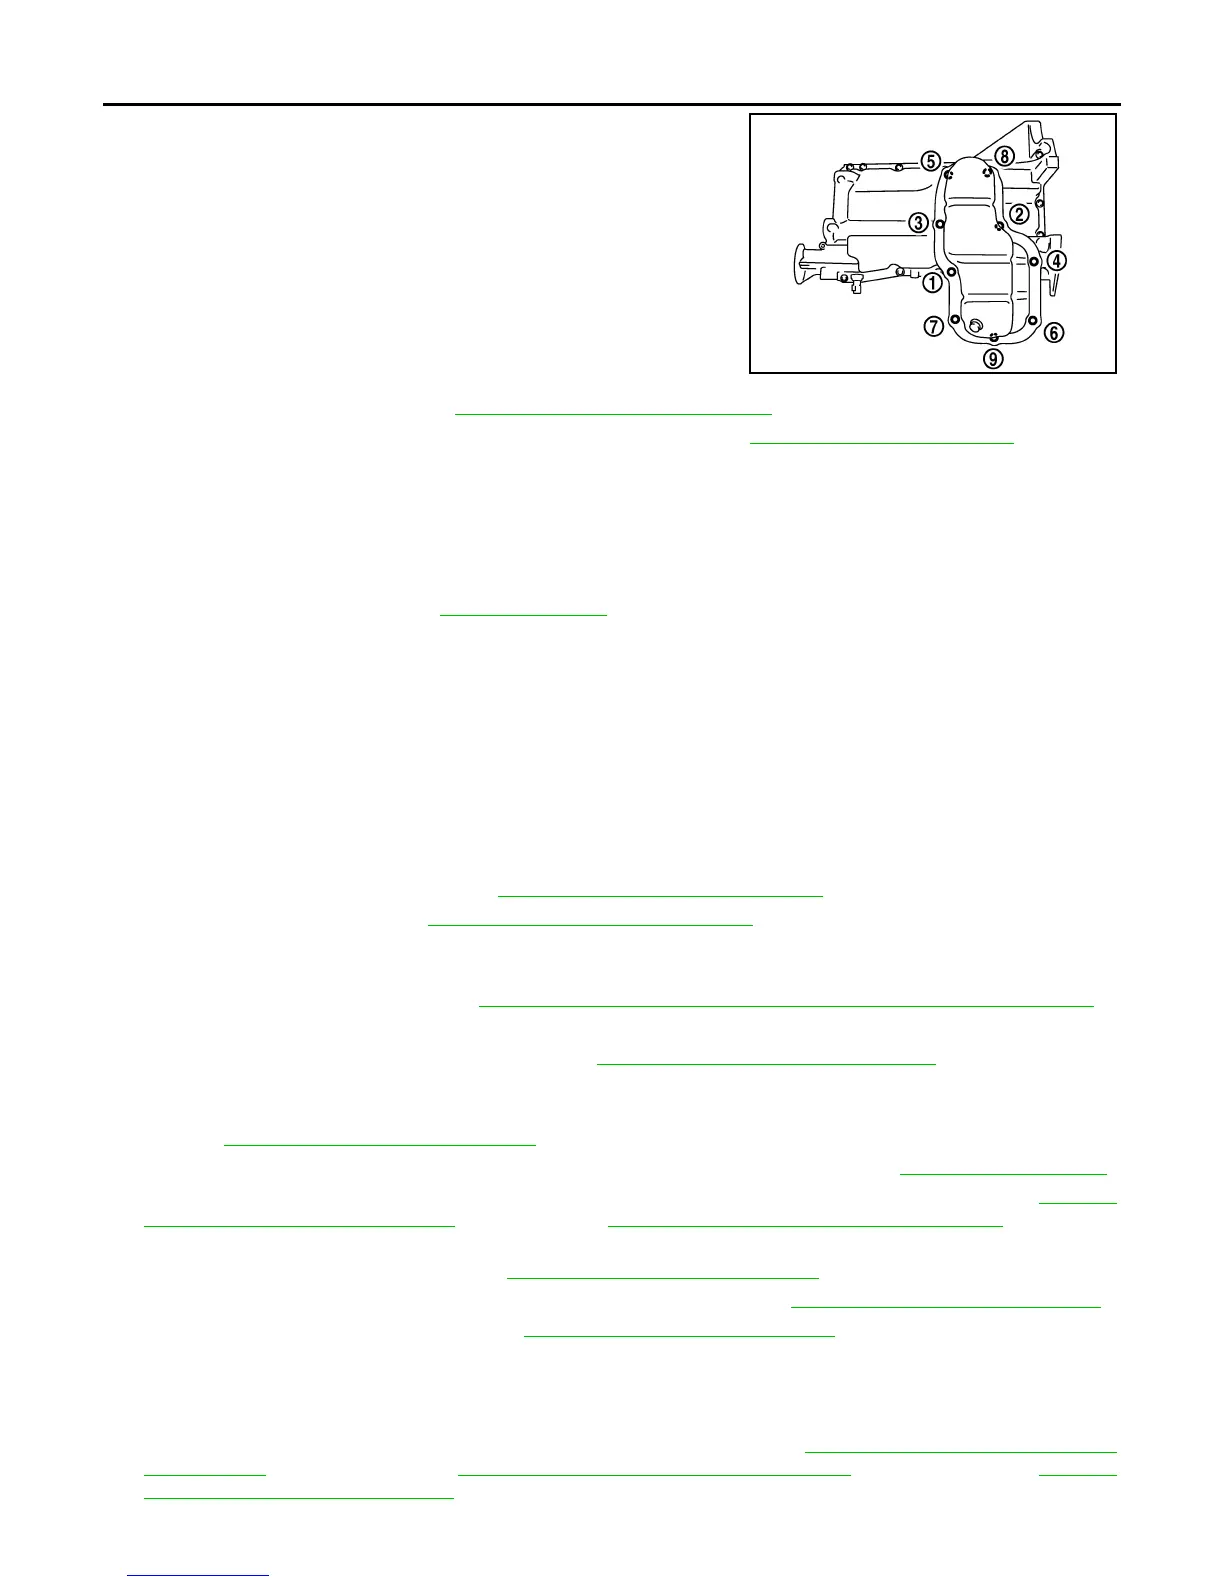
• Tighten oil pan (lower) bolts in numerical order as shown.
2. Install oil pan drain plug. Refer to EM-34, "Removal and Installation"
.
3. After 30 minutes fill with engine oil and inspect for leaks. Refer to LU-8, "Changing Engine Oil"
.
CAUTION:
Do not fill the engine with oil for at least 30 minutes after oil pan is installed.
INSPECTION AFTER INSTALLATION
1. Start engine, and check for engine oil leaks.
2. Stop engine and wait for 10 minutes.
3. Check engine oil level. Refer to LU-7, "Inspection"
.
REMOVAL (UPPER)
WARNING:
To avoid the danger of being scalded, do not drain engine oil when engine is hot.
CAUTION:
• Perform this procedure when engine is cold.
• Do not spill engine oil on drive belts.
• Do not spill engine coolant on drive belts.
NOTE:
When removing components such as hoses, tubes/lines, etc., cap or plug openings to prevent fluid from spill-
ing.
1. Remove engine under cover. Refer to EXT-15, "Removal and Installation"
.
2. Drain engine coolant. Refer to CO-11, "Changing Engine Coolant"
.
3. Remove oil pan (lower). Refer to REMOVAL (LOWER).
4. Reposition the (RH) brake caliper aside and support with a suitable wire without disconnecting the front
brake hose (4WD models). Refer to BR-34, "Removal and Installation of Brake Caliper and Disc Rotor"
.
5. Remove oil level gauge and oil level gauge guide.
6. Remove front final drive (4WD models). Refer to DLN-166, "Removal and Installation"
.
7. Remove front frame crossmember.
8. Disconnect steering gear lower joint shaft bolt and steering gear nuts and bolts, position out of the way.
Refer to ST-15, "Removal and Installation"
.
9. Remove stabilizer bar brackets and position stabilizer bar out of the way. Refer to FSU-13, "Component"
.
10. Disconnect A/T fluid cooler tube brackets and position out of the way (A/T models). Refer to TM-248,
"Removal and Installation (2WD)" (2WD models), TM-250, "Removal and Installation (4WD)" (4WD mod-
els).
11. Remove oil filter, if necessary. Refer to LU-10, "Removal and Installation"
.
12. Disconnect oil cooler hoses. Remove oil cooler, if necessary. Refer to LU-11, "Removal and Installation"
.
13. Remove oil cooler, if necessary. Refer to LU-11, "Removal and Installation"
14. Disconnect oil pressure switch and remove.
15. Remove oil pan (lower).
16. Remove oil strainer.
17. Remove transmission joint bolts which pierce oil pan (upper). Refer to TM-21, "Removal and Installation
from Vehicle" (4WD M/T models), TM-248, "Removal and Installation (2WD)" (2WD A/T models), TM-250,
"Removal and Installation (4WD)" (4WD A/T models).
PBIC2890E
Revision: January 2013 2013 Xterra